
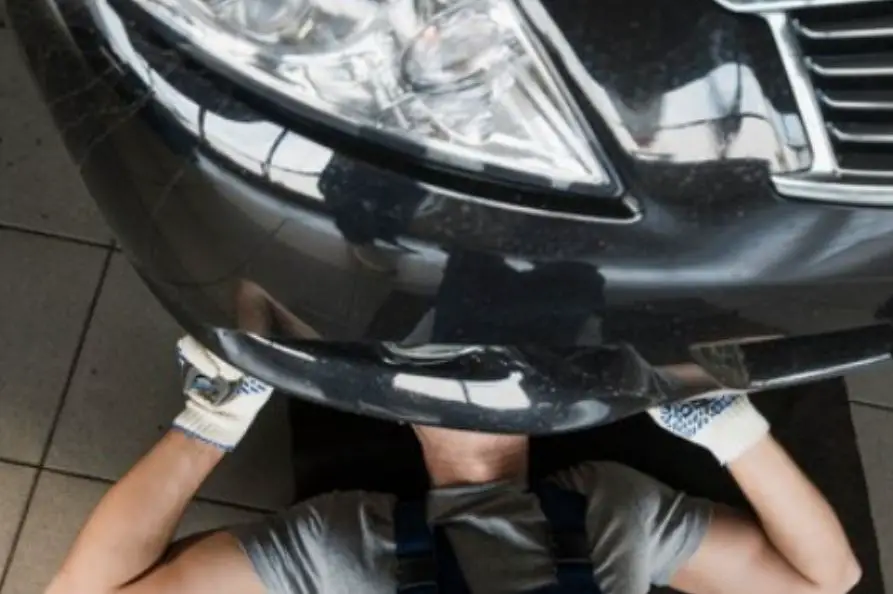
Replacing the headlight bulb on a 2010 Malibu does not require removing the bumper. Access the bulb through the wheel well liner or the hood.
Replacing a headlight bulb in your 2010 Chevy Malibu is a straightforward maintenance task that you can perform at home with basic tools. Change the bulb by reaching through the engine or wheel. No need to remove the whole bumper—simple and easy!
This not only saves time but also reduces the risk of damaging the bumper during removal. Good headlights keep driving safe, helping see in dark or bad weather. Replace Malibu’s bulbs promptly for safe, bright lights on the road. With a few simple steps, you can restore full illumination to your vehicle’s headlights and maintain optimal driving conditions. 2010 Malibu Headlight Bulb Replacement.
Introduction To Headlight Bulb Replacement In The 2010 Malibu
Replacing the headlight bulb in a 2010 Malibu doesn’t require a trip to the mechanic or an afternoon lost in your garage. Contrary to popular belief, this maintenance task is relatively straightforward and can often be done without removing the front bumper. Malibu owners need to know about headlight care for safe driving.
Overview Of Bulb Replacement Relevance
The importance of functional headlights cannot be understated. They are your eyes on the road when the sun sets, a critical safety feature that ensures you can see and be seen. A single burned-out bulb can severely impair visibility and increase the risk of accidents. Regular maintenance and prompt replacement of your 2010 Malibu headlight bulbs are not just recommended but essential for safe driving. Frequent checks ensure that headlight outages never catch you by surprise.
Understanding The 2010 Malibu Headlight Assembly
The 2010 Malibu comes with a headlight assembly that’s engineered for easy access to the bulb, eliminating the need to remove the entire bumper. Comprehending the assembly layout is key — from the back cover to the retaining clips and the power connector. Here’s a bird’s-eye view of what you’re working with:
- Access Panel: Located at the back of the headlamp assembly, the access panel can be removed to expose the headlight bulb.
- Retaining Clips: These are designed to secure the bulb in place and must be carefully released to change the bulb.
- Power Connector: This provides power to the bulb and has a locking mechanism that ensures a snug connection.
With this knowledge, Malibu owners can tackle headlight bulb replacement with confidence. The simplified design of the 2010 Malibu allows for the quick and effortless exchange of bulbs, ensuring drivers remain safe on the road with minimal downtime.
Preparatory Steps For Replacing Headlight Bulbs
When it comes to the intricate process of changing your 2010 Malibu’s headlight bulb without wrestling with the bumper, a few preparatory steps are key. First off, ensuring safety is paramount. Before diving in, switch off the vehicle’s engine and allow the headlights to cool down.
Tools are your trusty companions for this task. Gather essentials like a socket wrench set and gloves to protect your hands. Next, disconnect the light assembly carefully, following your vehicle’s manual to avoid any mishaps.
Take note of the headlight assembly‘s removal process, which typically involves releasing clips or screws. You’ll want to handle the assembly with care to avoid damaging the trim panel or the headlight itself.
Before swapping the old bulb for a new one, it’s a good idea to check for any headlight adjustments needed to ensure optimal visibility on the road. Once everything’s in place, securely reinstall the headlight assembly.
Stay tuned for the next steps in our detailed guide, where we’ll walk you through the precise process of replacing the headlight bulb without the bumper struggle.
Starting on a DIY journey to replace the headlight bulbs on your 2010 Malibu can be both rewarding and cost-effective. With the right approach, there’s no need to remove the entire bumper to access the headlight assembly. Preparing adequately beforehand streamlines the process and paves the way for a smooth, hassle-free experience. Here’s how to get your vehicle ready for headlight bulb replacement.
Tools And Materials Required For Bulb Replacement
The first step toward a successful bulb change is gathering all the necessary tools and materials. Here’s a rundown of what you’ll need:
- New headlight bulbs – Ensure they are the correct model for your 2010 Malibu.
- Screwdriver set – For accessing the headlight assembly.
- Gloves – To protect your hands and prevent oils from contaminating the new bulbs.
- Clean cloth – For cleaning any debris around the headlight area.
With these items at the ready, you’re well on your way to a successful bulb replacement.
Safety Precautions And Preliminary Checks
Prioritize safety and ensure your Malibu is ready for the task ahead with a few critical preliminary checks:
- Vehicle Safety: Make sure your vehicle is parked on a flat surface, with the engine off and the keys removed from the ignition.
- Headlight Inspection: Inspect the headlight compartment for any visible damage that might complicate the replacement process.
- Battery Precaution: Disconnect the battery to prevent any electrical shocks or short circuits. This action is as simple as loosening the negative terminal with a wrench and carefully removing it.
- Workspace Preparation: Ensure your work area is well-lit and free of hazards. Proper visibility and a clutter-free environment are key to a smooth operation.
Adhering to these steps not only ensures your safety but also sets the stage for a successful replacement of your Malibu’s headlight bulbs without the need to remove the bumper.
Step-by-step Guide To Replace Headlight Bulbs Without Bumper Removal
Starting on a 2010 Malibu headlight bulb replacement without the daunting task of removing the bumper is simpler than it may appear. This guide helps Malibu owners do it confidently, no professionals are needed! Let’s illuminate the process step by step.
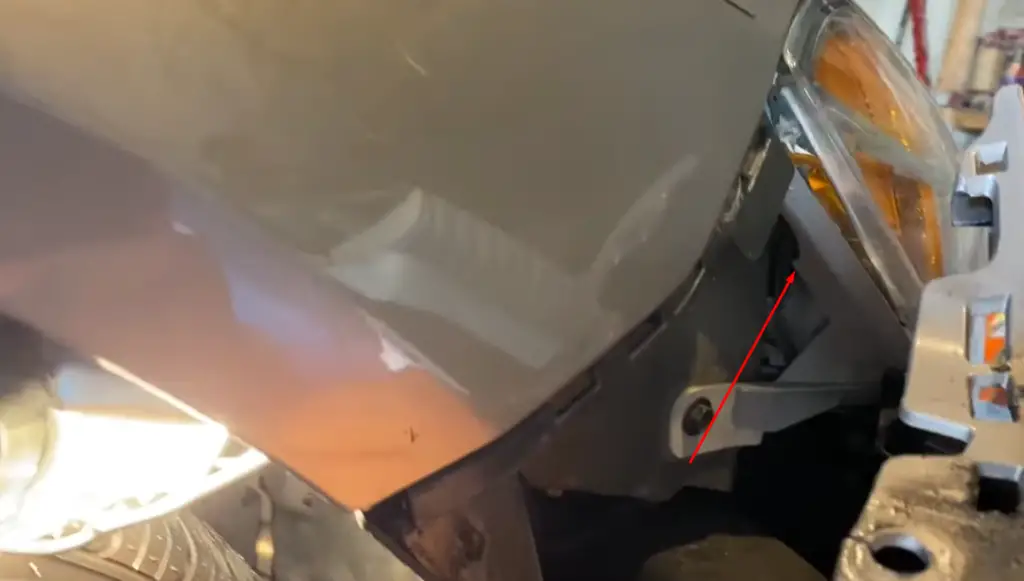
Accessing The Headlight Assembly
- Open the hood to expose the engine compartment and secure it with the prop rod.
- Locate the headlight assembly behind the headlight being replaced.
- Identify the two headlight assembly pins on the top that hold it in place.
- Gently pull these pins straight up to disengage the assembly.
- After removing the pins, carefully maneuver the headlight assembly forward to gain access to the bulb.
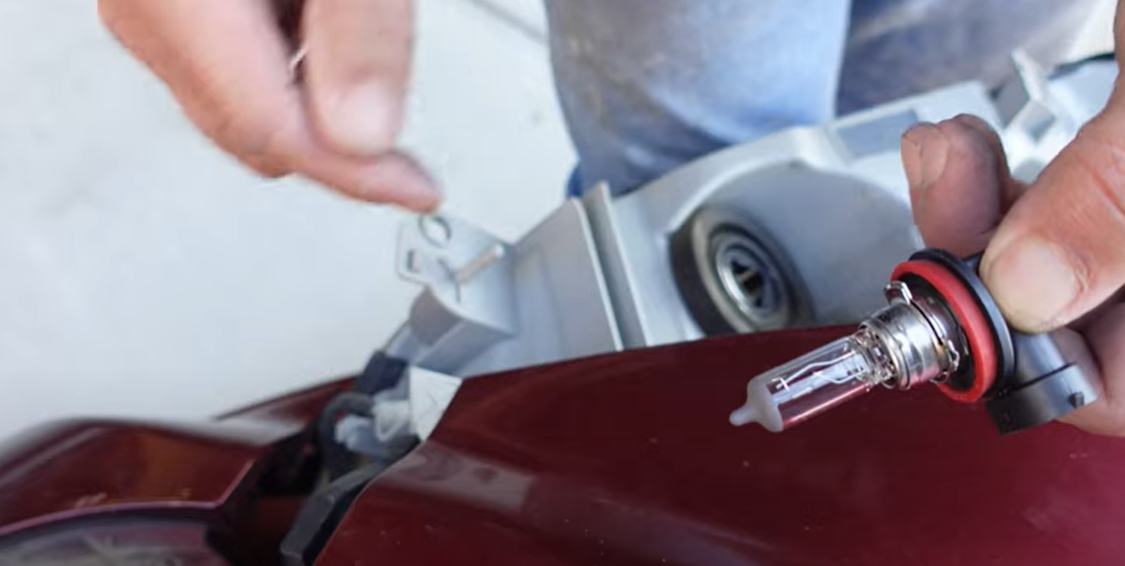
Removing And Installing The Headlight Bulbs
- Locate the headlight bulb that needs to be replaced.
- Disconnect the power connector from the bulb by squeezing the tab and pulling it away.
- Remove the old bulb by twisting it counterclockwise and gently pulling it out of the assembly.
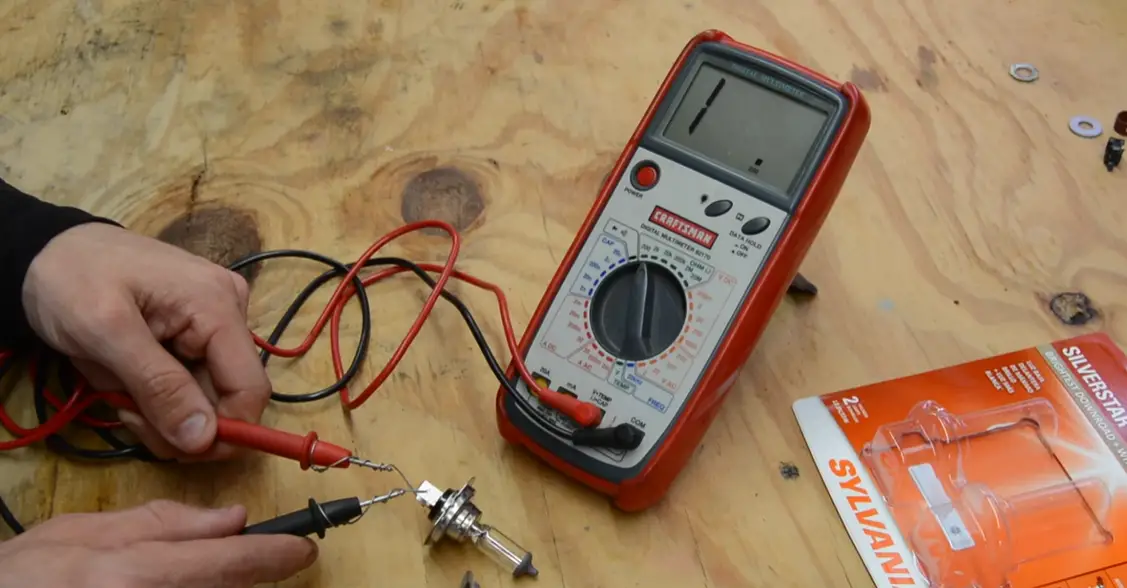
- Before installing the new bulb, compare it with the old one to ensure compatibility.
- Insert the new bulb into the socket and twist it clockwise until it locks into place. Avoid touching the glass part of the bulb with your fingers.
- Reconnect the power connector to the new bulb.
- Test the new bulb by turning on your vehicle’s headlights to ensure it’s working correctly.
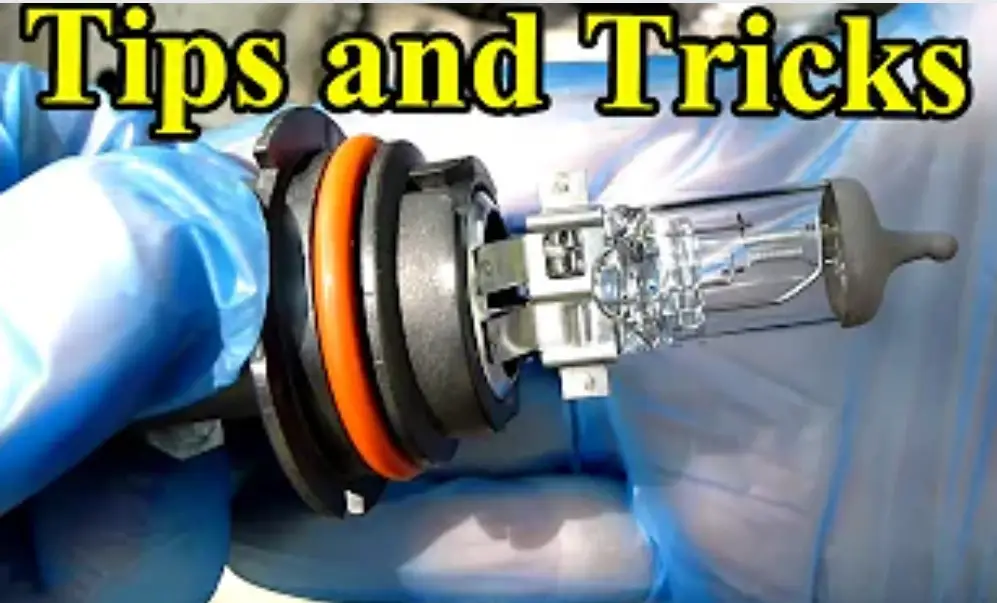
Tips For Handling Bulbs And Avoiding Common Mistakes
- Never touch the glass of the headlight bulb with your fingers; oils from your skin can shorten the bulb’s lifespan.
- Utilize clean gloves or a paper towel when handling new bulbs.
- Ensure the power connector is securely attached to avoid any flickering or connection issues.
- Do not force the bulb into the socket; it should fit snugly but without excessive pressure.
- Double-check the alignment of the bulb to ensure a proper beam pattern.
- If the headlight seems dim after replacement, verify that the headlight assembly is free from dust and moisture.
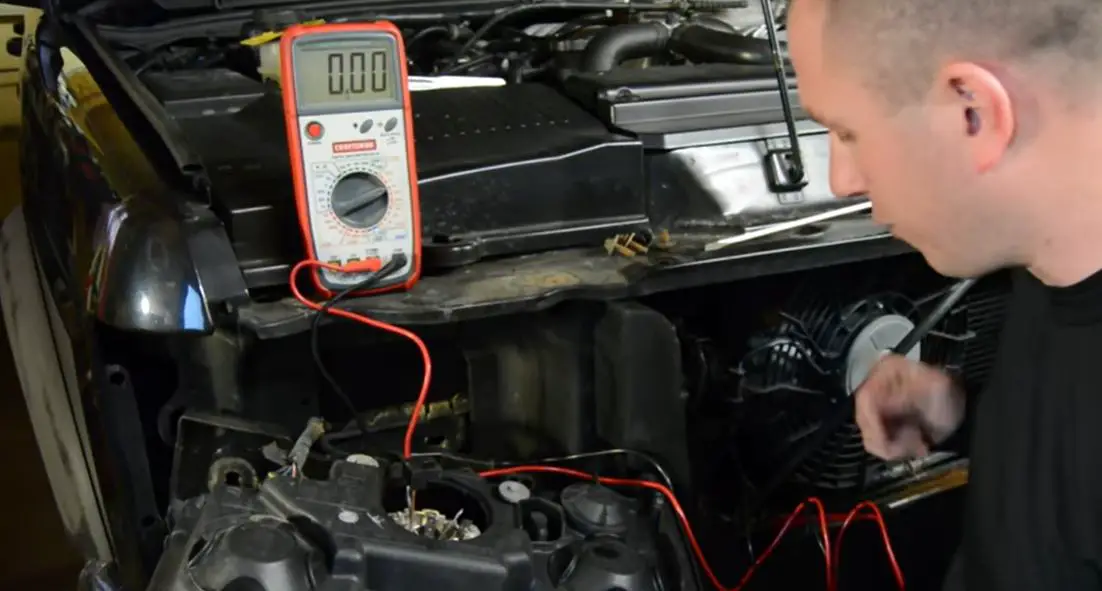
Testing And Troubleshooting Post-installation
Once you complete a 2010 Malibu headlight bulb replacement, it’s crucial to ensure everything works flawlessly. Proper testing and troubleshooting after installation can save you from future headaches and keep you safe on the road. Check new bulbs work. Follow the steps and tips. Solve issues you find.
How To Test New Headlight Bulbs
After replacing your headlight bulbs, the first step is to test their performance. To do this, follow a systematic approach:
- Ensure that your car is on a level surface and against a flat wall or garage door.
- Turn on the headlights and observe the beam pattern.
- Verify that both headlights emit a consistent and even light.
- Check for alignment, ensuring both beams are level and straight ahead.
- Test high beams to confirm they switch on and off without issues.
Troubleshooting Common Issues After Replacement
If you notice any problems with your headlights post-installation, here are common issues and solutions:
- Dim Headlights: This might indicate a poor connection. Double-check all connectors and wiring.
- Flickering Bulbs: A flickering bulb usually points to a loose connection. Make sure the bulb is securely fitted into the headlight housing.
- Non-functioning Lights: If the new bulb doesn’t turn on, it may be defective or not properly installed. Re-examine the bulb seating and connections.
- Uneven Beam Patterns: Headlight alignment may be necessary. Adjust the alignment screws to rectify the beam.
Always refer to the vehicle’s manual for specific guidance on adjusting and fixing headlights. Keep your 2010 Malibu headlights safe and working well with regular care.
Maintenance And Longevity Of Your Headlights
Keeping your 2010 Malibu’s headlights in top condition is not just about maintaining its sleek appearance—it’s a critical component of road safety. The clarity and functionality of your headlights can significantly impact your nighttime visibility and the ability to signal other drivers. Regular maintenance helps avoid the hassle of complex procedures, such as removing the bumper to replace a headlight bulb. Let’s Probe how you can extend the life of your Malibu’s headlights with some simple upkeep practices.
Regular Maintenance Tips For Headlight Longevity
- Clean Regularly: Accumulated dirt and grime can significantly diminish headlight output. Gentle cleaning using appropriate solutions helps maintain brightness.
- Check Alignment: Misaligned lights can impair visibility. Ensure headlights are correctly oriented for optimal road illumination.
- Inspect for Damage: Regularly inspect for cracks or moisture, which can lead to bulb failure and reduce headlight efficiency.
- Replace in Pairs: When replacing bulbs, do it in pairs. This ensures consistent illumination and prevents overworking one over an aged bulb.
- Choose Quality Bulbs: Invest in high-quality bulbs that promise longevity, and are less likely to require frequent replacements.
When To Consider Professional Assistance For Headlight Issues
While routine maintenance can be managed by car owners, certain situations necessitate the expertise of a professional. Here are indicators that it’s time to take your vehicle to an expert:
- Electrical Issues: If you’re experiencing flickering or intermittent light failure, the issue may stem from your vehicle’s electrical system.
- Severe Damage: Significant damage or moisture buildup that isn’t resolved by simple fixes should be professionally addressed to prevent further issues.
- Installation Complications: If headlight replacement seems daunting or you’re unsure about the procedure, it’s wise to seek professional help.
Scheduled upkeep and recognizing when professional help is needed ensure your Malibu’s headlights function effectively and stand the test of time. Not only do well-maintained headlights contribute to the aesthetic appeal of your vehicle, but they are also integral to safe driving practices.
Frequently Asked Questions On 2010 Malibu Headlight Bulb Replacement Without Removing Bumper
How Much Does It Cost To Replace A Headlight Bulb In A 2011 Chevy Malibu?
The cost to replace a headlight bulb in a 2011 Chevy Malibu typically ranges from $15 to $50 for the parts and between $50 and $70 for labor.
Do I Need To Disconnect the Car Battery To Change the Headlight Bulb?
No, disconnecting the car battery is not usually necessary to change a headlight bulb. Always check your vehicle’s manual for specific instructions.
Can You Replace Just The Headlight?
Yes, you can replace just the headlight bulb or the entire headlight assembly if needed. Ensure you purchase the correct model for your vehicle and follow the manufacturer’s instructions.
Do I Need To Replace The Whole Headlight Or Just The Bulb?
Typically, only the bulb needs replacement unless the headlight assembly is damaged. Check for issues with the lens, housing, or seals to determine if you need a full replacement.
Conclusion
Wrapping up, and replacing a headlight bulb on a 2010 Malibu is simpler than you might think. No need to wrestle with the bumper—just a few steps and you’re set. Stay safe with clear visibility and tackle this quick fix confidently.
Remember, proper lighting on the road is a must for your safety and others.


