
Auto headlight restoration is a simple and profitable job that involves removing the old coating through sanding and using different cleaning solutions to restore the headlights to a like-new appearance, removing haze and improving visibility at night. There are various kits available in the market that offer easy and effective solutions to remove oxidation, cloudiness, and yellowing from headlights.
These kits are DIY projects that can be done in your garage or driveway, providing improved visibility and making driving safer. Additionally, toothpaste, baking soda, and polishing compounds like Rain-X can also be used to restore headlights and remedy UV damage.
Why Headlight Restoration Is Essential For Vehicle Safety
Headlight restoration is essential for vehicle safety as it improves visibility on the road. With the use of specific kits and solutions, the process removes oxidation, haze, and yellowing from headlights, ensuring a like-new appearance and better nighttime visibility.
Importance Of Clear And Bright Headlights For Safe Driving
Clear and bright headlights are vital for safe driving. They ensure improved visibility, allowing drivers to see the road ahead and potential hazards. Dim or foggy headlights can significantly reduce visibility, especially in low-light conditions, and increase the risk of accidents.
How Headlights Deteriorate Over Time
Over time, headlights can deteriorate due to various factors. Exposure to the sun’s UV rays, harsh weather conditions, and road debris can cause oxidation, cloudiness, and yellowing of the headlight lenses. This deterioration not only affects the aesthetics of the vehicle but also compromises the functionality of the headlights.
Benefits Of Headlight Restoration
Headlight restoration offers several benefits, ensuring optimal performance and safety while driving.
- Improved visibility: By restoring headlights, you can remove the haze, oxidation, and yellowing, allowing for clearer and brighter beams. This enhances visibility and helps drivers spot obstacles or hazards on the road.
- Enhanced safety: Clear and bright headlights contribute to safer driving, reducing the risk of accidents, especially during nighttime or in adverse weather conditions. Improved visibility also makes it easier for other drivers to see your vehicle.
- Cost-effective alternative: Headlight restoration is a cost-effective alternative to replacing the entire headlight assembly. Restoring the headlights can bring them back to their original condition, saving you money in the long run.
- Extended headlight lifespan: Proper headlight restoration techniques can prolong the lifespan of your headlights. By removing the oxidation and preserving the integrity of the lenses, you can prevent further deterioration and the need for frequent replacements.
- Improved vehicle aesthetics: Restoring headlights can greatly enhance the overall appearance of your vehicle. Clear and bright headlights not only improve safety but also add to the aesthetic appeal of your car, making it look well-maintained and attractive.
Overall, headlight restoration is an essential maintenance task that ensures safer driving, enhances visibility, saves money, and improves the overall appearance of your vehicle. By investing in headlight restoration, you can drive with confidence, knowing that your headlights are in optimal condition.
Understanding The Headlight Restoration Process
Auto headlight restoration is a simple yet effective process that can bring back the clarity and brightness of your headlights. Over time, headlights can become cloudy, yellowed, and dull due to oxidation and UV damage. This not only reduces visibility but also makes your car look older and less appealing. To restore your headlights to their former glory, you’ll need to go through a series of steps that involve cleaning, sanding, applying a restoration solution, and polishing. Let’s take a closer look at each step in detail.
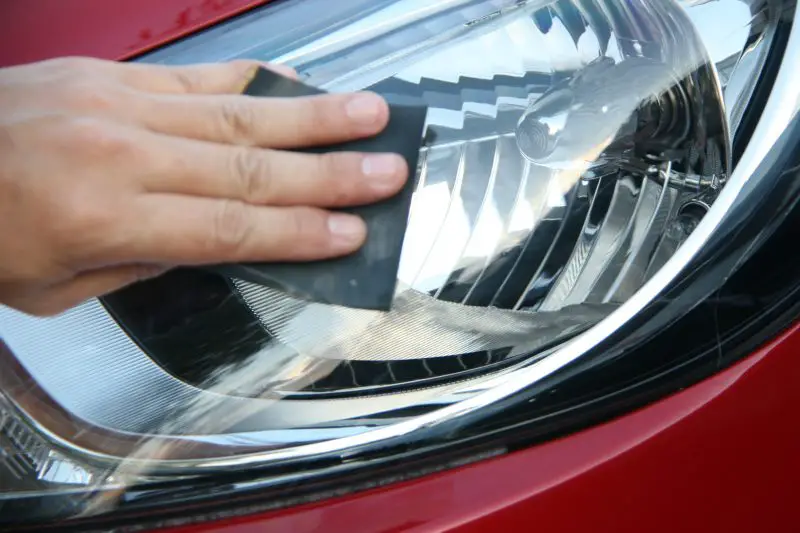
Step 1: Cleaning The Headlights
The first step in the headlight restoration process is to clean the headlights thoroughly. This removes any dirt, grime, and debris that may have accumulated on the surface. You can use a mild automotive soap and water solution and a soft cloth or sponge to gently scrub the headlights. Be sure to rinse off any soap residue and dry the headlights completely.
Step 2: Sanding Off The Old Coating
Once the headlights are clean, it’s time to sand off the old, degraded factory coating. This coating is often responsible for the cloudiness and yellowing of the headlights. Using sandpaper with a fine grit, such as 2000 or 3000, you’ll need to sand the entire surface of the headlights in a back-and-forth motion. This helps to remove the oxidation and smoothen the surface, preparing it for the restoration solution.
Step 3: Applying The Restoration Solution
After sanding, it’s time to apply the headlight restoration solution. This solution typically comes in a kit and contains special chemicals designed to remove any remaining oxidation and restore the clarity of the headlights. Follow the instructions on the kit carefully and apply the solution using a soft cloth or applicator pad. Make sure to cover the entire surface of the headlights evenly and let the solution sit for the recommended time.
Step 4: Buffing And Polishing The Headlights
Once the restoration solution has had time to work its magic, it’s time to buff and polish the headlights. This step helps to remove any remaining residue and bring out the shine and clarity of the headlights. You can use a buffing pad attached to an electric drill or a polishing cloth to gently rub the headlights in circular motions. Be sure to apply even pressure and work on one headlight at a time.
Step 5: Adding A Protective Sealant
To ensure the longevity of your newly restored headlights, it’s important to add a protective sealant. This sealant acts as a barrier against UV rays and other environmental factors that can cause the headlights to degrade again. Apply the sealant according to the instructions on the product and make sure to cover the entire surface of the headlights. Let the sealant dry completely before exposing the headlights to any moisture or sunlight.
By following these five steps, you can successfully restore your auto headlights and enjoy improved visibility and a refreshed appearance. Headlight restoration is a cost-effective alternative to replacing the entire headlight assembly and can be done at home with the right tools and materials. So why wait? Give your car a new lease on life by restoring its headlights today!
Factors To Consider Before Starting A Headlight Restoration Project
Before diving into a headlight restoration project, it is important to consider a few factors to ensure a successful outcome. By taking these factors into account, you can make sure that the restoration process is smooth and that you achieve the desired results. Here are the key factors to consider:
Assessing The Condition Of Your Headlights
The first step in any headlight restoration project is to assess the condition of your headlights. Are they slightly foggy or severely yellowed? Is there any damage or cracks on the lens? Answering these questions will help you determine the level of restoration required and the appropriate approach to take.
Choosing The Right Restoration Kit
With a wide range of restoration kits available in the market, it is crucial to choose the right one that suits your specific needs. Consider factors such as the severity of the damage, the type of headlight material, and the level of expertise required for the kit. Research customer reviews and ratings to find the most effective and reliable restoration kit.
Tools And Materials Needed For The Restoration Process
Once you have chosen the right restoration kit, it is important to gather all the necessary tools and materials for the restoration process. This ensures that you have everything you need before starting the project, saving you from any hassle or delays. Some common tools and materials for headlight restoration include:
- Sanding pads or discs of various grits
- Masking tape to protect the surrounding areas
- Microfiber cloth for cleaning
- Polishing compound or solution
- UV-resistant clear coat for protection
These tools and materials will help you achieve optimal results and restore your headlights to their former glory.
Step-by-step Guide To Restoring Clear And Bright Headlights
Restoring clear and bright headlights is an essential maintenance task for any vehicle owner. Over time, headlights can become cloudy, yellowed, and dim, limiting visibility and detracting from the overall appearance of your car. Fortunately, with a step-by-step guide, you can easily restore your headlights to their former glory. Follow the instructions below and bring back that crystal-clear shine to your headlights.
Cleaning The Headlights Using A Specialized Cleaner
The first step in the restoration process is to clean the headlights using a specialized cleaner. This cleaner is designed to remove dirt, grime, and any built-up residue on the surface of the headlights. To clean your headlights, follow these simple steps:
- Gather all the necessary materials, including the specialized cleaner, microfiber cloth, and water.
- Apply the cleaner to the microfiber cloth and gently scrub the headlights in a circular motion.
- Rinse off the headlights with water and dry them thoroughly using a clean cloth.
Sanding Off The Old, Degraded Factory Coating
Once the headlights are clean and dry, it’s time to remove the old, degraded factory coating. This coating can contribute to the cloudiness and yellowing of the headlights. Use the following steps to sand off the old coating:
- Prepare the sanding materials, including sandpaper with different grits (starting from coarse to fine) and a spray bottle filled with water.
- Wet the headlights with the water spray to lubricate the sanding process.
- Starting with the coarse-grit sandpaper, sand the headlights in a back-and-forth motion, applying light pressure.
- Gradually switch to finer-grit sandpaper and continue sanding until the old coating is completely removed.
- Remember to keep the headlights wet during the sanding process to avoid overheating and damaging the plastic.
Applying The Restoration Solution And Allowing It To Dry
With the old coating removed, it’s time to apply the restoration solution to bring back the clarity of the headlights. Use the following steps to apply the solution:
- Apply the restoration solution to a clean, dry cloth.
- Gently rub the solution onto the headlights, making sure to cover the entire surface.
- Allow the solution to dry according to the instructions provided, typically for about 10-15 minutes.
Buffing And Polishing The Headlights For A Clear Finish
After the restoration solution has dried, it’s time to buff and polish the headlights to achieve a clear finish. Follow these steps:
- Using a clean, soft cloth or a buffing pad, apply a small amount of polish to the headlights.
- Buff the headlights in a circular motion, applying gentle pressure.
- Continue buffing until the headlights appear clear and free from any haze or residue.
Applying A Protective Sealant To Prolong The Restoration Results
To ensure that your headlights stay clear and bright for longer, it’s important to apply a protective sealant. This sealant will help protect the headlights from further degradation caused by environmental factors. Here’s how to apply the sealant:
- Choose a high-quality headlight sealant.
- Apply a thin, even layer of the sealant to the headlights using a clean cloth.
- Allow the sealant to dry completely before exposing the headlights to water or harsh weather conditions.
By following these step-by-step instructions, you can restore your headlights to their original clarity and brightness. Not only will this improve your visibility on the road, but it will also enhance the overall appearance of your vehicle. Take the time to give your headlights the attention they deserve and enjoy safer and more enjoyable night drives.
Tips And Tricks For Optimal Headlight Restoration
Restoring your car’s headlights not only improves visibility but also enhances the overall appearance of your vehicle. However, to achieve optimal results, it’s essential to follow the right techniques and avoid common mistakes. In this section, we’ll explore some tips and tricks that will help you achieve exceptional headlight restoration.
Avoiding Common Mistakes During The Restoration Process
When it comes to headlight restoration, it’s crucial to avoid some common mistakes that can hinder the effectiveness of the process. Here are some essential tips:
- Choose the right restoration kit: Selecting a high-quality headlight restoration kit can make all the difference. Look for one that includes sandpaper, polishing compound, and a sealant to ensure a thorough restoration.
- Properly clean the headlights: Before starting the restoration process, make sure to clean the headlights thoroughly to remove any dirt or debris. This will ensure better adhesion of the restoration products.
- Use the correct sanding technique: When sanding the headlights, be gentle and use a back-and-forth motion to avoid creating uneven surfaces or scratches. Follow the instructions provided with your restoration kit for the best results.
- Apply the sealant: After restoring the headlights, don’t forget to apply the sealant provided in the kit. This will protect the headlights from future damage and help maintain their clarity.
Maximizing The Longevity Of Your Restored Headlights
Once you’ve successfully restored your headlights, it’s essential to take steps to maximize their longevity. Here are some tips to help you achieve that:
- Regularly wash your car: Keeping your car clean not only improves its appearance but also prevents dirt and grime from building up on the headlights. Regularly washing your car will help maintain the clarity and brightness of the restored headlights.
- Apply a protective coating: To provide additional protection to your restored headlights, consider applying a clear protective coating. This will help shield the headlights from UV rays and other environmental factors.
- Store your car in a covered area: If possible, park your car in a covered area or use a car cover to protect the headlights from direct sunlight when not in use. This will prevent them from fading or becoming hazy again.
Maintaining The Clarity And Brightness Of Headlights After Restoration
After restoring your headlights, proper maintenance is key to ensure they stay clear and bright for a long time. Here are some maintenance tips:
- Regularly inspect the headlights: Periodically check the condition of your restored headlights for any signs of hazing or discoloration. This will allow you to address any issues promptly and maintain their optimal condition.
- Use a headlight restoration kit: If you notice any deterioration in the clarity or brightness of your headlights, consider using a headlight restoration kit to touch up the restoration. This will help maintain their original shine.
- Protect the headlights with a wax: Applying a layer of automotive wax to your restored headlights can provide an additional protective barrier and enhance their shine. However, make sure to use a wax specifically designed for plastics.
By following these tips and tricks, you can ensure that your headlight restoration efforts last longer, maintaining optimal clarity and brightness. Remember, proper technique and regular maintenance are the keys to long-lasting results. Now let’s dive into the common mistakes to avoid during the restoration process.
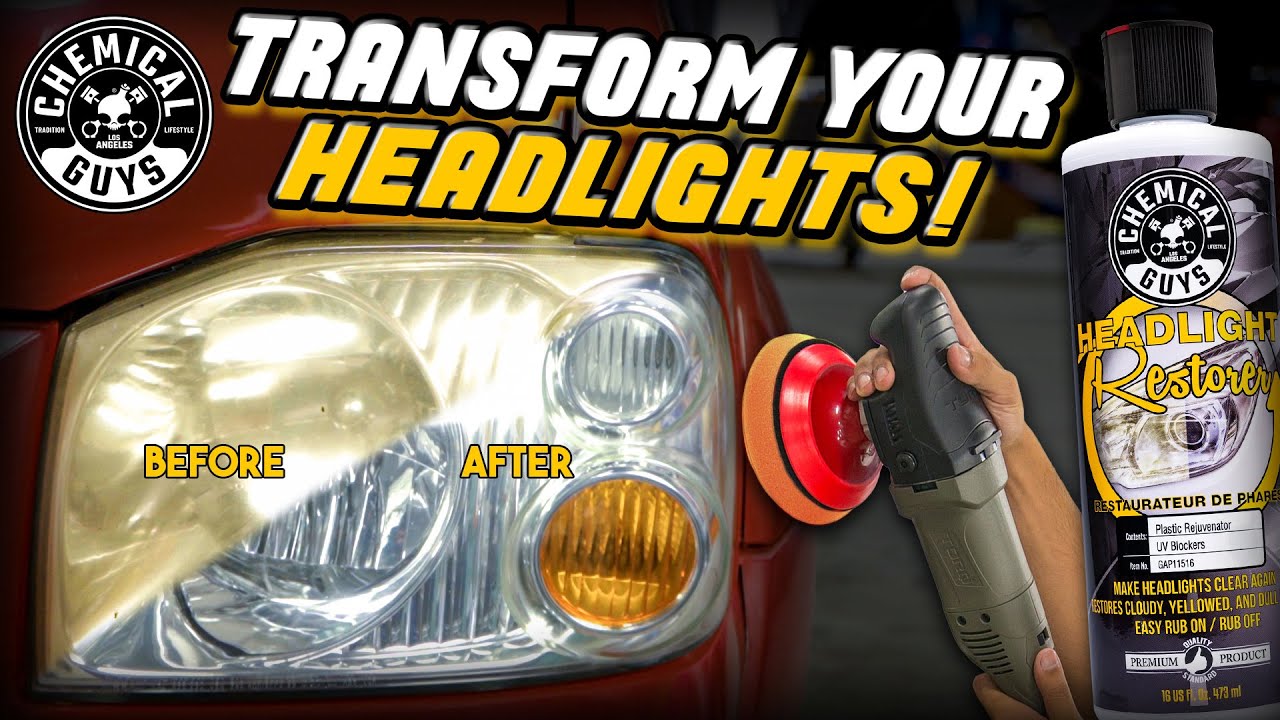
Credit: m.youtube.com
Frequently Asked Questions For Auto Headlight Restoration
Is Restoring Your Headlights Worth It?
Restoring your headlights is worth it as it improves visibility at night and increases safety on the road. Headlight restoration kits are easy to use and can be done as a DIY project in your garage or driveway. These kits effectively remove oxidation, cloudiness, and yellowing, giving you clearer headlights.
How Do You Fix Cloudy Headlights Permanently?
To fix cloudy headlights permanently, follow these steps: 1. Use a headlight restoration kit like Cerakote Ceramic or Meguiar’s Two Step. 2. Sand off the old coating. 3. Apply the included cleaning solution or toothpaste/baking soda mixture. 4. Polish with a polishing compound like Rain-X.
5. Repeat if necessary.
Does Wd-40 Work To Restore Headlights?
Yes, WD-40 can be used to restore headlights. It helps remove oxidation and restores clarity to the lenses.
What Is The Best Thing To Restore Headlights?
To restore headlights, toothpaste and baking soda are effective cleansers that can remove fog without scratching. Polishing compounds like Rain-X can also help with UV damage. Alternatively, there are headlight restoration kits available for purchase, such as the Cerakote Ceramic Headlight Restoration Kit.
Conclusion
Auto headlight restoration is a simple and profitable job that can greatly improve the appearance and functionality of your vehicle’s headlights. By using a reliable kit or professional service, you can remove oxidation, cloudiness, and yellowing, allowing for better visibility while driving at night.
Whether you do it yourself or seek assistance, restoring your headlights is definitely worth it. Say goodbye to dull headlights and enjoy the benefits of restored clarity and safety on the road.


