

To clean headlights at home, you can use household products such as toothpaste, coca-cola, baking soda, vinegar, and hydrogen peroxide. These methods are effective in restoring the clarity of headlights and can be easily done with minimal effort.
Toothpaste Method
Remove headlight fog and restore clarity with the toothpaste method. Apply toothpaste to the headlights, buff with a cloth or dremel, and see the before and after results. An easy and cost-effective DIY solution for cleaning headlights at home.
How To Use Toothpaste To Clean Headlights Effectively:
Toothpaste can be a surprisingly effective method for cleaning your headlights and restoring their clarity. Here’s a step-by-step guide on how to use toothpaste to clean your headlights effectively:
- Choosing the right toothpaste:
- Look for a toothpaste that is non-gel and non-abrasive.
- Avoid toothpaste with whitening agents or added chemicals, as they can damage your headlight lenses.
- Step-by-step process for applying toothpaste:
- Start by cleaning the headlights with water and a soft cloth to remove any dirt or grime.
- Squeeze a small amount of toothpaste onto a clean microfiber cloth.
- Rub the toothpaste in circular motions onto the headlights, applying gentle pressure.
- Continue rubbing the toothpaste for a few minutes, making sure to cover the entire headlight surface.
- Rinse off the toothpaste with water and inspect the headlights to see if any residue remains.
- Repeat the process if necessary until the headlights are clean and clear.
- Buffing with a Dremel for improved results:
- If the toothpaste method alone doesn’t achieve the desired results, you can take it one step further by using a Dremel tool with a buffing attachment.
- Apply a small amount of toothpaste onto the buffing attachment and gently buff the headlights using low speed.
- Be careful not to apply too much pressure or buff the same area for too long, as it may damage the lenses.
- After buffing, rinse off any toothpaste residue with water and inspect the headlights for a noticeable improvement in clarity.
By following these steps, you can effectively use toothpaste to clean your headlights at home and restore them to their original clarity. Give it a try and see the difference it can make in improving your visibility on the road.
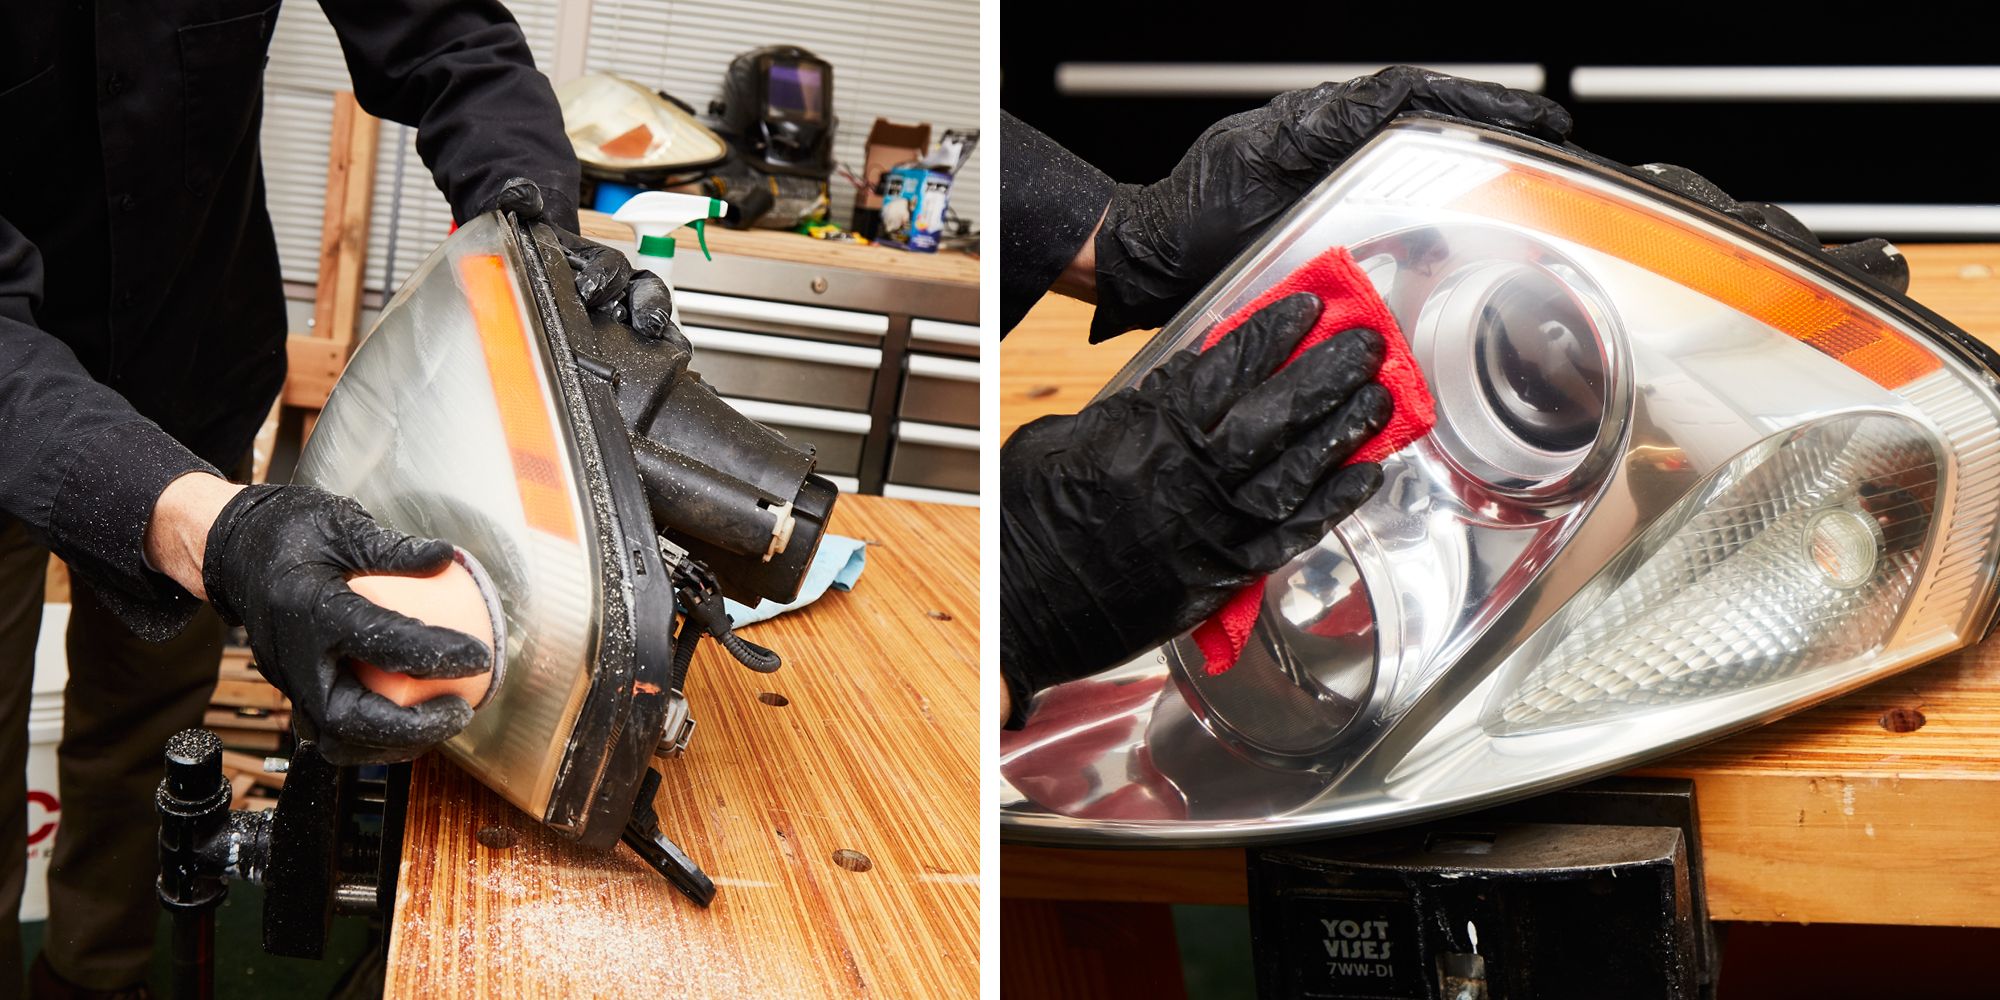
Before and after comparison:
Take some before and after photos to compare the condition of your headlights. This will help you visually see the difference that toothpaste cleaning can make.
Coca-Cola Method
Do you want to clean your headlights at home? Forget about fancy products and try the Coca-Cola method for a quick and easy solution. Apply Coca-Cola to your headlights and see the magic happen!
Using Coca-Cola To Clean Headlights:
- Coca-Cola is a surprising yet effective method for cleaning headlights, thanks to its acidic properties and ability to break down grime and oxidation.
- The carbonation in Coca-Cola helps to loosen and dissolve dirt and debris on the surface of the headlights.
- This method is a cost-effective alternative to expensive headlight restoration kits.
- Before attempting this method, ensure that your headlights are made of glass or plastic, as Coca-Cola may damage certain materials.
Step-By-Step Process For Applying Coca-Cola:
- Start by gathering the necessary materials: A bottle of Coca-Cola, a soft cloth or sponge, and water for rinsing.
- Thoroughly clean the headlights with water to remove any loose dirt or debris.
- Pour Coca-Cola onto the cloth or sponge, and begin to scrub the headlights in circular motions. Make sure to cover the entire surface.
- Continue scrubbing for a few minutes, focusing on areas with heavy grime or oxidation.
- Rinse the headlights with water to remove the Coca-Cola residue.
- Inspect the headlights to see if further cleaning is needed. If necessary, repeat the process.
Cleaning Headlights With Toothpaste As A Second Pass:
- While Coca-Cola can effectively clean headlights, using toothpaste as a second pass can further enhance the results.
- Toothpaste acts as a gentle abrasive, helping to remove any remaining grime and oxidation.
- This method is particularly useful for headlights with stubborn stains or yellowing.
Results With Vinegar-Only Cleaning:
- Some people prefer using vinegar as a natural alternative to clean headlights.
- Vinegar contains acetic acid, which can help to remove dirt, grime, and oxidation.
- However, the results of using vinegar alone may not be as dramatic as using Coca-Cola or toothpaste.
Magic Eraser Demonstration:
- Magic Eraser is another option for cleaning headlights, especially for light surface stains and oxidation.
- To use Magic Eraser, dampen it with water and gently scrub the headlights.
- The micro-abrasive particles in the eraser help to remove dirt and grime without damaging the headlights.
- It is essential to exercise caution and avoid excessive pressure to prevent scratching the surface.
Final Results And Comparison:
- After using Coca-Cola, toothpaste, vinegar, or Magic Eraser, you will notice a significant improvement in the clarity and brightness of your headlights.
- Each method has its advantages and limitations, so choose the one that suits your preferences and materials.
- It is advisable to test any cleaning method on a small, inconspicuous area of your headlights before proceeding with the entire surface.
Remember, regular maintenance and cleaning of headlights will ensure better visibility and a safer driving experience.
Glass Cleaner Method
Clean your headlights at home easily with the glass cleaner method. Simply apply glass cleaner to a cloth and scrub the headlights in circular motions for a clear, restored look.
Cleaning Headlights With Glass Cleaner:
- Glass cleaner is a popular and effective method for cleaning headlights at home. It is readily available and easy to use. Here is how you can clean your headlights using glass cleaner:
Step-By-Step Process For Using Glass Cleaner:
- Start by gathering the necessary materials, including a bottle of glass cleaner, a clean microfiber cloth, and a spray bottle if needed.
- Ensure that your car is parked in a shaded area and the headlights are cool to touch.
- Spray the glass cleaner directly onto the headlight lens. Make sure to cover the entire surface of the lens.
- Take a clean microfiber cloth and gently wipe the headlight in circular motions. This will help remove any dirt, grime, or road residue that has accumulated on the lens.
- For stubborn stains or debris, you can use a soft-bristle brush or a toothbrush dipped in glass cleaner to scrub the affected area.
- Once you have thoroughly cleaned the headlight, use a dry microfiber cloth to wipe away any excess glass cleaner or moisture. This will help prevent streaks or water spots from forming.
- Repeat the process on the other headlight, ensuring both are clean and clear.
Applying Toothpaste For Additional Cleaning:
- Toothpaste can be an effective cleaning agent for headlights, especially if they are foggy or have minor scratches. Here’s how you can use toothpaste to further clean your headlights:
- Apply a small amount of toothpaste directly onto the headlight lens. Use a non-gel toothpaste for best results.
- Spread the toothpaste evenly across the surface of the lens using a soft cloth or a microfiber towel.
- Gently rub the toothpaste onto the headlight lens in circular motions. This will help remove any oxidation, haze, or light scratches.
- Allow the toothpaste to sit on the lens for a few minutes to maximize its cleaning properties.
- After the allotted time, dampen a clean cloth or towel with water and use it to wipe away the toothpaste residue.
Removing Toothpaste Residue:
- After cleaning your headlights with toothpaste, it’s important to remove any residue left behind. Follow these steps:
- Dampen a clean cloth or towel with water.
- Gently wipe the headlight lens to remove any remaining toothpaste residue.
- Inspect the lens to ensure there are no streaks or leftover residue. If needed, repeat the process until the headlight is clean and clear.
- Finally, use a dry cloth or towel to wipe away any moisture and ensure a streak-free finish.
Outro And Final Thoughts:
- Cleaning your headlights at home is a cost-effective way to improve visibility and enhance the overall appearance of your car. Whether you choose the glass cleaner method or opt for toothpaste for additional cleaning, these simple steps can help restore clarity to your headlights. Regular maintenance and cleaning can prolong the life of your headlights and ensure optimal performance on the road. Remember to always follow safety precautions and consult the vehicle’s manual for specific instructions.
Credit: www.popularmechanics.com
Baking Soda, Vinegar, And Hydrogen Peroxide Method
Revitalize your foggy headlights with the Baking Soda, Vinegar, and Hydrogen Peroxide Method. This at-home cleaning solution is an easy and cost-effective way to restore the clarity of your headlights without the need for expensive products or professional help.
How To Restore Headlights Permanently Using Household Products:
- First, gather all the required materials for the restoration process.
- Follow the step-by-step process using baking soda, vinegar, and hydrogen peroxide.
- Observe the results using vinegar only.
- Learn about the Magic Eraser demonstration for a more effective clean.
- Finally, see the impressive final restoration results.
Required Materials For The Restoration Process:
- Baking soda
- White vinegar
- Hydrogen peroxide
- Water
- Spray bottle
- Microfiber cloth
- Toothbrush
Step-By-Step Process With Baking Soda, Vinegar, And Hydrogen Peroxide:
- Create a cleaning paste by mixing baking soda with enough white vinegar to form a thick consistency.
- Apply the paste onto the headlight lens using a microfiber cloth or toothbrush.
- Gently scrub the headlights in circular motions, focusing on any areas with heavy oxidation or grime.
- Allow the paste to sit for a few minutes to break down the dirt and grime.
- Rinse the headlights with water and wipe them dry with a clean microfiber cloth.
Results Using Vinegar Only:
- Vinegar can be an effective cleaner for headlights as it has acetic acid that helps break down grime and oxidation.
- Dip a microfiber cloth into white vinegar and use it to wipe down the headlight lens.
- Gently scrub the headlights using circular motions to remove any dirt or oxidation.
- Rinse the headlights with water and dry them with a microfiber cloth.
Magic Eraser Demonstration:
- Another option to consider is using a Magic Eraser for headlight restoration.
- Moisten the Magic Eraser with water and gently scrub the headlight lens.
- The abrasive material of the Magic Eraser helps remove stubborn dirt and grime.
- Rinse the headlights with water and dry them thoroughly.
Final Restoration Results:
- By following the step-by-step process with baking soda, vinegar, and hydrogen peroxide, you can achieve impressive results in restoring your headlights.
- This method not only cleans the headlights but also helps remove oxidation and yellowing.
- The final result will be clear and bright headlights that can improve visibility and safety while driving.
Frequently Asked Questions For Headlight Cleaning Methods At Home
What Is The Best Home Remedy To Clean Headlights?
The best home remedy to clean headlights is using toothpaste. Apply toothpaste to the headlights, buff with a cloth or a Dremel, then wipe off the residue.
Should I Use Windex On My Headlights?
Should I use Windex on my headlights? Regular car soap or Windex can be used to wash headlights and remove dirt. However, over time, headlights may become foggy due to natural aging.
How Do You Clean Foggy Headlights Off?
To clean foggy headlights, mix two parts distilled white vinegar and one part baking soda. Stir the mixture and apply it to the headlights using a microfiber cloth. Gently scrub in circular motions, then rinse with water.
Does Wd-40 Fix Foggy Headlights?
No, WD-40 does not fix foggy headlights.
Conclusion
Keeping your headlights clean is essential for optimal visibility and safety on the road. In this blog post, we explored various methods for cleaning headlights at home. From using toothpaste and bug spray to vinegar and baking soda, there are plenty of DIY solutions to choose from.
Each method has its own advantages and disadvantages, but the key is to find the one that works best for you. By regularly cleaning and maintaining your headlights, you can improve their brightness and lifespan, saving you money in the long run.
Remember to follow the step-by-step instructions provided in each method, and always be cautious when working with chemicals or abrasive materials. With a little effort and the right approach, you can ensure that your headlights remain clear and effective, enhancing your overall driving experience.
