

To restore your headlights and make them shine like new, you can try various methods such as rubbing toothpaste or a mixture of toothpaste and baking soda onto the headlight’s surface and then wiping it off with a soft wet cloth. Another option is to use a headlight restoration kit or sandpaper for a more professional restoration.
It is important to finish the process by applying a sealant, which can be car wax for consumers. However, the only proper way to fully restore headlights is by color sanding to remove damaged plastic, followed by cut and color buffing, and then applying a sealant.
Why Headlight Lens Restoration Is Important?
Headlight lens restoration is a crucial maintenance task that every vehicle owner should prioritize. Over time, your car’s headlights can become foggy, yellowed, or scratched, which can significantly impact your visibility on the road. This not only poses a safety risk but also affects the overall appearance of your vehicle. By investing in headlight lens restoration, you can increase visibility and safety, improve the aesthetics of your vehicle, and save money by avoiding expensive headlight replacements.
Increase Visibility And Safety On The Road
Having clear and bright headlights is essential for safe driving. Over time, the plastic lens covering your headlights can become cloudy and faded due to exposure to UV rays, harsh weather conditions, and normal wear and tear. This can greatly reduce the effectiveness of your headlights, making it difficult to see and be seen on the road, especially during nighttime or in adverse weather conditions.
By restoring your headlight lenses, you can remove the built-up oxidation, scratches, and yellowing, allowing the maximum amount of light to pass through. This results in improved visibility, making it easier for you to spot potential hazards, pedestrians, and road signs. It also enhances your visibility to other drivers, reducing the chances of accidents and ensuring a safer driving experience for everyone on the road.
Improve The Overall Appearance Of Your Vehicle
Aside from the safety aspect, headlight lens restoration also enhances the overall appearance of your vehicle. Cloudy and faded headlights can make your car look old, neglected, and less appealing. On the other hand, restoring your headlights can instantly transform the look of your vehicle, giving it a fresh and well-maintained appearance.
With clear and shiny headlights, your car will have a more aesthetic appeal, which is especially important if you plan to sell your vehicle in the future. Potential buyers are more likely to be attracted to a car that looks well-cared for and visually appealing. Additionally, restoring your headlights can also boost your confidence and pride in your vehicle, making you feel good every time you get behind the wheel.
Save Money By Avoiding Expensive Headlight Replacements
Many car owners often consider replacing their headlights when they become too foggy, yellowed, or scratched. However, this can be a costly option, as replacing the entire headlight assembly can be expensive, especially for newer vehicles with complex headlight systems.
Headlight lens restoration offers a cost-effective alternative to headlight replacement. By investing in a quality headlight restoration kit or seeking professional restoration services, you can bring back the clarity and brightness to your headlights without breaking the bank. Restoring your headlights not only saves you money but also helps extend the lifespan of your headlights, ensuring that they will serve you well for years to come.
In conclusion, headlight lens restoration is essential for maintaining optimum visibility, ensuring your safety on the road, enhancing the appearance of your vehicle, and saving money in the long run. By taking the necessary steps to restore your headlights, you can enjoy clear and bright headlights that not only improve your driving experience but also contribute to the overall maintenance and value of your vehicle.
Signs That Your Headlight Lenses Need Restoration
Is your headlight lens looking dull and foggy? It might be time for restoration. Restore your headlights to their former glory by following simple steps like using toothpaste or baking soda to remove haze and applying a sealant for long-lasting shine.
Check out popular mechanics for detailed instructions.
Are you experiencing reduced visibility while driving at night? Or perhaps you’ve noticed a cloudy or yellowish appearance on your headlight lenses? These are all signs that your headlight lenses may be in need of restoration. Over time, the constant exposure to UV rays, environmental pollutants, and debris can cause your headlight lenses to deteriorate, compromising their performance and aesthetics.
Cloudy Or Yellowish Appearance
If your headlight lenses have a cloudy or yellowish appearance, it’s a clear indication that they need restoration. This cloudiness is often caused by oxidation, a natural process that occurs when the protective coating on the lens surface breaks down. As a result, your headlights not only look unattractive but also produce a dimmer light output, impacting your visibility on the road.
Reduced Brightness And Visibility At Night
Another telltale sign that your headlight lenses need restoration is reduced brightness and visibility at night. As the protective coating wears off, your headlights become susceptible to scratches, discoloration, and hazing. This accumulation of imperfections can significantly diminish the effectiveness of your headlights, making it harder for you to see the road ahead and for other drivers to see you.
Scratches Or Cracks On The Lens Surface
Inspect your headlight lenses for any visible scratches or cracks. These damages can occur due to normal wear and tear, road debris, or accidental impacts. Not only do scratches and cracks contribute to the overall deterioration of your headlight lenses, but they can also allow moisture and dirt to penetrate, further impairing their performance.
It’s important to address these signs of wear and tear on your headlight lenses promptly. Ignoring them can not only compromise your nighttime visibility and safety on the road but also lead to more severe and costly damages in the long run. Fortunately, with headlight lens restoration, you can restore your headlights to their former glory, improving both their appearance and functionality.
How To Choose The Right Headlight Restoration Kit
When it comes to restoring your headlights, choosing the right restoration kit is crucial. With so many options available in the market, it can be challenging to determine which kit will give you the best results. To help you make an informed decision, consider the following factors:
Consider The Quality Of The Kit Components
The first thing you should look for in a headlight restoration kit is the quality of its components. Pay attention to the type of sandpaper or abrasive pads included in the kit. Higher-quality sandpaper or pads will ensure effective removal of oxidation and yellowing from the headlight lenses.
Additionally, check if the kit includes a polish or compound. A high-quality polish or compound will help restore a clear and shiny finish to your headlights. The quality of the sealant or protective coating in the kit is also important as it will help prolong the clarity of the lens after restoration.
Look For User-friendly Instructions And Tools
The next factor to consider is the user-friendliness of the instructions and tools provided in the kit. Clear and detailed instructions are essential for a successful restoration process. Look for kits that provide step-by-step guidance on how to properly use the included products and tools.
Furthermore, check if the kit includes user-friendly tools such as a sanding block or a buffing pad. These tools will make the restoration process easier and more efficient.
Check Customer Reviews And Ratings
Before making a final decision, take the time to read customer reviews and ratings of the headlight restoration kit you are considering. Customer feedback can provide valuable insights into the effectiveness and ease of use of the kit.
Look for kits with positive reviews and high ratings. Pay attention to any recurring issues or concerns mentioned by customers in their reviews. This will help you identify potential drawbacks or limitations of the kit before making a purchase.
By considering the quality of the kit components, user-friendly instructions and tools, and customer reviews and ratings, you can confidently choose the right headlight restoration kit for your needs. Don’t settle for foggy or yellow headlights any longer – restore them to like-new condition with the right kit.
Step-by-step Guide To Headlight Lens Restoration
Headlights play a crucial role in ensuring your safety on the road. Over time, the plastic lens covering the headlights can become dull, cloudy, and yellowed, reducing their effectiveness. Luckily, you don’t have to replace the entire headlight assembly to restore their clarity. With a step-by-step headlight lens restoration process, you can bring back the shine and improve your visibility on the road. In this guide, we will walk you through the entire process, from cleaning the surface to applying a protective sealant for long-lasting results.
Cleaning The Surface Of The Headlight Lens
- Remove any dirt and debris by gently brushing or blowing them off the lens.
- Use a specialized cleaner or soap and water to thoroughly clean the surface. Be sure to choose a cleaner specifically formulated for headlight restoration.
- Dry the lens thoroughly using a clean, lint-free cloth to remove any moisture or residue.
Sanding The Lens
- Choose the appropriate grit sandpaper for the level of damage on your headlight lens. Start with a lower grit sandpaper, such as 400 or 600, and gradually move to higher grits if necessary.
- Wet the lens with water and gently sand it in a circular motion. This helps to remove oxidation, scratches, and other imperfections on the surface.
- Rinse the lens with water to remove any sanding residue, and wipe it off using a clean cloth.
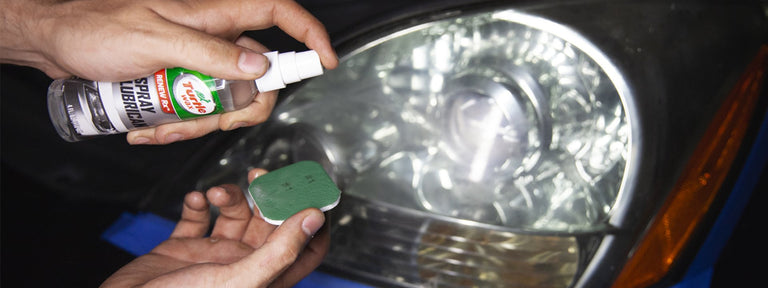
Applying The Restoration Solution
- Follow the instructions on the headlight restoration kit you are using.
- Apply the restoration solution to the lens evenly, making sure to cover the entire surface.
- Let the solution sit for the recommended time to allow it to work its magic.
Polishing The Lens
- Use a polishing compound specifically designed for headlights.
- Apply a small amount of the polishing compound to a soft cloth or polishing pad.
- Buff the lens in a circular motion, applying gentle pressure. This helps to remove any remaining scratches and restore the clarity of the lens.
- Repeat the polishing process until the lens is clear and shiny.
Applying A Protective Sealant
- Apply a sealant or UV protectant specifically formulated for headlights. This helps to protect the lens from future damage and yellowing.
- Follow the instructions on the sealant for curing time and reapplication.
- Reapply the sealant as necessary to maintain long-lasting results.
By following this step-by-step guide to headlight lens restoration, you can restore your headlights and make them shine like new. Not only will this improve your visibility on the road, but it will also enhance the overall appearance of your vehicle. Take the time to properly care for your headlights and enjoy the benefits of clear, bright lights during your nighttime drives.
Tips And Tricks For Headlight Lens Restoration
Restoring your headlights can significantly improve their appearance and brightness, enhancing both the look and safety of your vehicle. Whether your headlights have minor scratches or are covered in stubborn stains, these tips and tricks will help you achieve optimal results in your restoration process.
Protect Surrounding Areas With Masking Tape
Before you begin the restoration process, it’s essential to protect the surrounding areas of your headlights to prevent any accidental damage or overspray. Using masking tape, carefully cover the painted areas adjacent to the headlights. This step will help maintain the integrity of the surrounding surfaces and ensure a clean and professional-looking restoration.
Use A Rotary Tool For Deeper Scratches Or Stubborn Stains
For deeper scratches or stubborn stains that cannot be eliminated with simple cleaning methods, a rotary tool can be a valuable ally in your headlight lens restoration process. Attach a polishing or buffing pad to the rotary tool and work it gently over the affected areas. The rotary tool’s high-speed rotation combined with a suitable abrasive compound will help remove the blemishes, leaving your headlights looking refreshed and clear.
Regularly Clean And Maintain Your Headlights To Prolong Restoration Results
Once you’ve successfully restored your headlights, it’s important to maintain and clean them regularly to maximize the longevity of the restoration results. Regular cleaning will prevent dirt, grime, and debris from building up again, allowing your headlights to shine brightly for an extended period. To clean your headlights, use a mild soap or specialized lens cleaner, a soft microfiber cloth, and gentle circular motions. Avoid using abrasive materials or harsh chemicals, as they can damage the restored surface.
By following these tips and tricks, you can achieve impressive results in restoring your headlights to their former clarity and brilliance. Remember to protect the surrounding areas with masking tape, employ a rotary tool for deeper scratches or stubborn stains, and regularly clean and maintain your headlights to enjoy long-lasting restoration effects.
Credit: www.turtlewax.com
Frequently Asked Questions Of Headlight Lens Restoration
Can Headlight Lenses Be Restored?
Yes, headlight lenses can be restored. The best way to restore headlights is by color sanding to remove the damaged plastic, followed by cut and color buffing. Applying a sealant, such as car wax, is recommended as a final step.
How Do You Restore Cloudy Headlights?
To restore cloudy headlights, first, rub toothpaste onto the lens using a toothbrush or rotary buffer. Then, mix toothpaste with baking soda and apply it evenly. Let it dry and wipe off with a wet cloth. Another option is using a headlight restoration kit or professional service.
Avoid using car wax as a sealant.
What Is The Best Headlight Lens Restorer?
The best headlight lens restorer varies depending on your preference. Some popular options include the Sylvania Headlight Restoration Kit, Turtle Wax Headlight Lens Restorer Kit, and professional headlight restoration services.
Does Wd 40 Work To Restore Headlights?
WD-40 can temporarily improve headlight appearance, but it is not a long-term solution for restoring headlights. Consider using a specialized headlight restoration kit or seeking professional assistance for a more effective and lasting result.
Conclusion
Restoring your headlights doesn’t have to be a complicated task. By following the right techniques and using the right products, you can make your headlights shine like new. Whether you choose to use toothpaste, baking soda, or a headlight restoration kit, the key is to remove the damaged plastic and then buff and seal the headlights for long-lasting results.
So don’t let cloudy headlights dim your driving visibility. Take the time to restore your headlights and enjoy safer and clearer nights on the road.


