

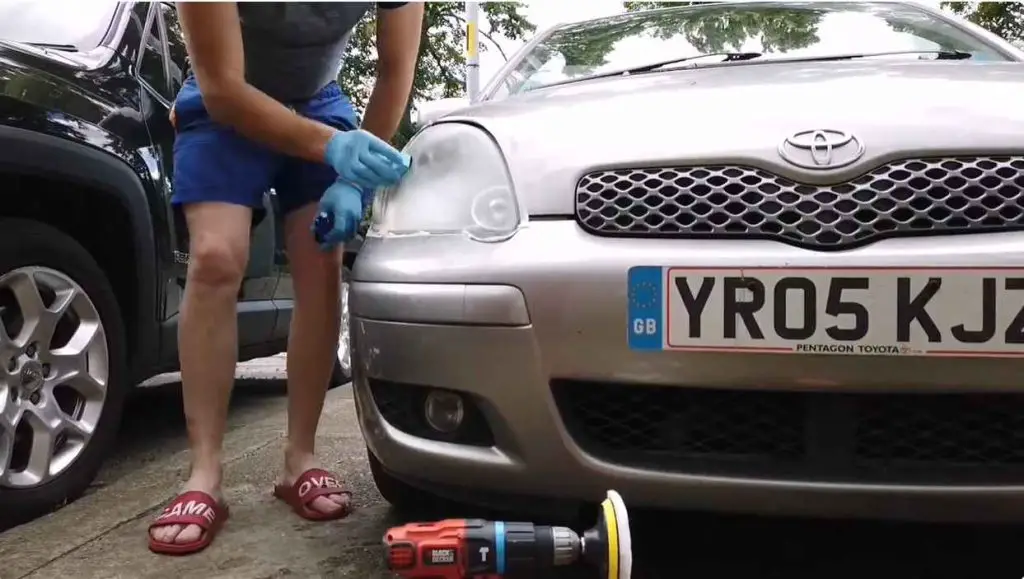
Apply innovative headlight repair polish by cleaning the surface and then applying the polish evenly. Buff the headlights until they are clear and restored.
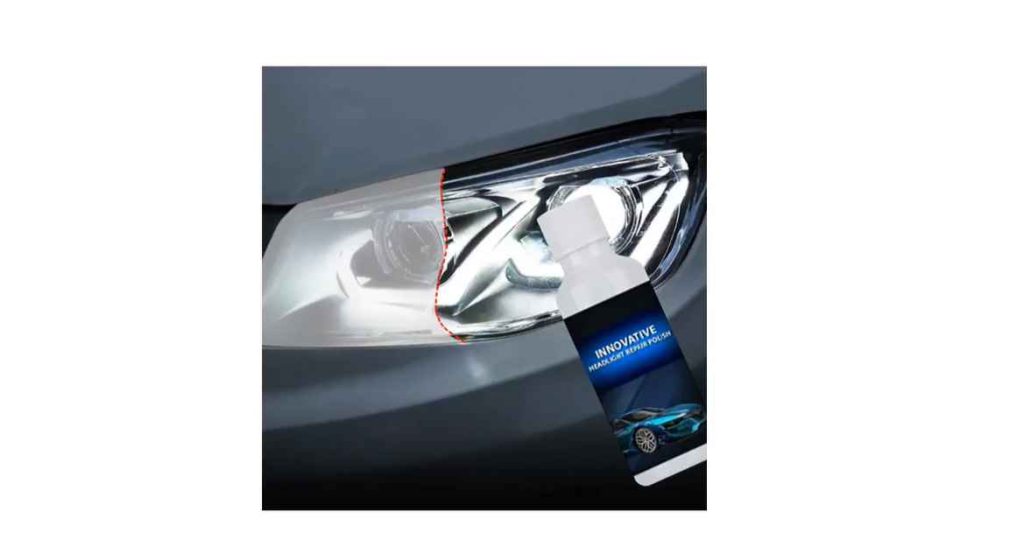
Wondering about a quick fix for foggy headlights? Innovative headlight repair polish can restore clarity to your vehicle’s headlights in just a few minutes. With time, headlights can become dull and yellowed, impairing your vision and vehicle appearance.
Fortunately, a straightforward application of a quality headlight repair polish can reverse this fading, improving both the aesthetics and safety of your car.
If you want to know how to apply innovative headlight Repair Polish, This easy-to-use solution demands minimal tools and can be a cost-effective alternative to professional restoration or replacement. Embrace the simplicity of DIY auto maintenance and ensure your headlights shine bright for improved nighttime visibility.
Introduction To Headlight Restoration
Dim and foggy headlights are not just an eyesore — they can be dangerous. Over time, car headlights can become dull due to oxidation, UV rays, and dirt. This is where headlight restoration steps in to bring back the clarity. Opting for a DIY headlight repair polish is a smart, cost-effective solution to improve your vehicle’s appearance and safety.
The Importance Of Clear Headlights
Clear headlights are vital for safe driving conditions at night and during poor weather. Not only do they illuminate the road ahead, but they ensure other drivers see your vehicle. Neglected headlights can result in reduced visibility, which may lead to accidents. Therefore, regular maintenance with a quality headlight polish keeps you and others secure on the road.
Overview of Headlight Repair Polish Solutions
Overview Of Headlight Repair Polish Solutions
On the market, various solutions exist to tackle yellowing and cloudy headlights. They range from abrasive kits to chemical cleaners. Abrasive options typically include sanding down the surface layer, while chemical polish restores transparency with less elbow grease. Selecting the right product is important for effective results; look for polishes that offer a balance between restoration quality and ease of use.
- DIY Kits: Come with all you need for at-home restoration.
- Professional-Grade Solutions: Provide longer-lasting results.
- Eco-Friendly Alternatives: Ensure a safe environment while cleaning.
Comprehending Headlight Damage
Car headlights are like the eyes of your vehicle. They need care to shine bright. Headlights turn foggy, yellow, and scratched over time. This makes driving at night hard and unsafe. Let’s shine a light on why this happens and how to fix it.
Common Causes Of Headlight Deterioration
Several factors dull your car’s headlights. It’s important to know what affects them:
- Age: Headlights age like anything else. The more you drive, the older they get.
- Debris: Small rocks and dirt hit the headlight when you drive. This can cause marks and scratches.
- Chemicals: Car wash soaps and road salts sometimes hurt the headlight material.
- Water: Water can get inside and leave a cloudy look.
The Impact Of Oxidation And UV Exposure
Oxidation happens when your headlights are exposed to oxygen over time. This leads to a dull and frosty appearance. UV rays from the sun are also bad for your headlights. They can fade and discolor the clear plastic. To keep your headlights clear, you need to protect them from these elements. Applying a headlight repair polish not only restores their clarity but also adds a protective layer against future damage.
Benefits Of Using Innovative Headlight Repair Polish
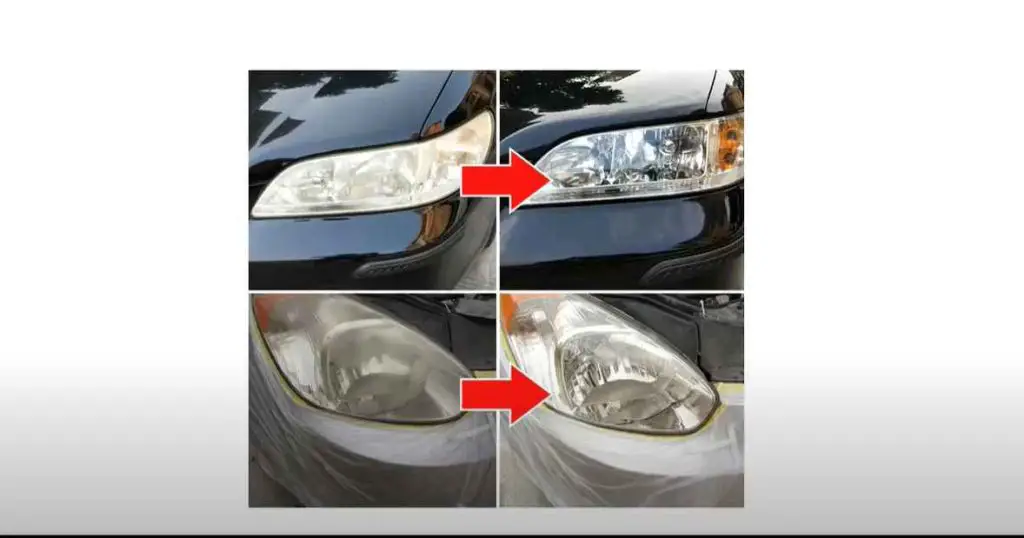
Your vehicle’s headlights are essential for safe driving, especially at night. Over time, they can become dull and cloudy from exposure to the sun, extreme weather, and road debris. Innovative headlight repair polish is designed to tackle this issue and restore your headlights to near-original condition. Let’s explore some key benefits of using this product to rejuvenate your vehicle’s headlights.
Enhancing Visibility For Safer Driving
Improved visibility is fundamental for driver safety. Cloudy or yellowed headlights can significantly reduce the amount of light that illuminates the road ahead. Applying a headlight repair polish improves clarity and brightness. This polish can effectively remove the haze from your headlights, resulting in a clearer and more powerful beam of light. The improvement in visibility makes for a safer driving experience during low-light conditions.
Cost-effective Alternative To Replacement
Headlight replacement can be expensive. Using innovative headlight repair polish provides a cost-effective solution. Rather than purchasing new headlight units, this polish allows you to maintain your existing ones. With a bit of effort and a small investment in the polish, you can achieve dramatic results that could save you hundreds of dollars. Additionally, maintaining your vehicle’s original parts preserves its value and authenticity.
| Benefit | Description | Impact |
|---|---|---|
| Visibility | Clears headlight haze | Improves safety |
| Cost | Avoids replacement | Saves money |
- Easy to apply
- Long-lasting results
- Universal compatibility with all types of headlights
- Clean the headlight surface.
- Apply the polish evenly.
- Buff to a brilliant shine.
Selecting The Right Headlight Repair Polish
Your car’s headlights are your eyes on the road at night. Like any other part of your vehicle, they need attention and care. Over time, they can get dull, hazy, or yellowed, reducing visibility. The right polish can restore them to crystal-clear perfection. Discovering the best headlight repair polish demands a keen eye. Key ingredients and brand reputatives are vital to look out for.
Key Ingredients To Look For
Effective headlight polish has certain ingredients that make it work well. These are some to keep an eye out for:
- Abrasives: They remove the hazy layer.
- Solvents: They clean the headlight surface.
- Sealants: They protect the headlight after polishing.
- UV blockers: They prevent future yellowing.
Comparing Different Brands And Formulas
Not all headlight polishes are equal. Comparing them helps find the best match for your needs. Consider the factors in the table below:
| Brand | Key Ingredient | UV Protection | User Reviews | Price |
|---|---|---|---|---|
| Brand A | Abrasives, Sealants | Yes | 4.5 stars | $$ |
| Brand B | Solvents, UV Blockers | No | 4.0 stars | $ |
| Brand C | Abrasives, UV Blockers | Yes | 3.5 stars | $$$ |
Checking customer reviews and weighing the cost against benefits makes selecting easier. Choose a polish that suits your headlight condition and budget. Brands with excellent reviews and a solid mix of key ingredients usually deliver the best results. Keep in mind, that pricier doesn’t always mean better. Find a brand that gives your headlights a new lease on life and ensures safe driving in the dark.
Preparing Your Headlights For Application
Welcome to the first step in restoring the sparkle to your vehicle’s headlights with Innovative Headlight Repair Polish. Taking the time to prepare your headlights properly will ensure a stellar finish. Let’s guide you through each process.
Cleaning The Headlight Surface
Begin with a thorough clean. Dirt and grime affect the polish’s effectiveness. Follow these steps:
- Wash the surface with soap and water.
- Rinse thoroughly to remove all soap residues.
- Dry the headlight with a soft, lint-free cloth.
Ensure no water spots or streaks remain. A clean headlight guarantees a smooth application.
Masking Area Around The Headlights
Protecting the surrounding areas is vital. Here’s how:
- Get quality masking tape. It should stick well and peel off easily.
- Cover the paintwork near the headlights to avoid damage.
- Ensure no gaps where the polish could seep through.
Taking these precautions keeps your car’s bodywork safe.
Step-by-step Guide To Applying Headlight Repair Polish
Cloudy headlights dull your car’s shine. Headlight repair polish brings back clarity. Follow this guide to refresh your car’s eyes safely and effectively.
Application Techniques
Before you start, clean your headlights with soap and water. Then, dry them completely. Let’s dive into the application:
- Tape off surrounding areas to protect your car’s paint.
- Apply a small amount of polish onto a microfiber cloth.
- Gently rub the polish on the headlight in a circular motion.
- Cover the entire surface to ensure an even application.
Use multiple layers for deeper scratches. Each layer should be thin. Remember to swap out the cloth if it gets too dirty.
Drying And Curing Time
After applying the polish, give it time to set. Do not rush this step.
- Lay down a layer and wait at least 5 minutes.
- Headlights should feel dry to the touch before the next step.
- Leave the car in a cool, shaded area for an hour to cure completely.
For the best results, avoid driving or washing your car for at least a few hours after the curing process. Patience ensures a clear, smooth finish.
Troubleshooting Common Application Issues
Encountering issues during your headlight repair polish application? No worries. Even the most meticulous DIY tasks can come with their own set of challenges. Luckily, some common problems have straightforward fixes. Dive into some troubleshooting methods to overcome these pesky issues.
Dealing With Streaks And Uneven Applications
Streaks or uneven polish can spoil your hard work. Try these tips for a seamless finish:
- Ensure the headlight surface is clean and dry before application.
- Apply polish in a shade rather than in direct sunlight.
- Use a microfiber cloth for application to reduce streaking.
- Polish in small sections to maintain consistent pressure.
- If streaks persist, apply a fine mist of water and buff again.
Fixing Poor Polish Adhesion
Struggling with poor adhesion? Consider these steps:
- Check the expiration date of your polish; old products may not adhere well.
- Clean the headlights with isopropyl alcohol to remove oils and residue.
- Lightly sand the surface with fine-grit sandpaper for better grip.
- Allow ample drying time between coats for stronger adhesion.
- If needed, apply a headlight primer before the polish for an extra stickiness boost.
Maintenance Tips Post-polish Application
Applying innovative headlight repair polish brings new life to your car’s headlights. Yet, to keep them shining brightly, post-application care is vital. By adhering to a few maintenance tips, your headlights will remain clear and functional for longer. Let’s focus on how to maintain that new polish gleam.
Regular Cleaning And Care
Clean headlights often to maintain visibility. Use a soft cloth and soapy water for routine cleaning. Avoid harsh chemicals that can damage the polish. Here’s a cleaning guide to follow:
- Wet a microfiber cloth with water and a drop of soap.
- Gently wipe the headlight surface in a circular motion.
- Rinse with clean water, ensuring all soap is gone.
- Dry with another clean microfiber cloth.

Protection From Future Damage
After polishing, shield your headlights from the elements. Apply a UV protection sealant to prevent sun damage. Consider a headlight protection film for extra defense against scratches and chips. Here are steps for applying UV protection:
- Ensure the headlight is clean and dry.
- Apply the UV protection sealant as directed.
- Allow it to dry completely before driving.
A quality headlight protector film also adds a durable barrier. Seek professional installation for the best results.
Comparing Diy To Professional Headlight Restoration
Clear headlights are vital for safe driving. Over time, they can become cloudy. This impacts visibility. You have two main choices. You can do it yourself with a headlight repair polish. Or, you could choose professional restoration. Each option has its benefits and challenges. Mastering these will help you make the best decision for your car and safety.
Pros And Cons Of Diy Vs. Professional Services
Pros of DIY:
- Cost-effective: DIY kits are cheaper than professional services.
- Convenient: Repair at home, no need to schedule appointments.
- Immediate results: Complete the job quickly and see the results.
Cons of DIY:
- Time-consuming: It might take longer if you’re not experienced.
- Risk of damage: Without the right skills, you may damage the headlights.
- Short-term fix: Results might not last as long as professional work.
Pros of Professional Services:
- Expertise: Professionals bring experience and precise skills.
- Durability: They often use high-quality materials for lasting results.
- Guarantee: Many services offer a guarantee on their work.
Cons of Professional Services:
- Cost: More expensive than doing it yourself.
- Appointment: You need to schedule a time that suits you both.
- Vehicle downtime: You might be without your car for a time.

When To Consider Professional Restoration
It’s not always easy to decide whether to get professional help. Here are signs you need a pro:
| Consider Professional Help If: | Reason |
|---|---|
| Headlights are severely damaged: | Professionals can fix deep scratches and heavy discoloration. |
| You lack time or equipment: | Pros have the right tools and can get it done fast. |
| You’ve tried DIY without success: | A professional approach might achieve better results. |
Enhancements And Advanced Techniques
Headlights are vital for safe driving. They need care just like the rest of your car. With time, headlights can get cloudy. This can make it hard to see at night. A good headlight repair polish can help. But, there are ways to make the Polish work even better. Let’s look at some advanced tricks.
Using Sanding For Deeper Defects
Sanding is a key step before applying polish. It helps remove deep scratches and clears the cloudiness.
- Start with a coarser sandpaper. Wet the headlight and sand in a circular motion.
- Move to finer sandpaper gradually. This smooths out the surface more each time.
- Keep the headlight wet during the process to avoid scratching.
- Finish with the finest sandpaper for a smooth surface. It prepares the headlight for polishing.
Adding A Protective Uv Sealant
UV sealant protects the headlight after polishing. It keeps your lights clear for longer.
- Choose a quality UV sealant for the best protection.
- Apply the sealant evenly over the entire headlight surface.
- Let it dry as per the instructions. This ensures the sealant sets well.
- Buff the headlight if needed for extra shine.
Frequently Asked Questions For How To Apply Innovative Headlight Repair Polish
How Do You Use A Headlight Polishing Kit?
Begin by cleaning the headlights with soap and water. Next, sand the lenses with provided sandpaper, starting with coarse and progressing to fine. Apply the polishing compound on the lenses, and buff it out using a microfiber cloth or drill attachment.
Finish by wiping clean and applying a sealant if included.
What Do You Put On Headlights After Polishing?
After polishing the headlights, apply a UV sealant or headlight coating to protect them from oxidation and UV damage.
How Do You Use A Headlamp Repair Agent?
To use a headlamp repair agent, start by cleaning the headlamp thoroughly. Apply the agent evenly, following the product’s specific instructions. Allow it to dry, then buff out any residue until the headlamp is clear and restored. Always use in a well-ventilated area.
How Do You Fix Cloudy Headlights Permanently?
To permanently fix cloudy headlights, sand them with progressively finer grits, then apply a UV sealant to protect the clear surface. Regular maintenance will prevent future cloudiness.
Conclusion
Restoring your vehicle’s headlights to their former glory is simple with the right polish. By following the steps outlined, you’ll ensure a crystal-clear finish. Remember, regular maintenance goes a long way. Embrace this easy DIY task and keep your car’s beams shining bright, enhancing both appearance and safety.


