
Credit: Amazon.com
Introduction
The 2013 Nissan Altima is a reliable and stylish vehicle, but like all cars, it requires regular maintenance to keep it in top shape. One crucial component that can sometimes need attention is the headlight assembly. Whether your headlights have become cloudy, are malfunctioning, or you’re upgrading to a new set, knowing how to remove the headlight assembly is a valuable skill.
In this guide, we’ll walk you through the entire process of removing the headlight assembly from a 2013 Nissan Altima. With the right tools and a bit of patience, you can perform this task yourself, saving time and money.
Tools and Materials Needed
Before diving into the job, you’ll want to gather all the necessary tools. Here’s what you’ll need:
- Socket wrench set
- Phillips and flathead screwdrivers
- Plastic trim removal tools
- Ratchet and extension
- Torx bit set (optional but helpful)
- Safety gloves
- Safety glasses
- New headlight assembly (if replacing)
Having these tools on hand will make the process smoother and help prevent any frustration mid-task.
Preparation Before Removal
The first step in any automotive repair is preparation. Here’s how to get ready:
- Park Your Car Safely: Ensure your vehicle is parked on a flat surface and turn off the engine. Engage the parking brake for added safety.
- Disconnect the Battery: Always disconnect the negative battery terminal to prevent any electrical shorts or shocks.
- Gather Tools and Materials: Make sure all your tools and materials are within reach before you start.
Proper preparation is key to making the removal process as straightforward as possible.
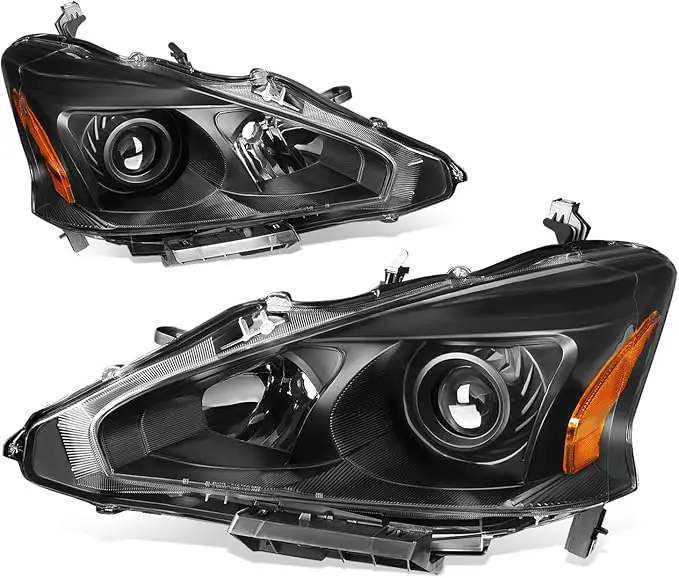
Locating the Headlight Assembly

Credit: Amazon.com
The headlight assembly on the 2013 Nissan Altima is located at the front of the vehicle, nestled within the front fender and bumper. Understanding its exact location and how it’s secured will make the removal process easier.
- Mounting Points: The headlight assembly is typically secured with a combination of screws, bolts, and plastic clips. These are usually accessible from the engine bay and behind the front bumper.
Removing the Front Bumper (If Necessary)
In some cases, you might need to remove the front bumper to access the headlight assembly fully. While this might seem daunting, it’s a manageable task with the right approach.
- Removing Screws and Clips: Start by removing the screws and clips securing the bumper to the body of the car. These are usually found along the edges of the bumper, under the hood, and along the wheel wells.
- Detaching the Bumper: Once all fasteners are removed, gently pull the bumper away from the vehicle. Be cautious of any connected fog lights or sensors.
Accessing the Headlight Assembly

Credit: Pixabay.com
If you’re able to access the headlight assembly without removing the bumper, great! Here’s how:
- Checking for Obstructions: Ensure that nothing is obstructing your access to the headlight assembly, such as splash guards or other components.
- Reaching the Assembly: With the obstructions cleared, you should have enough room to work on the headlight assembly.
Removing the Headlight Assembly
Now that you have access to the assembly, you can begin the removal process:
- Locate the Bolts: Identify all the bolts and screws securing the headlight assembly in place. Typically, there are three or four bolts to remove.
- Remove the Bolts: Using your socket wrench, carefully remove each bolt. Keep them in a safe place as you’ll need them for reinstallation.
- Gently Remove the Assembly: With all bolts removed, gently wiggle the headlight assembly free from the car. Be cautious of the wiring still attached.
Disconnecting the Electrical Connectors
Before you can fully remove the headlight assembly, you need to disconnect the electrical connectors:
- Wiring Harness: Locate the wiring harness attached to the back of the headlight assembly. Gently press the release tab and pull the connector away from the assembly.
- Avoiding Damage: Be careful not to force the connectors, as this could damage the wiring or connectors.
Removing the Headlight Bulbs
If you’re planning to reuse the bulbs, it’s important to remove them carefully:
- Twist and Pull: Most headlight bulbs can be removed by twisting them counterclockwise and then pulling them straight out.
- Store Properly: If you’re reusing the bulbs, store them in a clean, safe place to avoid contamination or damage.
Installing a New Headlight Assembly
With the old assembly out, it’s time to install the new one:
- Prepare the New Assembly: Ensure the new headlight assembly is ready for installation, with all protective covers removed.
- Reconnect Electrical Connectors: Attach the wiring harness to the new headlight assembly, ensuring a secure connection.
- Secure the Assembly: Carefully place the new assembly in position and reattach the bolts. Tighten them evenly to avoid misalignment.
Testing the New Headlight Assembly

Credit: Amazon.com
Before reassembling the car, you’ll want to test the new headlight assembly:
- Reconnect the Battery: Attach the negative terminal back to the battery.
- Test the Headlights: Turn on the headlights to ensure they’re functioning correctly. Check both high and low beams.
- Adjust the Aim: If necessary, adjust the headlight aim using the adjustment screws on the assembly.
Reinstalling the Front Bumper
If you removed the bumper, now’s the time to put it back on:
- Align the Bumper: Carefully align the bumper with the mounting points on the vehicle.
- Reattach Screws and Clips: Secure the bumper by replacing all screws and clips. Ensure everything is tightened properly.
Final Checks and Safety Tips
Before you hit the road, perform these final checks:
- Double-Check Connections: Ensure all electrical connections are secure and that the assembly is firmly in place.
- Proper Alignment: Make sure the headlights are aimed correctly to avoid blinding other drivers.
Common Mistakes to Avoid
Avoid these pitfalls to ensure a smooth process:
- Forgetting to Disconnect the Battery: Always disconnect the battery to prevent electrical issues.
- Over-Tightening Bolts: Over-tightening can lead to cracking or damaging the assembly.
- Forgetting to Test: Always test the new assembly before fully reassembling the vehicle.
Conclusion
Removing the headlight assembly of a 2013 Nissan Altima might seem like a daunting task, but with this guide, you should find the process manageable. By following these steps carefully, you can replace your headlights with confidence, ensuring your Altima is safe and road-ready.


