
To remove headlight tint spray, use a microfiber cloth and a designated adhesive remover. Gently rub the area until the tint begins to come off.
Removing headlight tint spray can be a tedious yet necessary task to ensure your car’s headlights are clear and functioning optimally. Whether you’re looking to revert your car to its original aesthetic, failed an inspection due to tinted headlights, or simply didn’t like the outcome of a DIY project, this removal process is crucial.
If you want to know how to Get Headlight Tint Spray off, Then this guide will outline a straightforward method for stripping away that headlight tint spray and restoring your headlights to their former clarity. Always remember to work in a well-ventilated area and use products specifically designed for automotive applications to prevent damage to your vehicle.
Safety should be your priority, not just for maintaining the condition of your headlights but also for ensuring proper visibility on the road.
Introduction To Headlight Tint Spray Removal
Changing your car’s aesthetics with headlight tint spray can give it a sleek, custom look. But what happens when you need to remove that tint? Perhaps the tint has begun to peel or bubble, or maybe you’re just ready for a change. Removing headlight tint spray is not always straightforward. This guide will navigate the removal process, ensuring that your headlights are clear, and road safety is not compromised.
Overview Of The Challenges In Removing Headlight Tint Spray
Headlight tint removal can be a tricky process. Perfecting it requires patience, the right tools, and an understanding of potential hurdles. Adhesive residue, potential damage to the headlight surface, and ensuring the tint is completely removed are common challenges. Preparing adequately for the job is the first step to success.
Importance Of Ensuring Clarity And Visibility In Headlights
Clear and bright headlights are vital for both legal and safety reasons. Any modification, like tinting, should not impede the headlight’s function. Proper removal of headlight tint ensures full luminosity, critical for night-time visibility and driving in poor weather conditions. This section emphasizes the importance of maintaining the highest level of headlight clarity and vehicle safety.
Understanding Headlight Tint Spray
Headlight tint sprays are a popular way to customize a vehicle’s appearance. They add a colored tint or smoke effect to car headlights, creating a sleek and stylish look. But sometimes, for various reasons, car owners may need to remove this tint. This section will delve into the spray’s composition and why removal might be necessary.
Composition Of Headlight Tint Sprays
Knowing what’s in headlight tint sprays helps in the removal process. Here’s what they often contain:
| Components | Functions |
|---|---|
| Solvents | Aid in application and drying. |
| Binder | Helps the tint adhere to the headlight surface. |
| Pigment | Gives the tint its color. |
| UV inhibitors | Protect against sun damage. |
Reasons For Removing Headlight Tint
There can be several motives for taking off headlight tint sprays.
- Visibility: Over time, tints may fade or bubble, reducing light output.
- Damage: Scrapes or peeling can occur, affecting the look and function.
- Legal Reasons: Tinting might not align with local vehicle regulations.
- Aesthetic Change: Owners may desire a different style for their car.
Tools And Materials Needed
The tools and materials you choose for a task can make all the difference. The right equipment simplifies the removal of headlight tint spray. A DIY project like this demands care. You will need specific tools to do the job thoroughly while keeping safety in mind. Let’s explore what’s necessary for this procedure.
List Of Essential Tools For The Removal Process
- Heat Gun or Hair Dryer – To soften the tint adhesive.
- Plastic Razor Blades – For scraping without damaging headlights.
- Adhesive Remover – To dissolve leftover glue.
- Microfiber Cloth – For a gentle, lint-free clean.
- Soap and Water Mixture – To aid in removing the tint and adhesive.
- Spray Bottle – For an even distribution of the soapy water.
- Bucket – To hold the soap and water mixture.
- Sponge or Soft Brush – To apply soapy water and help lift the tint.
- Gloves – To protect your hands from the chemicals.
Safety Equipment And Precautions
| Equipment | Precaution | Purpose |
|---|---|---|
| Protective Gloves | Wear at all times | Protects skin from harsh chemicals |
| Safety Goggles | Cover eyes fully | Protects eyes from splashes |
| Respiratory Mask | Use in well-ventilated areas | Prevents inhalation of fumes |
Before you start, put on all necessary safety gear. Ensure the workspace is well-ventilated. Keep cautious to prevent accidents and ensure a smooth headlight tint removal process.
Preparation Steps Before Removal
Removing headlight tint spray requires careful preparation. Right methods protect headlights and cars. Follow these steps for a safe, effective clean.
Cleaning And Preparing The Headlight Surface
Before starting, clean the headlight surface. A clean headlight ensures a smoother removal process. Use these steps:
- Wash with soapy water.
- Rinse off all soap.
- Dry with a microfiber towel.
- Wipe with isopropyl alcohol for extra cleaning.
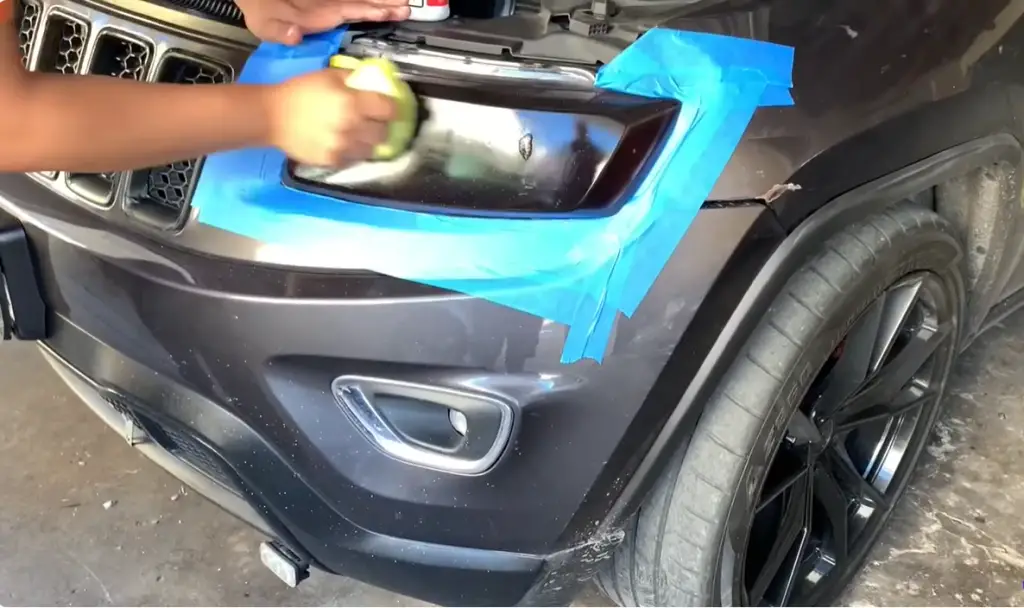
Protecting The Surrounding Areas With Masking Tape
Masking tape shields paint and chrome during tint removal. Careless removal can damage these areas. Here’s how to protect them:
- Place tape around the headlight edges.
- Cover a few inches beyond the headlight.
- Press down firmly on the tape edges.
Initial Removal Techniques
Ready to transform your cloudy headlights back to their former glory? Removing headlight tint spray is a straightforward task. Begin with these initial removal techniques for the best results. A successful process leaves your headlights looking as good as new. Follow each step with care and patience. Let’s dive in!
Peeling Off The Tint Film By Hand
Starting at a corner or edge, gently lift the tint film with your fingernail. If it peels without resistance, continue slowly. Avoid rushing this step to prevent leaving adhesive residue or damaging the headlight.
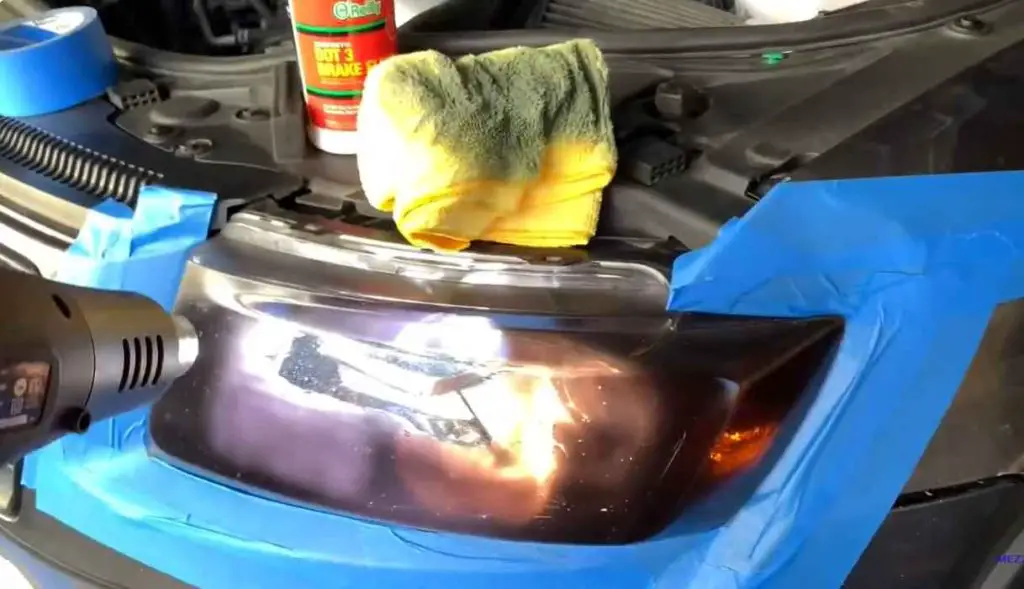
Applying Heat To Ease The Removal Process
Using a hairdryer or heat gun can greatly ease the removal process. Point the heat source at the film, moving it back and forth to avoid overheating. The heat softens the adhesive. Once warm, restart the peeling by hand. Repeat as needed until the film lifts away.
Applying Chemical Solutions
Tinted headlights can enhance a car’s appearance, but sometimes they need to be removed. Whether it’s due to changing regulations or a desire for a new look, removing headlight tint spray is a task that requires the right approach. Chemical solutions often provide the most effective way to dissolve and remove the tint. This section explores how to select and apply these chemicals safely and efficiently.
Choosing The Right Solvent For Tint Spray
Finding an effective solvent is critical for the successful removal of headlight tint spray. Select a non-abrasive chemical that’s specifically designed for automotive use. This will ensure the headlight remains unharmed while removing the unwanted tint. Here are some options:
- Acetone: Cuts through the tint quickly but use with care.
- Isopropyl alcohol: A safer alternative that works well on many tints.
- Goo Gone Automotive: A gentle yet effective remover meant for cars.
Step-by-step Guide To Applying Chemical Removers
- Clean the headlight surface to remove any debris or dirt.
- Apply the chosen solvent onto a microfiber towel or soft cloth.
- Rub the cloth gently onto the tinted area in a circular motion.
- Let the solvent sit for a few minutes to break down the tint.
- Wipe away the residue with a clean, damp cloth.
- Repeat if any tint remains, gradually softening and removing layers.
- Clean the headlight thoroughly once all the tint is gone.
Always wear protective gloves and work in a well-ventilated area to avoid inhaling fumes. If the headlight tint doesn’t come off after several attempts, you might need a stronger solvent or professional assistance. Remember, patient application of the chemical remover usually yields the best results.
Mechanical Methods For Stubborn Residues
Removing headlight tint spray can sometimes be tough. Mechanical methods come in handy for those stubborn residues. These methods use physical force. They work best when chemical solutions fail. Let’s explore some effective techniques.
Using Razor Blades Or Scrapers Carefully
A razor blade or scraper can be your go-to tool. It scrapes off the tint. Use this method with caution to avoid scratches. Follow these steps:
- Soften the tint with a heat gun or hairdryer.
- Hold the blade at a low angle to the headlight.
- Gently push the blade forward to peel off the tint.
- Clean the residue with a microfiber cloth.
The Role Of Sanding In Tint Removal
Sanding is another effective mechanical method. It removes the tint layer by layer. This requires more effort but works well when the tint is old and brittle. Use sandpaper with moderate to fine grit. Start with these steps:
- Wet the headlight and sandpaper to prevent scratching.
- Sand in a circular motion for even removal.
- Wipe away the slurry with a damp cloth.
- Finish with a finer grit for a smooth surface.
Natural And Eco-friendly Alternatives
Many people prefer natural and eco-friendly alternatives when removing headlight tint spray. Not only do these methods protect the environment, but they often prove gentler for your car’s surfaces.
Using Vinegar Or Soapy Water Solutions
Vinegar is a powerful, yet harmless, cleaning agent. Follow these steps for a DIY solution:
- Mix equal parts white vinegar and water in a spray bottle.
- Apply the mixture to the tinted area.
- Let it soak for five minutes.
- Wipe off with a soft cloth.
For soapy water, here is a simple method:
- Combine a few drops of eco-friendly dish soap with warm water.
- Sponge the solution onto the tint.
- Wait, then gently peel off the tint.

Importance Of Eco-friendly Methods And Their Limitations
Using eco-friendly methods helps prevent harmful chemicals from impacting nature. They often cost less and are safer for users. These methods do have limitations though. They may take longer than chemical alternatives. Stubborn adhesives might not always respond to milder approaches. Always test in a small area to ensure the car’s surface remains unharmed. Patience is key when using natural solutions to achieve desired results.
Aftercare Of Headlight Post Removal
Aftercare of headlight post removal is crucial for maintaining your car’s aesthetics and durability. Once you’ve successfully taken off the headlight tint spray, it’s vital to take extra steps. These steps ensure the longevity and clarity of your headlights. Here’s a detailed guide on how to care for your headlights post-tint removal.
Polishing And Buffing The Headlight
With the tint removed, your headlight lens might appear dull or have residue. Polishing helps in removing any leftover adhesive. It restores the shine to your headlights. Buffing smooths out any fine scratches. This process improves the overall clarity of the lens. Use a microfiber cloth and a quality polishing compound designed for headlights.
Sealing And Protecting The Lens From Future Damage
Once polished, seal your headlights to protect them against future damage. The sealant acts as a shield. It protects against UV rays, dirt, and moisture. Apply a headlight sealant following the instructions on the product. Give it time to cure to ensure optimal protection. Regular cleaning and reapplication of the sealant are key to keeping your headlights looking like new.
Troubleshooting Common Issues
So, you’ve sprayed your headlights, and things didn’t turn out perfect? Don’t worry! Removing headlight tint spray may bring up a few challenges. Let’s tackle them one by one to restore your car’s sleek look.
Addressing Leftover Adhesive Or Haze
Sticky residue can dull your headlights after peeling off the tint spray. To remove this haze, a methodical approach is crucial.
- Start with a clean, dry microfiber towel.
- Gently wipe with a mixture of soap and water.
- For stubborn adhesive, apply an adhesive remover.
- Use circular motions to loosen and lift residue.
- Rinse thoroughly with clean water and dry.
For delicate areas, a cotton swab soaked in adhesive remover can help. Ensure you work in a well-ventilated area. Patience is key—do not rush the process.
What To Do When Scratches Are Left Behind
Accidental scratches can occur while removing the headlight tint. These scratches are unsightly but fixable.
- Clean the headlight with glass cleaner.
- Sand the scratched area with fine-grit sandpaper.
- Use a headlight polish and buff the surface.
- Finish with a wax or sealant for shine and protection.
Go slow and check your progress frequently. This prevents deepening scratches or causing new ones.

Recap Of Effective Tint Spray Removal
Removing headlight tint spray involves precision and care.
- Start by cleaning the headlight surface.
- Apply a specialized removal solution or rubbing alcohol.
- Use a plastic scraper gently to peel the tint.
- Rinse thoroughly with water after removal.
Always wear gloves to protect your hands. Work in a well-ventilated area for safety.
Long-term Care Tips For Maintaining Clear Headlights
Clear headlights are not only about looks but also safety.
- Regularly clean the headlights to prevent buildup.
- Polish headlights every few months to maintain clarity.
- Use UV-protectant sprays to shield against sun damage.
- Inspect for scratches and address them promptly.
Simple steps ensure your headlights stay clear for the road ahead.
Conclusion And Best Practices
As we wrap up our guide on removing headlight tint spray, remember to follow these best practices.
Frequently Asked Questions Of How To Get Headlight Tint Spray Off
How Do You Remove Tint From Car Headlights?
Begin by heating the tinted film with a hair dryer to loosen the adhesive. Peel off the film slowly, starting from a corner. Remove any residue with an adhesive remover. Finally, clean the headlight with soapy water and a microfiber cloth for clarity.
Can You Remove the Window Tint Spray?
Yes, you can remove window tint spray. Use ammonia and a plastic scraper for easier removal. Thoroughly clean with soap and water afterward to eliminate residue. Always wear protective gloves during the process.
Will Wd 40 Take Off Spray Tint?
WD-40 can remove spray tint from most surfaces when properly applied and gently wiped away. Ensure to test on a small area first to avoid damage.
How Long Does Spray Headlight Tint Last?
Spray headlight tint typically lasts between 1 to 3 years, depending on maintenance and exposure to the elements. Regular cleaning can help extend its lifespan.
Conclusion
Removing headlight tint spray doesn’t have to be daunting. With patience and the right tools, you can restore your headlights to their original clarity. Remember, safety is paramount—wear gloves and work in a ventilated area. For stubborn residue, repeat the process or seek professional assistance.
Keep your car’s aesthetics in top shape and ensure your headlights shine bright!


