To install sealed beam headlights, start by removing any trim rings or bezels surrounding the headlights using a screwdriver. Next, remove the bulb from the assembly with a quarter turn and unplug the factory harness from the bulb.
Finally, place the headlamp assembly in a safe place. Sealed beam headlights are popular for their durability, longevity, and simplicity. They provide reliable performance and are often used in older vehicles. Installing sealed beam headlights can improve visibility on the road and enhance the overall appearance of your vehicle.
Whether you have a Toyota or Chevy, the installation process is similar and can be completed with basic tools and minimal expertise.

Credit: www.amazon.com
Preparing For The Installation
When it comes to installing sealed beam headlights, start by removing any trim rings or bezels around the headlights using the appropriate tools. There are several online tutorials and videos available that provide step-by-step instructions for replacing sealed beam headlights.
Gathering The Necessary Tools And Materials
Before starting the installation process for sealed beam headlights, it is essential to gather all the necessary tools and materials. By having everything prepared in advance, you can streamline the installation process and ensure a smooth transition.
Here is a list of the tools and materials you will need:
- Sealed beam headlights
- Phillips-head screwdriver
- Socket wrench set
- Wire strippers
- Electrical tape
- Wire connectors
- Zip ties
Make sure you have all these items ready before you begin the installation process.
Ensuring Safety Precautions Before Starting
Prioritizing safety is crucial when installing sealed beam headlights. Take the necessary precautions to protect yourself and your vehicle. Here are a few safety measures you should follow:
- Disconnect the negative terminal of the car battery to prevent any electrical accidents.
- Use gloves and safety glasses to protect your hands and eyes from any potential hazards.
- Ensure the car is parked on a flat and stable surface to prevent any accidents or injuries.
- Allow the headlights to cool down before starting the installation process to avoid burning yourself.
- If you are unsure about any step or encounter difficulties during the installation, it is always advisable to seek professional help.
By adhering to these safety precautions, you can ensure a secure and hassle-free installation process.
Removing The Existing Headlights
To install sealed beam headlights, start by removing any trim ring or bezel surrounding the headlights. This may require a screwdriver. Once removed, you can proceed with the installation process.
Removing The Trim Rings Or Bezels Surrounding The Headlights
Before you can begin the process of installing sealed beam headlights, you will need to remove any trim rings or bezels that surround the existing headlights. This step may require a Phillips-head screwdriver or a special tool, depending on the make and model of your vehicle. By carefully removing the trim rings or bezels, you will have better access to the headlight assembly.
Disconnecting The Wiring Harness From The Bulb
Once the trim rings or bezels have been removed, the next step is to disconnect the wiring harness from the bulb. This can usually be done by locating the connector attached to the back of the headlight bulb and gently pulling it apart. It is important to handle the wiring harness with care to avoid damage.
Unfastening Any Screws Or Bolts Holding The Headlight In Place
After disconnecting the wiring harness, you will need to locate and unfasten any screws or bolts that are holding the headlight in place. These screws or bolts are typically found on the sides or top of the headlight assembly. Using the appropriate tool, carefully loosen and remove these fasteners to free the headlight from its mounting position.
Taking Out The Old Sealed Beam Headlight
With the screws or bolts removed, you can now take out the old sealed beam headlight. Gently pull the headlight assembly out of its housing, ensuring that you do not damage any surrounding components. It is important to handle the old headlight with care to prevent any shattered glass or other debris from causing injury.
By following these steps in removing the existing headlights, you are now ready to proceed with the installation of sealed beam headlights. Remember to take your time and exercise caution to ensure a successful and safe headlight replacement process.
Installing The New Sealed Beam Headlights
Installing new sealed beam headlights is a straightforward process that begins with removing any surrounding trim rings or bezels. Once the trim is removed, the headlight assembly can be safely detached from the car and the bulb can be replaced.
Sealed beam headlights are appreciated for their durability, simplicity, and reliable performance.
Placing The New Sealed Beam Headlight Into Position
To begin installing your new sealed beam headlights, start by removing any trim rings, chrome, or plastic bezels that may be surrounding the headlights. This can typically be done using a Phillips-head screwdriver or a specialized tool. Once the trim has been removed, you can proceed with placing the new sealed beam headlight into position. Make sure to handle the headlight with care and avoid touching the bulb itself, as this can cause damage or decrease its lifespan.Fastening The Screws Or Bolts To Secure The Headlight In Place
After the new sealed beam headlight is properly positioned, the next step is to fasten the screws or bolts to secure it in place. Make sure to use the appropriate tools, such as a socket wrench or screwdriver, to tighten the screws or bolts securely. This will ensure that the headlight remains stable and doesn’t move or vibrate while driving. It’s important to follow the manufacturer’s instructions and specifications regarding the torque settings for the screws or bolts to avoid any potential damage.Connecting The Wiring Harness To The New Bulb
Once the headlight is securely fastened, the next step is to connect the wiring harness to the new bulb. Locate the wiring harness that came with the new sealed beam headlight and align it with the corresponding socket on the bulb. Ensure that the connections are secure and snugly fit together. Take care not to force or bend the wires during this process, as it can lead to poor electrical connectivity or even wire breakage. Properly connecting the wiring harness is crucial for the headlight to function correctly.Installing The Trim Ring Or Bezel Around The Headlights
The final step in installing sealed beam headlights is to install the trim ring or bezel around the headlights. This step is necessary to provide a finished, polished look and to protect the headlight assembly. Ensure that the trim ring or bezel is aligned properly and fits snugly around the headlight. Use the appropriate tools to fasten it securely, whether it be screws, clips, or other fastening mechanisms. Once installed, visually inspect the trim ring or bezel to ensure it’s evenly positioned and visually appealing. In conclusion, installing new sealed beam headlights involves placing the headlight into position, fastening the screws or bolts to secure it, connecting the wiring harness correctly, and installing the trim ring or bezel. Following these steps will lead to a successful installation, ensuring optimal performance and durability for your sealed beam headlights.Adjusting The Headlight Alignment
Installing sealed beam headlights involves removing the trim ring or bezel around the headlights, which may require a screwdriver. Various resources on YouTube provide detailed procedures for replacing and adjusting sealed beam headlights. Sealed beam headlights are favored for their durability, simplicity, and reliable performance.
Testing The Alignment Of The New Headlights
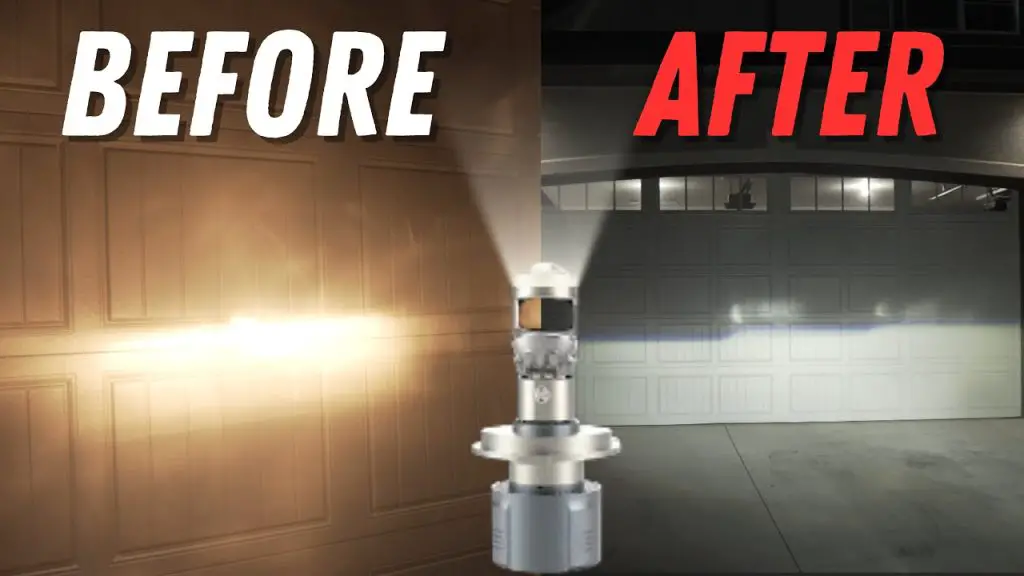
Before diving into adjusting the headlight alignment, it’s important to test the alignment of the new headlights to ensure they are properly installed. Here are the steps to follow:- Start by parking your vehicle on a flat surface facing a wall or garage door.
- Turn on the headlights and observe the beam projection on the wall.
- The beam should be centered and straight, without any tilting or misalignment.
- If you notice any irregularities in the beam projection, it’s an indication that adjustments are needed.
Making Adjustments For Proper Beam Projection
Once you have tested the alignment and identified the need for adjustments, you can proceed with making the necessary changes for proper beam projection. Follow these steps:- Locate the adjustment screws on the back of the headlight assembly.
- Using a Phillips-head screwdriver, rotate the screws clockwise or counterclockwise to adjust the height and angle of the headlight beam.
- Make small adjustments and test the beam projection on the wall after each adjustment.
- Continue making adjustments until the beam is centered, straight, and at the desired height.
- Once satisfied with the alignment, tighten the adjustment screws to secure the position of the headlights.
Ensuring Both Headlights Are Aligned Symmetrically
To achieve optimal visibility and safety, it’s crucial to ensure that both headlights are aligned symmetrically. Follow these steps to align both headlights:- Repeat the previous steps for adjusting the headlight alignment on the opposite headlight.
- Make sure both headlights have the same height, angle, and beam projection.
- Check the alignment of both headlights by observing the beam projection on the wall.
- If necessary, make further adjustments to achieve symmetrical alignment.
Testing And Finalizing The Installation
After successfully installing sealed beam headlights in your vehicle, it is crucial to thoroughly test and finalize the installation to ensure proper functionality and optimal performance. This step will help you identify any issues that need to be addressed before hitting the road.
Reconnecting The Car Battery
The first step in testing the sealed beam headlights is to reconnect the car battery. This involves reattaching the battery cables in the correct polarity. Take caution and ensure that the positive cable is connected to the positive terminal and the negative cable to the negative terminal.
Turning On The Headlights To Check Functionality
Once the battery is reconnected, it’s time to turn on the headlights and check their functionality. Start the vehicle’s engine, and using the vehicle’s controls, activate the headlights. Observe both the low and high beam settings to verify if the sealed beam headlights are functioning correctly. Ensure that they illuminate with the appropriate intensity and provide sufficient visibility.
Making Any Necessary Adjustments For Optimal Performance
If you notice any issues with the sealed beam headlights during the functionality check, it may be necessary to make some adjustments for optimal performance. This can include aligning the headlights to ensure they are properly aimed and adjusting the beam pattern to provide the best possible visibility.
Refer to your vehicle’s owner’s manual or consult a professional if you are unsure about the correct adjustments for your specific vehicle model. Making precise adjustments will not only enhance your safety but also avoid blinding other drivers on the road.
Securing All Connections And Reinstalling Any Removed Components
Once you have confirmed the functionality and made any necessary adjustments, it’s essential to secure all connections and reinstall any removed components. This ensures that the sealed beam headlights are securely attached and won’t come loose while driving.
Double-check all connections, including those of the headlight housing and wiring harness. Make sure they are properly fastened and tightened to prevent any possible electrical or mechanical issues down the road.
If you had to remove any trim rings, chrome bezels, or other parts during the installation process, now is the time to reinstall them. Follow the correct procedures and use any necessary tools to ensure a proper fit and finish.
By completing these final steps, you can have peace of mind knowing that your sealed beam headlights are installed correctly, functioning optimally, and ready to provide reliable illumination for your nighttime driving adventures.
Frequently Asked Questions On How To Install Sealed Beam Headlights
How Do You Aim Sealed-beam Headlights?
To aim sealed-beam headlights, remove any surrounding trim and carefully adjust the headlight’s height. Note that side-to-side adjustments may not be possible on newer aerodynamic headlight systems. Sealed beam headlights are preferred for their durability, simplicity, and reliable performance.
Can You Replace A Sealed-beam Headlight?
Yes, sealed-beam headlights can be replaced by removing any surrounding trim and unplugging the factory harness from the bulb. The bulb can be removed with a ¼ turn, and then the new headlight can be installed.
Can Sealed-beam Headlights Be Aligned?
Yes, sealed-beam headlights can be aligned. However, only the headlight height can be adjusted. Side-to-side adjustments are not possible on newer headlight systems with aerodynamic lights. Older round and square sealed-beam headlamps can be aligned.
What Are The Advantages Of Sealed-beam Headlights?
Sealed beam headlights have advantages such as durability and longevity. They are also simple to use and provide reliable performance.
Conclusion
To conclude, installing sealed beam headlights is a straightforward process that can be done with a few basic tools. The first step is to remove any trim rings or bezels around the headlights. Then, carefully remove the old headlight assembly and disconnect the factory harness.
Finally, install the new sealed beam headlight, securely attach the trim and bezel, and you’re good to go. Sealed beam headlights offer durability, simplicity, and reliable performance, making them a popular choice for many vehicle owners. So, why not give it a try and enhance your driving experience with these reliable headlights?