

If you are thinking about how to make a headlight wiring harness? you are on the right blog, here I am going to show you all the easiest ways to solve this task.
To make a headlight wiring harness, gather the correct gauge wires, connectors, relay, fuse, and tools. Carefully draft a wiring diagram to ensure proper connections and vehicle safety.
Automotive enthusiasts and DIY mechanics often find the need to replace or upgrade their vehicle’s headlight wiring harness. This process entails creating an electrical system that can handle the power demands of headlights without causing damage or posing a safety risk.
Whether you’re restoring a classic car or enhancing your current vehicle’s lighting system, a custom-built wiring harness offers reliability and tailored performance. Crafting a headlight wiring harness involves choosing the right materials, precise planning, and a working knowledge of automotive electrical systems.
With meticulous attention to detail, even beginners can undertake this project, leading to improved lighting efficiency and a deeper comprehension of their vehicle’s electrical workings. Ensure you follow all safety protocols to prevent any mishaps while working on your car’s electrical components.
Introduction To Headlight Wiring Harnesses
Headlight wiring harnesses play a important role in vehicle lighting systems. These harnesses provide the pathway for electrical power to travel from the vehicle’s battery to its headlights. Over time, original wiring can wear out or become damaged, leading to lighting issues.
Creating a customized headlight wiring harness provides a solution tailored to specific vehicle needs and preferences.
Comprehending The Role Of A Wiring Harness
The function of a wiring harness is to efficiently conduct electricity while protecting the wires from damage. In terms of headlights, the harness connects to the vehicle’s electrical system, relaying power and ensuring headlamp functionality.
A properly functioning harness means reliable lighting, critical for safe driving, especially in low-light conditions.
Benefits Of Building Your Wiring Harness
| Aspect | Description |
|---|---|
| Customization | Tailor harness to fit the vehicle’s specific setup. |
| Quality Control | Select high-grade materials for enhanced durability. |
| Cost-Efficiency | Potentially reduce expenses compared to pre-made harnesses. |
| Problem-Solving | Address and fix wiring issues specific to your vehicle. |
Tools And Materials Required
Building a headlight wiring harness needs precision and the right tools and materials. Without these, you may face issues down the line, like faulty connections or dim lights. Let’s ensure you’re set up for success by outlining the essentials for this project.
List Of Essential Tools
To get started, gather the following tools:
- Wire stripper: For removing insulation without damaging wires.
- Crimp tool: For securing terminals and connectors.
- Screwdrivers: A selection of flathead and Phillips might be required.
- Multimeter: To test connections and ensure proper flow of current.
- Cable ties: For organizing and securing the harness.
- Soldering iron: For permanent connections, if preferred.
- Heat gun: For sealing heat shrink tubing.
All these tools will make your work efficient and safe.
Choosing The Right Materials And Components
Selecting high-quality materials is improtant. Here’s what you need:
- Electrical wires: Choose the correct gauge. Thicker wires can handle more current.
- Connectors and terminals: Pick these based on wire gauge and required connection type.
- Heat shrink tubing: Protects splices and improves appearance.
- Electrical tape: To insulate and secure wire ends.
- Wire loom: To bundle wires together and protect them from abrasion.
- Relays and fuses: For circuit protection and to control power flow.
With the right materials, your harness will be durable and reliable.

Planning Your Headlight Wiring Harness
Upgrading or repairing your vehicle’s headlights means dealing with wiring. A custom harness can improve illumination and increase durability. Let’s plan the perfect headlight wiring harness and shine a light on the necessary steps to ensure a successful project.
Assessing Your Vehicle’s Headlight Specifications
Before you start, know your vehicle’s needs. Headlight power, bulb type, and system voltage are key. You’ll need this information to select the right materials. Check your vehicle’s manual or use online tools to find out these specs.
- Bulb Size: Match your harness to the bulb size for a perfect fit.
- Wattage: Be aware of the power demand to choose the correct wire gauge.
- System Voltage: Usually 12V, but verify to prevent issues.
Creating A Wiring Diagram
A diagram maps your project. Use graph paper or diagram software to sketch. Include power sources, ground connections, switches, and relays. Accurate diagrams guide your work and help troubleshoot.
The diagram should show:
- Connection points for all components.
- Wire paths between various elements.
- Color coding for easy identification.
Get the right tools and connectors ready. Now, the real work begins!
Cutting And Preparing The Wires
Headlight wiring harness creation starts with the right preparation. Cutting and preparing the wires is foundational to ensuring a bright, reliable headlight connection. Let’s navigate through the steps needed to measure, cut, and prep the wiring effectively.
Measuring And Cutting Wires To Length
Accurate measurements are critical. Begin with determining the needed lengths for your headlight wiring harness. Each wire will connect various points, like the battery, switch, relay, and headlights. Use a tape measure for precisions and mark the correct lengths on your wires with a marker.
- Select the appropriate gauge of wire depending on your vehicle’s specifications.
- Leave extra slack for flexibility and adjustments.
- Once measured, cut the wires using a wire cutter ensuring a clean cut.
Stripping And Tinning The Ends
Stripping and tinning wire ends ensure strong, conductive connections. Start by stripping the insulation off the wire, about 1/4 inch from the end.
- Use a wire stripper to remove the insulation without damaging the wire.
- Twist the exposed strands tightly, making them easier to tin.
- Heat the exposed wire with a soldering iron and apply solder until the wire absorbs it, known as tinning.
Well-tinned wires prevent fraying and ensure easy insertion into connectors. These steps are critical for a durable wiring harness that can withstand the rigors of the road.

Connecting The Wires
Wiring a headlight requires precision and care. Proper connections are vital for reliable performance. Discover the optimal methods in this guide.
Soldering Vs. Crimping: Pros And Cons
Choosing between soldering and crimping can define your harness’s success. Each method has its benefits and drawbacks.
| Soldering | Pros | Cons |
|---|---|---|
| Durable Connections | Lasts longer | Requires skill |
| Minimal Resistance | Ensures full brightness | Time-consuming |
| Crimping | Pros | Cons |
|---|---|---|
| Fast Application | Quick to connect | Can loosen over time |
| No Heat Damage | Safer for wires | May have higher resistance |
Securing Connections With Heat Shrink Tubing
Secure wiring is fundamental for safety and function. Heat shrink tubing provides that extra security layer. See the steps below:
- Slide tubing onto the wire before joining.
- Make the wire connection through soldering or crimping.
- Position the tubing over the connection.
- Apply heat evenly until the tubing contracts firmly.
Heat shrink tubing wraps the connection, preventing corrosion and short circuits.
Well-connected headlights will enlighten your journey. Follow these steps for a bright and safe road ahead.
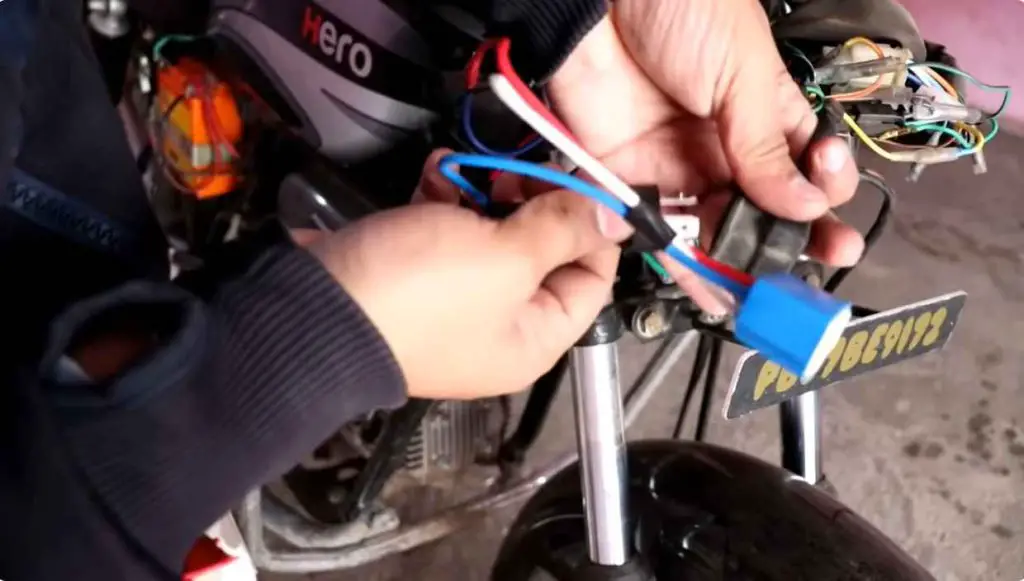
Installing The Connectors
Creating a headlight wiring harness means making secure connections. Properly installed connectors ensure your headlights work reliably. This section covers how to pick and fix connectors to your harness.
Choosing Compatible Connectors
Selecting the right connectors is essential. They must fit your vehicle’s headlight bulbs. Be sure to check:
- Connector type
- Voltage rating
- Current capacity
Use a compatibility chart to match connectors to your vehicle’s make and model.
Techniques For Reliable Connection
After choosing connectors, follow these steps for a secure fit:
- Strip the wires: Remove 1/4 inch of insulation from wire ends.
- Insert the wires: Push stripped wires into the connector terminals.
- Crimp or solder: Use a crimping tool or solder iron for a sturdy connection.
- Test continuity: Use a multimeter to ensure the connection is solid.
Heat shrink tubing can provide extra protection. Slide it over the connection before heating.

Grounding The Harness
Grounding the Harness is a important step in making a headlight wiring harness. It ensures that electrical circuits have a safe path to dissipate energy. Proper grounding helps prevent short circuits and electrical shocks, keeping your vehicle’s electrical system running smoothly. Let’s explore how to establish a reliable ground connection for your harness.
Identifying Ground Points
To start grounding your headlight wiring harness, you must find suitable ground points. These are typically metal surfaces connected to the vehicle’s frame. Use the following checklist to identify them:
- Check the vehicle manual for recommended grounding points.
- Inspect the frame for clean, unpainted metal surfaces.
- Ensure accessibility of the point for the wiring harness.
- Look for existing ground straps that can be shared.
Ensuring A Solid Ground Connection
Once you have identified the ground points, establish a solid connection. Follow these steps for a trouble-free grounding:
- Use a wire brush to clean the grounding point.
- Secure the ground wire with a bolt and star washer.
- Apply dielectric grease to prevent corrosion.
- Test the connection with a multimeter.
Remember, a poor ground connection can lead to dim headlights or other electrical issues. Invest time in creating a reliable ground to keep your lights shining bright.
Routing And Securing The Harness In The Vehicle
Creating a custom headlight wiring harness increases reliability and efficiency. Proper routing and securing are important for safety and function. This guide simplifies the process.
Principles Of Proper Wire Routing
Wire routing involves planning the path your harness will take through the vehicle.
- Avoid hot surfaces like exhaust components to prevent melting.
- Steer clear of moving parts such as belts or fans to avoid abrasion.
- Follow factory wiring paths when possible for best fit and protection.
- Consider servicing by allowing slack for easy harness removal and installation.
- Use grommets when passing through metal to protect against cuts and shorts.
Using Cable Ties And Conduit For Protection
Cable ties and conduits are essential in securing your wiring harness.
| Material | Use |
|---|---|
| Cable Ties | Bundle wires together and attach to the vehicle body. |
| Conduit | Protect wires from heat, moisture, and wear. |
- Choose the right size conduit to fit all wires comfortably.
- Use cable ties every few inches to ensure the harness stays put.
- Cut ties’ ends flush to prevent sharp edges.
Following these steps will ensure your headlight wiring harness is tidy, protected, and reliable.
Testing The Headlight Wiring Harness
Before hitting the road at night, make sure your headlights shine bright. A vital step in making a headlight wiring harness is testing it. Safety and functionality depend on this. Get ready to check those wires and lights!
Conducting A Continuity Test
A continuity test ensures your harness has no breaks. Grab a multimeter, one with a continuity setting. Follow these steps:
- Turn off all power sources to prevent accidents.
- Set your multimeter to the continuity symbol (usually an arrow at a dot).
- Attach one probe to one end of the wire, and the second probe to the opposite end.
- If you hear a beep, your wire is good! No beep means you’ve got a problem to fix.
Headlight Functionality Check
Now, let’s see those headlights work! Steps to check functionality:
- Connect the harness to your car battery and headlights.
- Switch on the car or battery power.
- Observe if both headlights light up evenly.
If both lights are on, you’ve got a successful harness. If they’re not, double-check all connections and components. Remember, a correctly working harness means safer night drives.
Troubleshooting Common Issues
Making a headlight wiring harness can seem tricky, but knowing how to fix common issues helps. Users face some issues like dim lights or bad connections. Here we’ll tackle the most common problems to keep your headlights shining bright. Remember to always disconnect the battery before starting any electrical work for safety.
Addressing Dim Or Flickering Headlights
Dim or flickering headlights can be a nuisance. This problem often signals an issue with your wiring harness. Check the wiring for any signs of wear or damage. Wires should not be frayed or exposed. Use electrical tape to cover minor damage.
If the issue persists, consider replacing the wires. Ensure the headlight bulbs are the correct wattage. Use a multimeter to verify power is reaching the headlights consistently. If readings fluctuate, the harness may have a short. Fixing this issue involves locating the short and re-wiring the faulty section.
Solving Connector And Grounding Problems
A poor connection can cause headlights to malfunction. Begin by examining all connectors along the headlight wiring harness. Clean connectors contact cleaner to ensure a solid connection.
Tighten any loose connectors and replace any that are damaged. Grounding issues often cause headlights to perform poorly. Most vehicles ground the headlights on the vehicle’s frame. Look for the grounding wire and check its contact point.
It must have a clean, metal-to-metal connection. Sand down the area if it’s rusted or dirty. A secure ground ensures optimal headlight functionality. If you’ve taken these steps and problems persist, replacing the entire harness may be the best solution.
Maintenance And Upkeep Of The Harness
Keeping a headlight wiring harness in prime condition ensures safety and reliability. Proper maintenance minimizes risks of shorts and failures. It’s essential to follow a disciplined approach to care for your harness. A well-maintained harness will serve you well in the long run.
Regular Inspection Schedule
Set regular intervals for inspecting your headlight wiring harness. This practice helps spot potential issues early. Use the following checklist for inspections:
- Check for exposed wires: Insulation must cover all wiring.
- Look for corrosion: Corrosion can cause poor connections.
- Ensure connectors are tight: Loose connections may lead to shorts.
- Test light functionality: Headlights should operate without flickering.
Mark your calendar to inspect the harness every six months. A thorough inspection before long trips is advisable.
Dealing With Wear And Tear
Over time, wear and tear on your wiring harness is inevitable. Here’s how to manage it:
- Identify signs of wear: Look for fraying or brittle wires.
- Use electrical tape: Repair minor issues with quality tape.
- Apply dielectric grease: This grease prevents moisture buildup.
- Consider a replacement: If damage is significant, replace the harness.
By addressing wear and tear promptly, you extend the lifespan of your harness. Always opt for quality replacement parts that match your vehicle’s specifications.

Advanced Tips And Modifications
Readers who have tackled basic installations can enhance their vehicle’s lighting. Upgrading wiring harnesses increases brightness and safety. Learn how with these advanced tips.
Upgrading To High-performance Bulbs
High-performance bulbs transform night driving. Brighter light improves visibility. Follow these steps to upgrade:
- Choose compatible bulbs. Ensure they fit your car model.
- Upgrade wiring to handle increased power needs.
- Test bulbs for consistent illumination.
Adding Relay Systems And Security Features
Relays and security features add protection. They prevent overloading and theft. Adopt these enhancements:
- Install relays near the battery to reduce voltage drops.
- Choose relays with fuses for safety.
- Use security screws to deter theft.
Frequently Asked Questions For How To Make A Headlight Wiring Harness
Can You Rewire the Headlights?
Yes, you can rewire headlights, though it typically requires some electrical knowledge. It’s important to follow the vehicle’s wiring diagram and use the correct tools to ensure safety and functionality.
What Gauge Wire Should You Use For Headlights?
For headlights, use 14 to 16-gauge wire to ensure proper conductivity and safety. Check your vehicle’s manual for specific requirements.
What Does A Headlight Wire Harness Do?
A headlight wire harness provides power and connects the vehicle’s electrical system to its headlights for proper functioning.
Do LED Headlights Need A Relay Harness?
LED headlights may require a relay harness to ensure proper function and protect the vehicle’s electrical system from potential damage caused by increased power demands.
Conclusion
Crafting your own headlight wiring harness is a satisfying project. It enhances vehicle light performance and ensures safety. Embrace the challenge, follow the steps, and take control of your car’s electrical system. Remember to always prioritize precision and caution for the best results.
Start now for a brighter, safer drive.


