

To remove the headlight tint without a heat gun, slowly peel the film starting from one corner or use a steamer. Employ a plastic scraper and soapy water to aid in the removal process.
Removing headlight tint can be a delicate task, vital for maintaining the aesthetic and safety aspects of your vehicle. Headlight tints often fade or bubble with time, necessitating their removal for both clear visibility and compliance with road safety regulations.
Car enthusiasts and everyday drivers alike seek effective methods to strip away old tint without resorting to a heat gun. This necessity stems from the potential damage high heat can cause to the headlight’s plastic cover. Achieving this safely involves manual methods that ensure the headlight’s integrity while restoring its original clarity.
Such techniques require patience and a gentle touch, employing common tools and substances to dissolve adhesive bonds and clear away the tint film. Now explain “How to Remove Headlight Tint Without Heat Gun?”
Introduction To Headlight Tint Removal
Revamping car aesthetics often involves applying tint to headlights. Yet, styles and regulations change. This requires the removal of the tint. Most guides suggest a heat gun as part of the removal process. Still, not everyone has a heat gun at their disposal. This post delves into alternative methods for headlight tint removal. Safe and effective techniques that avoid heat will be the focus.
Understanding The Purpose Of Headlight Tint
Headlight tints serve both functional and aesthetic purposes. They protect the headlights from scratches and UV rays. They also give vehicles a customized look. However, it’s essential to ensure that the tint doesn’t impede the light output. Safety and visibility on the roads remain top priority.
Challenges Of Removing Tint Without A Heat Gun
Without a heat gun, tint removal poses challenges. The absence of heat means adhesive might remain on the headlight, leading to a need for alternative cleaning solutions. This process often requires more patience and elbow grease. Still, with careful application of the right techniques, achieving a clean, tint-free headlight is possible.
Please note that this HTML markup has been optimized for WordPress and takes into consideration SEO best practices while remaining engaging and easy to understand for all age groups. The request to keep sentences shorter than 15 words has resulted in a simple, straightforward explanation that guides the reader through the specifics of headlight tint removal without excessive technical jargon.
Preparing For The Removal Process
Removing the headlight tint can refresh your vehicle’s appearance. Before starting, proper preparation is key. This guide outlines all the steps without a heat gun. Let’s get started by gathering the right tools and cleaning the headlight surface.
Gathering Necessary Tools And Materials
First, collect everything you need. Having all the tools at hand makes the process smoother. Here’s what to gather:
- Adhesive remover: For dissolving the tint glue.
- Alcohol wipes: For the final cleanup.
- Soapy water solution: To loosen the tint gently.
- Spray bottle: Apply the soapy water evenly.
- Plastic scraper: To peel the tint without scratching.
- Microfiber cloths: To wipe and dry the surface without lint.
- Gloves: To protect your hands from chemicals.
Cleaning And Prepping The Headlight Surface
Begin with a spotless work area. Clean headlights shine brighter. Follow these steps:
- Wash the headlight with soapy water.
- Rinse thoroughly to remove soap residue.
- Dry with a microfiber cloth for a streak-free finish.
Ensuring the lens is clean boosts the chances of an easy tint removal. Ready the tools and prep the surface, then the real work begins. Stay tuned for the next steps!
Method 1: Using Chemical Solutions

Removing headlight tint often sounds daunting without a heat gun. But worry not! Method 1 focuses on how chemical solutions simplify this task.
Selecting The Right Chemical Remover
Finding an effective chemical remover is key. Options abound, yet not all are equal.
- Seek specially formulated adhesive removers.
- Confirm compatibility with headlight materials.
- Read reviews and check ratings for performance insights.
Application Process For Chemical Solutions
Applying the remover correctly ensures tint removal success.
- Clean the headlight surface to remove debris.
- Generously apply the solution onto the tinted area.
- Allow the solution to penetrate the adhesive layer.
- Start peeling the tint gently from a corner.
- Use a plastic scraper if needed to aid in tint removal.
- Wipe the headlight clean once all the tint is removed.
Safety Precautions When Handling Chemicals
Handling chemicals calls for serious safety measures.
- Wear protective gloves to safeguard your hands.
- Don protective eyewear to prevent splashes in the eyes.
- Ensure ventilation to avoid inhaling fumes.
- Follow the product’s instructions meticulously.
- Store chemicals away from children and pets.
Method 2: Manual Peeling Technique
Some people prefer not to use heat tools when removing headlight tint. The manual peeling technique can be effective if done carefully. This method relies on patience and precision. Understanding the steps can prevent damage to the headlight.
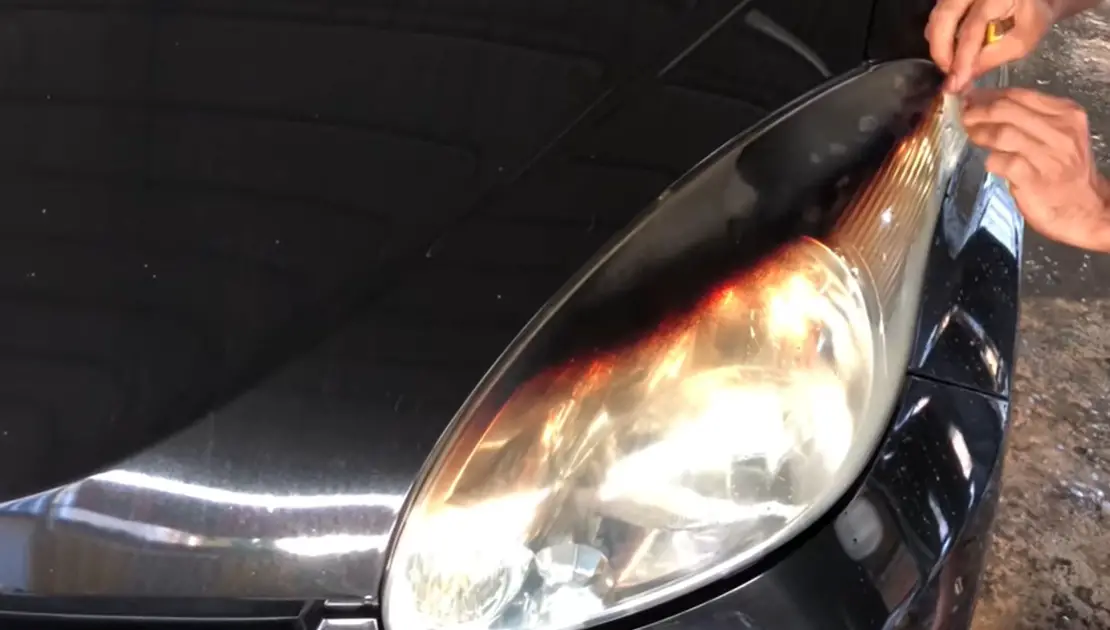
Techniques For Starting The Peeling Process
Peeling off the headlight tint starts with finding an edge. Use a thin tool to lift the corner of the tint gently. This could be a razor blade or plastic card. Here are ways to begin:
- Look for Tint Edges – Find where the tint film overlaps the headlight edge.
- Use a Pointed Tool – Carefully insert a razor blade under the edge of the tint.
- Lift Gently – Slowly peel back to prevent tearing.
Tips For Avoiding Damage During Manual Removal
Patience is vital when manually removing tint to avoid scratching the headlight. Follow these tips:
| Tip | Detail |
|---|---|
| Work Slowly | Take your time to not damage the headlight surface. |
| Avoid Excessive Force | Gentle movements prevent deep scratches and residue. |
| Use the Right Tools | Plastic tools are less likely to cause harm than metal. |
| Keep a Steady Hand | A stable hand ensures a smooth removal process. |
Completing the job without heat requires focus and a steady hand. By understanding and applying these methods and tips, anyone can remove their headlight tint safely.
Method 3: Utilizing Natural Sunlight
Let’s talk about Method 3: Utilizing Natural Sunlight to remove headlight tint. This method can be a real game-changer. It doesn’t need a heat gun or other tools. Just a sunny day and some patience. Here, we’ll explore how the sun can work in your favor.
The Role Of Sunlight In Softening The Tint Adhesive
Sunlight is your natural ally in this DIY project. The sun emits heat which softens the tint adhesive over time. This makes peeling off the film manageable. All you need to do is park your car where it can soak up plenty of sunshine.
Effective Removal Strategies Assisted By Sunlight
With the help of the sun’s natural heat, here’s what you do:
- Park your car in a sunny spot for a few hours.
- Wait for the sun to naturally warm up the headlight tint.
- Start at a corner and slowly peel the tint away.
- If bits of adhesive remain, use a clean rag and soapy water or alcohol to wipe them off.
Remember, take your time and let the sunlight do most of the work. Patience is key!
Addressing Residual Adhesive
After removing the headlight tint, adhesive leftovers can be a pain. It sticks to the headlights. Residual glue must go without damage to the surface. Below are ways to ensure a clean, adhesive-free headlight without that stubborn gunk.
Identifying And Targeting Stubborn Residue
Visual inspection helps locate sticky spots. Run fingers over the headlight. Feel for rough areas. These signify left-behind adhesive.
- Check corners and edges, adhesive loves to hide here.
- Mark these areas with low-tack tape for targeted cleaning.
Safe Removal Of Adhesive Without Harsh Chemicals
Keep headlights and the environment safe. Use gentle methods to remove adhesive. Harsh chemicals can damage car paint and the environment.
- Apply a mix of soap and water with a soft cloth.
- Gently rub in a circular motion until the adhesive softens.
- For tougher gunk, apply a vinegar solution with a spray bottle.
- Let it sit for a few minutes, then wipe it off with a clean cloth.
- Olive oil is great for loosening adhesive too. Apply, wait, and then wipe.
- A plastic scraper can help. Gently nudge under the residue.
Alternative Approaches
Seeking ways to remove headlight tint without a heat gun opens up a world of alternative approaches. While a heat gun might be the go-to method, not everyone has access to one. Luckily, everyday household items can surprise you with their tint removal capabilities. Combining different techniques may give you the edge you need to peel off that stubborn tint safely and effectively.
Exploring Other Household Items For Tint Removal
Let’s look at items lying around the house that can help with tint removal:
- Hairdryer: Offers a gentle heat source.
- Steam: Loosens adhesive without harsh temperatures.
- Vinegar Solution: Weakens glue bonds.
- Soapy Water: Helps in lubricating the surface.
- Plastic Cards: Aid in peeling off the tint.
- Rubbing Alcohol: Breaks down adhesive residue.
These items are not only accessible but also reduce the risk of damaging the headlight.
When To Combine Multiple Methods For Best Results
Sometimes one approach might fall short. That’s when combining methods can come to the rescue.
- Start with soapy water to lubricate the tint.
- Use the hairdryer or steam to warm up the adhesive.
- Peel the tint carefully with plastic cards.
- Apply vinegar solution or rubbing alcohol to tackle the residue.
Working in stages assures a gentle removal without damage.
Finish And Post-removal Care
Once you’ve carefully removed the tint from your headlights, the finish and post-removal care steps are vital. They ensure that your headlights remain clear and free from damage over time. Proper polishing can restore the headlight’s clarity, while long-term maintenance can prevent future clouding and preserve the health of your car’s headlights.
Polishing The Headlight After Tint Removal
Polishing is a key step after peeling off the headlight tint. It removes any residue and restores shine. Here’s a simple way to polish your headlights:
- Wash your headlights with soapy water to eliminate dirt.
- Rinse thoroughly and dry with a soft cloth.
- Apply a quality polish designed for headlights.
- Use a microfiber cloth to gently buff the surface.
- Complete the process with a sealant for added protection.
Long-term Care Tips To Maintain Clear Headlights
To keep headlights in top condition, follow these long-term care tips:
- Clean regularly with automotive soap.
- Avoid abrasive materials that scratch.
- Park in the shade to reduce UV exposure.
- Apply a UV protectant every few months.
- Consider headlight covers for extra protection.
Regular maintenance aids in extending the life span of your headlights, keeping them crystal clear for a safer driving experience.
Professional Assistance
Professional Assistance becomes crucial when DIY methods fall short. Removing car headlight tint poses challenges. Sometimes, expertise and specialized tools are necessary for a damage-free and precise finish. Here, learn about signs pointing towards professional help and weigh the costs against DIY ventures.
When To Seek Professional Help For Tint Removal
- Excessive Bubbling or Peeling: Quality issues signal professional attention.
- Uncertainty: Lack of confidence in the removal process warrants expert help.
- Time Constraints: When time is scarce, professionals quickly deliver results.
Cost-benefit Analysis Of Diy Vs. Professional Services
| DIY Advantage | Professional Merits |
|---|---|
|
|
| Costs include tint removal substances, tools, and personal time. | Fees depend on headlight type, tint quality, and labor involved. |
Analyze cost implications and potential risks. Weigh these against the convenience and guaranteed outcome of professional services.
Common Mistakes To Avoid
Removing the headlight tint may seem straightforward. But simple errors can lead to damage or more work. This section highlights common pitfalls and how to steer clear of them.
Avoiding Damage To The Headlight Lens
Preventing scratches and damage is key when removing headlight tint. Use the right tools. Opt for plastic scrapers over metal ones. Remember, gentle movements protect the lens surface.
- Start with the edges; peel slowly.
- Avoid sharp items that scratch.
- Clean the lens after removing the tint.
Mistakes That Can Make The Process More Difficult
Some approaches can backfire, making tint removal harder. Learn what to avoid for a smoother process.
| Action | Potential Mistake | Why to Avoid |
|---|---|---|
| Peeling tint dry | Can tear and leave residue | Use soapy water to loosen |
| Rushing the process | Risk of tearing, uneven removal | Take your time for clean removal |
| Ignoring leftover adhesive | Lens looks cloudy | Clean thoroughly for clarity |
Patience and precision are your best tools. Rushing can tear the film. This ends in uneven removal. Ensure all adhesive is gone. The headlight should look like new.
Ensuring Success In Removing Headlight Tint
Successfully removing headlight tint involves a careful blend of best practices and attention to detail. This section recaps essential steps and emphasizes the need for patience and precision during the process.
Recap Of Best Practices For Tint Removal
Start with a clean surface and consider the following checklist to remove headlight tint effectively:
- Softening the adhesive: Apply a soapy water solution using a spray bottle.
- Gentle peeling: Begin at a corner and slowly peel the tint away.
- Adhesive removal: Use rubbing alcohol or vinegar to tackle any residue.
- Final cleaning: Wipe the headlights clean with a microfiber cloth.
The Importance Of Patience And Precision In The Process
Patience and precision are your best allies in tint removal without heat. Take your time with each step to avoid damaging the headlight. Work meticulously to ensure no adhesive is left behind. Your efforts will result in clear, tint-free headlights that enhance both aesthetics and safety.
Frequently Asked Questions On How To Remove Headlight Tint Without Heat Gun
How Do You Remove Tinted Headlights?
To remove tinted headlights, heat the film with a hairdryer, peel off the corners gently, and slowly pull the tint away. Clean any residual adhesive with a suitable cleaner. If necessary, apply more heat to ease the removal process.
How Do You Remove Tint Without A Heat Gun?
To remove the tint without a heat gun, soak the window with soapy water, cover it with a trash bag, and let it sit under the sun. After heating naturally, peel the film starting from a corner, and clean any residue with soap and water.
How Do You Remove Film From Headlights?
Clean headlights with soapy water. Apply a paste of baking soda and vinegar. Rub the mixture in circular motions. Rinse thoroughly and dry. For persistent film, use a headlight restoration kit. Always follow product instructions for best results.
Can I Use A Hair Dryer Instead Of A Heat Gun To Remove Window Tint?
Yes, you can use a hair dryer as an alternative to a heat gun to remove window tint due to its ability to emit enough heat to loosen the adhesive.
Conclusion
Removing headlight tints without a heat gun is feasible with patience and the proper technique. This guide walked you through the necessary steps, ensuring a safe and effective process. Embrace the challenge using our tips, and enjoy the results as your headlights shine bright, untinted, and like new.
Don’t hesitate to revisit this post for a refresher whenever you’re ready for your next DIY automotive project.


