


Credit: Amazon.com
Introduction
Removing the headlight on your Audi Q5 might sound like a daunting task, especially if you’ve never attempted it before. However, with the right tools and instructions, it’s a task you can handle in your own garage. This guide will walk you through the entire process of Q5 headlight removal, ensuring that you can carry out the task safely and effectively. Proper headlight maintenance is crucial not only for your visibility on the road but also for the overall appearance of your vehicle.
Understanding the Q5 Headlight Assembly
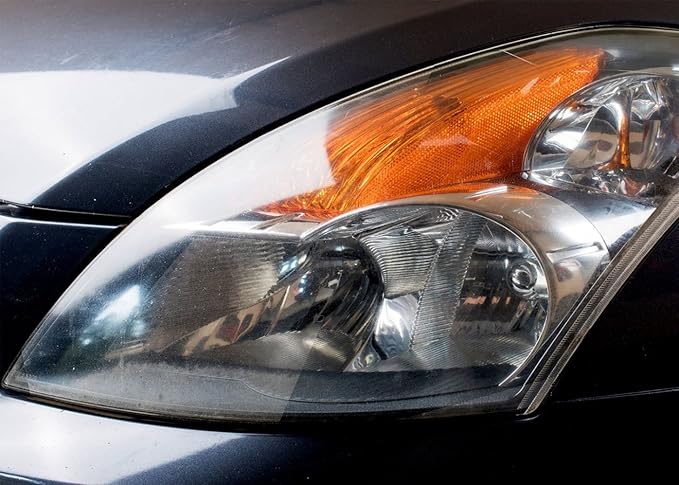
Before diving into the removal process, it’s essential to understand the Q5 headlight assembly. Audi Q5 models can come equipped with different types of headlights, including halogen, LED, or Xenon options. Each type has its unique setup and may require slightly different approaches when removing or replacing it.
The headlight assembly is a combination of various components, including the lens, bulb, housing, and sometimes a motorized adjuster. Understanding these parts will help you navigate the removal process more efficiently. Common reasons for headlight removal include bulb replacement, upgrading to a different type of headlight, or fixing an alignment issue.
Tools Needed for Q5 Headlight Removal
To remove the headlight from your Audi Q5, you’ll need a few essential tools:
- Flathead Screwdriver
- Phillips Screwdriver
- Ratchet with Socket Set
- Torx Screwdriver Set
- Trim Removal Tool (optional)
These tools will help you detach the necessary components without damaging them. Depending on your model year, you might also need a T30 Torx bit to remove specific bolts.
Safety Precautions Before Starting
Safety should always come first. Here are some precautions to take before you start:
- Disconnect the Battery: This is crucial to prevent any electrical issues or shocks while working on the headlight.
- Wear Protective Gear: Safety glasses and gloves can protect you from accidental scratches and debris.
- Work in a Well-Lit Area: Proper lighting is essential to see all the components clearly, ensuring you don’t miss any screws or clips.
Step-by-Step Guide to Q5 Headlight Removal

Credit: Amazon.com
Now, let’s get into the detailed process of removing the headlight from your Audi Q5.
Step 1: Open the Hood
Begin by locating the hood release latch, usually found under the dashboard on the driver’s side. Pull the latch to pop the hood, and then secure it open with the hood prop rod.
Step 2: Remove the Front Bumper
To access the headlight assembly, you’ll need to remove the front bumper. Start by removing the screws and clips that hold the bumper in place. This might involve unscrewing parts from the wheel wells and underneath the bumper. Be careful when pulling the bumper off to avoid breaking any clips or damaging the paint.
Step 3: Access the Headlight Assembly
With the bumper removed, you can now see the headlight assembly. Locate the mounting bolts that secure the headlight to the vehicle’s frame.
Step 4: Disconnect the Electrical Connectors
Before removing the headlight, disconnect the electrical connectors attached to it. These connectors power the bulbs and other components, so handle them with care to avoid damaging the wiring.
Step 5: Remove the Headlight Mounting Bolts
Using a ratchet and the appropriate socket, remove the bolts holding the headlight in place. Some Q5 models may have additional screws or fasteners, so ensure you’ve removed them all before attempting to pull out the headlight.
Step 6: Carefully Extract the Headlight Assembly
Once the bolts are removed, gently pull the headlight assembly out of its housing. If it feels stuck, double-check for any missed screws or clips. Do not use excessive force, as this could damage the headlight or surrounding components.
Step 7: Inspect and Replace the Headlight (If Necessary)
With the headlight removed, take a moment to inspect it for any damages or defects. If you’re replacing the headlight, now is the time to swap in the new one.
Step 8: Reinstall the Headlight Assembly
To reinstall, reverse the steps you took during removal. Carefully place the headlight back into the housing, secure it with the bolts, reconnect the electrical connectors, and reattach the bumper.
Common Mistakes to Avoid During Headlight Removal
Credit: Amazon.com
When removing a Q5 headlight, it’s easy to make mistakes if you’re not careful. Here are some common pitfalls to avoid:
- Not Disconnecting the Battery: Always disconnect the battery to avoid electrical hazards.
- Forcefully Removing Parts: If something doesn’t come off easily, check for additional screws or clips rather than using force.
- Forgetting to Reconnect Electrical Components: Before closing everything up, make sure all electrical connections are secure to avoid malfunctioning headlights.
Tips for First-Time DIYers
If this is your first time removing a headlight, keep these tips in mind:
- Patience is Key: Rushing through the process can lead to mistakes.
- Labeling Parts and Screws: Keep track of where each screw and part goes to make reassembly easier.
- Consulting the Vehicle’s Manual: Your vehicle’s manual can provide specific instructions that are crucial for your Q5 model year.
When to Seek Professional Help
While removing a headlight might be manageable, certain situations call for professional help:
- Complex Issues Beyond DIY: If the issue involves more than just replacing a bulb or headlight, consider visiting a professional.
- Warranty Considerations: If your vehicle is under warranty, check whether removing the headlight yourself might void it.
- Risks of Incorrect Installation: Improperly installed headlights can lead to poor visibility or damage, so don’t hesitate to seek help if you’re unsure.
Post-Removal Checklist
After reinstalling the headlight, run through this checklist to ensure everything is in order:
- Testing the New Headlight Functionality: Turn on the headlights to make sure they work correctly.
- Ensuring All Components Are Secure: Double-check that all screws, bolts, and clips are tightened and secure.
- Double-Checking the Electrical Connections: Ensure that all wires are properly connected and there are no loose connections.
Maintaining Your Q5 Headlights After Replacement

Credit: Amazon.com
Once you’ve successfully removed and reinstalled your headlights, it’s essential to maintain them properly:
- Regular Cleaning and Inspection: Keep your headlights clean to maintain brightness and visibility.
Adjusting Headlight Alignment: Misaligned headlights can affect your driving visibility, so adjust them if necessary.


