

To test headlight wiring with a multimeter, set it to the voltage reading and check for power at the headlight socket. Ensure the vehicle’s ignition and headlight switch are on during testing.
A properly functioning headlight system is crucial for safe driving conditions, especially during night-time or unfavorable weather. Understanding how to troubleshoot your car’s headlight wiring can save you time and money, and using a multimeter is a simple yet effective way to do it.
If you want to know how to Test Headlight Wiring With a Multimeter? Then you are on the right blog, This tool helps diagnose electrical issues, letting you know whether the problem lies within the wiring or if the issue is elsewhere. Car owners and enthusiasts keen on maintaining vehicle safety and performance should become familiar with the multimeter.
This versatile instrument quickly becomes an indispensable part of your automotive tool kit, streamlining the diagnostic process for headlight issues among other electrical complications. With headlight failures posing significant risks, acquiring the know-how to use a multimeter is a sensible step for any diligent vehicle operator.
Introduction To Troubleshooting Car Headlights
Navigating the dark roads without working headlights is like sailing a ship with no compass. Headlights are your vehicle’s eyes, providing the visibility needed for safe driving. When they flicker out or fail to turn on, understanding how to diagnose the issue is essential. This guide will teach you how to test headlight wiring swiftly and safely using a multimeter, ensuring you’re never left in the dark.
The Importance Of Functioning Headlights
Properly working headlights are critical to road safety. They allow you to see the road ahead and alert other drivers of your presence. Dim or non-operational headlights can lead to dangerous driving conditions or even accidents. Regular testing and maintenance can significantly reduce these risks.
Understanding The Headlight Wiring System
A car’s headlight system may seem complex, but it’s fairly straightforward. It consists of a few key components: the bulbs, wires, fuses, and switches. Electrical current flows from the battery, through the fuse box, and to the headlights when activated. Understanding this flow is essential for pinpointing where issues might occur.
- Battery: The power source for your headlights
- Wires: Conduct electricity to the headlights
- Fuses: Protect the wiring by breaking the circuit if it gets overloaded
- Switches: Allow the driver to control the headlights
Safety Measures When Working With Electrical Components
Before diving into electrical work, safety first. Here’s how to stay safe:
- Turn off the vehicle and remove the key from the ignition.
- Wear insulated gloves and safety glasses.
- Ensure the environment is dry and well-lit.
- Disconnect the car’s battery, beginning with the negative terminal.
With these safety measures in place, you’re ready to proceed with testing and repairing your headlights using a multimeter.
Essentials Of A Multimeter
Essentials of a Multimeter: When tackling the task of testing your vehicle’s headlight wiring, a multimeter is your best ally. This versatile tool measures voltage, continuity, and resistance. It helps diagnose electrical issues with precision. Understanding how to properly use a multimeter is crucial for any DIY auto electrical work.
Anatomy Of A Multimeter: Understanding The Dials And Leads
A multimeter consists of a display, selection knob, ports, and two leads. The display shows measurement results. The selection knob allows the user to set the type of measurement. Multimeters have various ports to insert the red (positive) and black (negative) leads. Proper placement of these leads is key for accurate readings.
Setting Up The Multimeter For Testing Headlight Wiring
First, ensure that your multimeter is in good working condition. Then select the correct setting for your test. If checking for voltage, set your multimeter to the appropriate voltage range. For headlight wiring, you’ll often use the DC voltage setting. Insert the leads into the correct ports — commonly, black into COM and red into the VΩmA port.
Types Of Measurements: Voltage, Continuity, And Resistance
- Voltage: This tests the electrical potential difference between two points in an electric circuit. It’s critical for ensuring your headlights have the power they need.
- Continuity: This function checks if there is a complete path for the current to flow. A continuous circuit will emit a beep from the multimeter.
- Resistance: This measures how much a component resists the flow of current. High resistance can indicate damaged wires or components.

Preparing For The Test
Welcome to the “Preparing for the Test” section of our tutorial on how to test headlight wiring with a multimeter. Before diving into the multimeter usage, it’s crucial to do some groundwork. Proper preparation will ensure a safe and accurate test of your vehicle’s headlight wiring. Follow these steps carefully to prep your car and multimeter for the diagnostic task ahead.
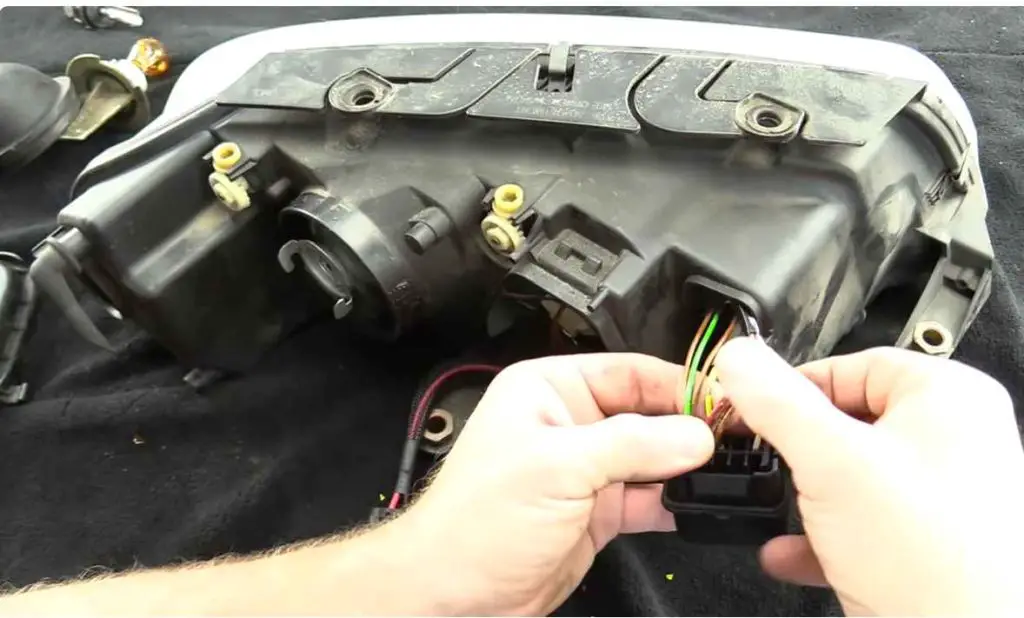
Locating The Headlight Wiring
Identifying your car’s headlight wiring is your first step. Open the car’s hood. Find the headlight assembly. Look for the wires leading to the back of the headlights. They’re usually encased in a protective rubber boot. Use your car manual if needed. It’ll show the wiring diagram for your specific vehicle model.
Accessing The Headlight Connector
- Turn off your car.
- Remove the key from the ignition.
- Use gloves to protect your hands.
- Locate the connector at the base of the headlight.
- Gently disconnect the connector.
This exposes the pins for testing. Handle the connectors with care to avoid damage. Make sure the area is dry to prevent electric shocks.
Setting The Vehicle Up For A Wiring Test
For a successful test, setting up the vehicle correctly is vital. Ensure the car is on a stable surface. Engage the parking brake. Keep your multimeter handy. Set your multimeter to the Ohm setting, symbolized as “Ω”. Make sure the car’s battery is fully charged. This guarantees the most accurate readings when you start testing the headlight wiring. These setups help prevent accidental shorts or electrical issues.
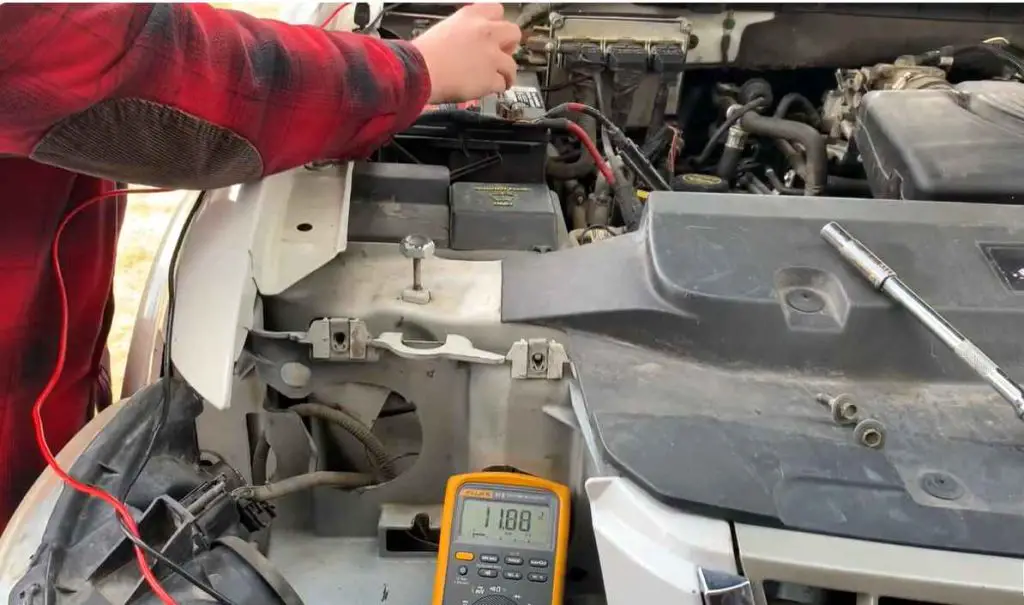
Conducting A Voltage Test
Testing headlight wiring requires a methodical approach using a multimeter. Begin by setting your multimeter to the voltage range suitable for your vehicle’s headlight circuitry, then probe the wiring to diagnose issues effectively.
To ensure your car’s headlights work correctly, a voltage test is essential. Tools needed are a multimeter and the car manual. Wait until the temperature is safe to touch them, usually a few minutes after turning off your car. Now, let’s discover the right voltage for your headlights and measure it accurately.
Determining The Correct Voltage For Your Car’s Headlights
Your car manual lists the needed voltage. Headlight voltage typically ranges from 12 to 14 volts. Multimeters manage up to 20 volts for cars. Make sure to select a DC setting on your multimeter.
Step-by-step Procedure For Measuring Voltage
- Open the hood of the car.
- Locate the headlight wiring.
- Identify the positive and negative wires.
- Set your multimeter to the proper DC voltage.
- Connect the red lead to the positive wire.
- Attach the black lead to the negative wire.
- Check the multimeter reading.
- Ensure the car’s battery is fully charged.
- Repeat for the other headlight if needed.
Interpreting The Voltage Test Results
| Voltage | Status |
|---|---|
| 12-14 Volts | Headlights are receiving power correctly. |
| Below 12 Volts | Possible issue with the battery or wiring. |
| Above 14 Volts | Risk of damaging the headlights. |
Below 12 volts may signal a wiring issue. Above 14 volts can harm the bulbs. Your headlights should function properly within the 12 to 14-volt range.
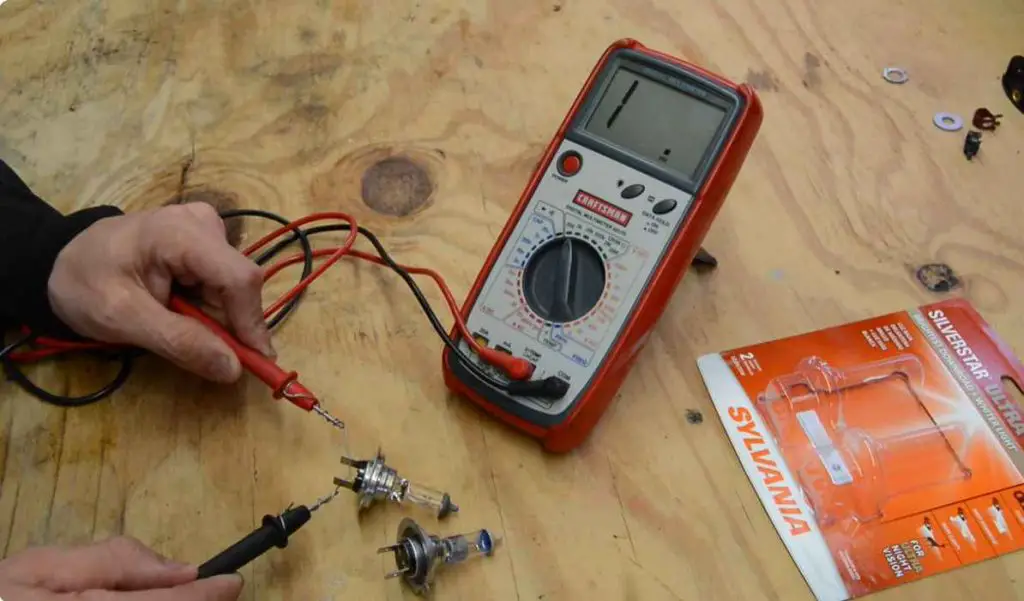
Testing For Continuity
Discovering a problem with your vehicle’s headlights can be a puzzling affair. Testing for continuity in headlight wiring is a crucial step in troubleshooting. It helps you ensure the electrical path is complete where it should be. Let’s dive into the process of using a multimeter to test your headlight wiring.
Understanding What Continuity Means In Electrical Circuits
You might wonder what continuity means. It refers to a continuous electrical path, with no breaks. If a circuit has continuity, electricity can flow through it unimpeded. Knowing this helps us find breaks in wiring or connectors.
How To Test For Continuity In Headlight Wiring
Ready to use your multimeter? Here’s what to do:
- Turn off your car and headlights.
- Set your multimeter to the continuity setting (symbolized by a sound icon).
- Disconnect the headlight connector.
- Attach the multimeter’s probes to each end of a wire. You are checking for a complete path.
- Listen for a beep. No sound means no continuity.
Diagnosing Issues Based On Continuity Test Outcomes
A continuity test can reveal various issues. Here are the outcomes to look for:
| Test Outcome | What It Means |
|---|---|
| Beep Sound | The circuit is complete. Look elsewhere for the issue. |
| No Beep | There’s a break in the circuit. Check for damaged wires or bad connections. |
If you hear no beep, inspect the wiring for visible damage. Use your multimeter to test individual sections of the wire. This helps narrow down the exact location of the problem.
Resistance Testing The Headlight Circuit
When headlights fade or fail, the culprit could lie within the circuitry. Resistance testing the headlight circuit helps diagnose issues often invisible to the naked eye. Using a multimeter set to measure resistance or ohms, provides valuable insights. Below are essential steps and techniques for effectively testing your vehicle’s headlight wiring for potential faults.
The Role Of Resistance In Headlight Operation
In a headlight circuit, resistance ensures the proper flow of electrical current. Too much or too little resistance can lead to headlight problems. It could mean damaged wires, poor connections, or failed components. Understanding resistance’s role is pivotal for pinpoint diagnosis and repair.
Proper Technique For Measuring Resistance
To measure resistance accurately, follow these simple steps:
- Turn off your vehicle and headlights to prevent electrical injury.
- Set your multimeter to the ohmmeter (Ω) setting.
- Disconnect the headlight connector to isolate the circuit.
- Place the multimeter probes on the headlight connector terminals.
- Ensure a firm connection between the probes and terminals.
- Record the resistance value displayed on the multimeter.
Analyzing Resistance Readings And Identifying Problems
Interpreting multimeter readings is straightforward:
| Reading | Interpretation | Possible Issue |
|---|---|---|
| 0 Ω | No resistance | Short circuit |
| Infinite Ω | No continuity | Break in the circuit |
| Higher than expected Ω | High resistance | Potential corrosion or wear |
Values significantly different from the standard indicate circuit issues. A zero reading suggests a short circuit, while infinite resistance points to a break in the circuit, often from a cut wire or bad connection. High resistance can mean corrosion or deteriorated wires, which require cleaning or replacement.
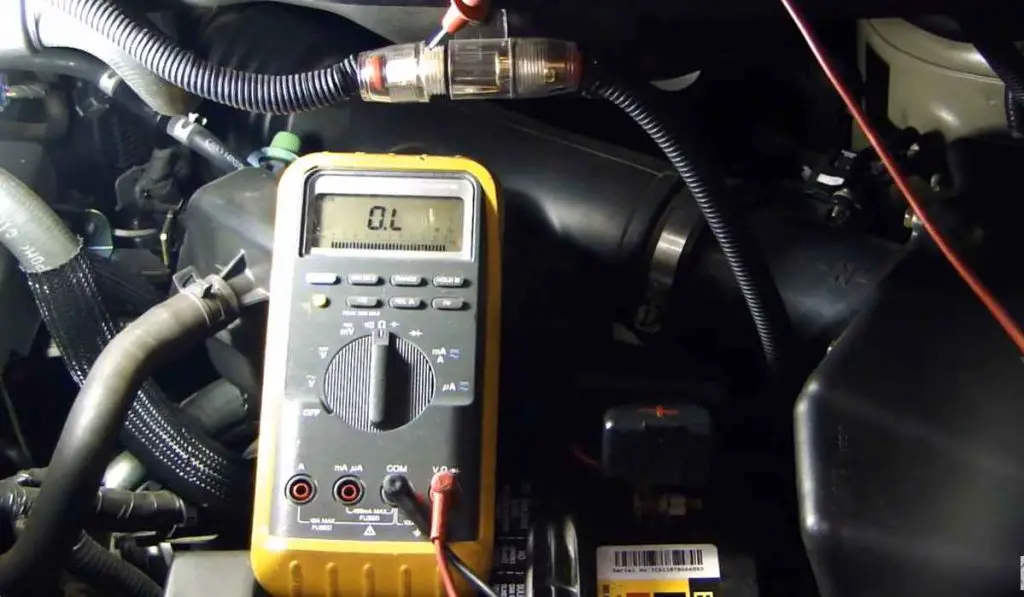
Ground Circuit Testing
Ensuring a properly functioning ground circuit in your vehicle’s headlight is crucial. A weak or broken ground can lead to dim headlights or even complete failure. Below, learn how to diagnose and address ground circuit issues with simple steps using a multimeter.
Recognizing Ground Circuit Issues
Common signs of a faulty ground circuit include flickering headlights or one that doesn’t work at all. Sometimes, headlight issues may not be with the bulb, but a result of bad ground wiring. A quick check can save time and unnecessary bulb replacements. Let’s identify these issues accurately.
Testing The Ground Wire With A Multimeter
- Set your multimeter to the continuity test mode (usually marked by an icon resembling a sound wave).
- Attach the multimeter’s black probe to a known good ground (like the negative battery terminal).
- Attach the red probe to the ground wire terminal of the headlight connector.
- Observe the multimeter. A continuous beep or a value close to zero indicates a good ground connection.
- If there’s no beep or the multimeter shows “OL” (open loop), there’s a break in the circuit.
Repairing Ground Faults In Headlight Wiring
Finding a ground fault requires a visual inspection for any obvious signs like corrosion or broken wires. Tighten loose connections, clean off corrosion, or replace damaged wires where necessary. For hidden issues within the wiring, it may be best to consult with a professional for intricate repairs.
- Inspect: Look for wear or damage along the wire.
- Clean: Remove rust or dirt from the connection points.
- Repair: Tighten the connections or solder broken wires if needed.
- Replace: In cases of severe damage, replacing the ground wire might be necessary.
By closely following these steps, solving headlight issues caused by ground faults becomes a manageable task. Proper maintenance ensures safe driving during all hours, especially at night.
Common Headlight Wiring Problems
Headlights stand as your night-time guardians on every road trip. But even these luminous guides can fall victim to malfunctions. If you notice dimming lights or total darkness, it’s time for a check-up. Dodge the dark with a dive into the heart of headlight hiccups. The culprit often lies in the wires – the lifelines of your car’s lighting system.
Identification Of Common Wiring Faults
Common wiring challenges can turn a simple drive into a stressful one. Visibility is vital, so knowing these issues is key:
- Corroded wires: Rust’s evil cousin, eating away at connections.
- Short circuits: A sneaky electrical loop, stealing your light.
- Broken wires: Snap, crackle, and pop go your light.
- Loose connections: When wires play tag, your lights lag.
Using The Multimeter To Pinpoint Specific Issues
Think of a multimeter as your headlight’s best friend. It talks about volts, resistance, and continuity. Begin with disconnecting the battery. Reach for the multimeter’s probes and set to continuity mode. Probe the headlight connector’s ground wire and the other end to any ground on the car. Did it beep? No beep means trouble in paradise.
Potential Solutions For Wiring Problems
Discovering the issue is half the battle. The next steps are all about fixing and winning:
- Clean corrosion: A dash of cleaner, a scrub, and wires breathe again.
- Mend broken wires: Strip, twist, solder, shrink wrap, and it’s like new.
- Secure loose connections: Tighten those bolts, and connect those dots.
- Treat short circuits: Track, isolate, and replace. Light prevails!
Repairing And Replacing Headlight Wiring Components
Checking the health of your headlight wiring is crucial for safety. You want your headlights reliable, especially at night. Sometimes, the fix is as simple as repairing a wire. Other times, you need a full replacement. A multimeter helps you figure out your next step.
Guidelines For Repairing Wiring
- Turn off your car and remove the keys. Safety comes first.
- Locate the headlight wiring. Refer to the vehicle’s manual.
- Use your multimeter to test continuity. No beeps mean there’s a break.
- Find the damage. Look for cuts or burns on the wires.
- If you find damage, strip the wires carefully. Remove insulation from both ends.
- Twist the wire strands. Join the exposed ends firmly.
- Seal with electrical tape or use a heat-shrink tube. This protects the repair.
When To Replace Headlight Wiring Or Connectors
- If multimeter tests show no continuity and you can’t find the break.
- When wires appear significantly corroded or brittle.
- If the damage is extensive, near connectors or the headlight housing.
- Connectors that are melted or deeply corroded also need replacement.
Ensuring The Repair Is Successful
Test with your multimeter after the repair. Continuity? Good sign. Check the headlights. Switch them on and see if they light. Secure the wires back in place. They should be snug, not loose. Keep an eye on the repair site for the next few days. No flickering allowed. Finally, a professional check-up can confirm your success.
Reassembling And Testing Headlights Post-repair
Reassembling and Testing Headlights Post-Repair is a crucial step in headlight maintenance. After fixing wiring issues, you must ensure everything works correctly. Proper reassembly prevents future electrical problems. Testing with a multimeter confirms a successful repair. Let’s guide you through the reassembly and testing process.
Steps For Reassembling The Headlight System
- Insert the bulb into the headlight housing. Be sure it’s secure.
- Reconnect the wiring harness to the headlight bulb firmly.
- Align the headlight assembly with the mounting area of your vehicle.
- Fasten the headlight assembly using the screws or clips you removed earlier.
- Ensure all electrical connections are tight to avoid issues.
Performing A Final Test With The Multimeter
Use your multimeter for a final check. Make sure it’s set to measure voltage.
- Connect the multimeter’s black probe to a ground point.
- Place the red probe on each headlight connector’s positive terminal.
- Have someone turn on the headlights and check for a stable voltage reading.
- If readings are consistent, the wiring is likely in good condition.
- Address any variations in voltage immediately.
Operational Check: Ensuring Headlight Functionality
Perform a functionality test for your headlights. Follow these steps:
- Turn on the headlights and observe their brightness.
- Check both low and high beams to confirm they switch properly.
- Ensure the headlight beams are even and well-aligned.
- Look for any flickering or dimming as this may indicate a problem.
- If all is well, your headlights are ready for the road.
Safety Considerations And Best Practices
Tinkering with your car’s headlight wiring can seem daunting. But with the right approach, it’s safe and straightforward. Before diving into the electrical deep-end, grasp these vital safety measures and best practices. They ensure your work on headlight wiring is both efficient and secure.
Revisiting Safety Measures For Electrical Repairs
Handling vehicle wiring?
Electrical safety is a must.
- Disconnect the battery to prevent shocks.
- Wear insulated gloves for protection against accidental zaps.
- Use non-conductive tools to keep safe from electrical currents.
- Keep your workspace dry and well-lit.
- Check your tools for damage before starting work.
Troubleshooting Best Practices With Multimeters
Multimeters are the Swiss Army knives of electrical diagnosis. However proper use is crucial for accurate results.
- Set your multimeter to the correct voltage range.
- Test the multimeter on a known source first to ensure it’s working.
- Connect the multimeter probes to the appropriate wiring – black to ground and red to power.
- Read the manual for your specific multimeter model for extra tips.
Maintenance Tips To Prevent Headlight Wiring Issues
Prevention is always better than a cure. Regular maintenance keeps headlight wiring in top shape.
Follow these tips:
| Regular Checks | Cleaning | Upkeep |
|---|---|---|
| Inspect wiring for frays or corrosion. | Clear debris from headlight casings. | Ensure all connections are tight. |
| Look for loose connections. | Use dielectric grease on connectors. | Replace any damaged wires. |
With these simple habits, you can minimize electrical issues before they start.
Conclusion And Maintenance Tips
Ensuring your vehicle’s headlights work properly is crucial for safety. This guide highlighted steps to test headlight wiring. Now, let’s focus on final thoughts and maintenance strategies to keep your headlights in peak condition.
Recap Of Headlight Wiring Testing Procedures
Here’s a quick review of testing headlight wiring. Remember these key points:
- Turn off the vehicle’s power.
- Set the multimeter to voltage.
- Find the grounding wire; test for continuity.
- Probe connector pins for proper function.
- Look for consistent readings aligning with specs.
- Fix issues based on your multimeter’s feedback.
Importance Of Regular Maintenance
Routine checks keep headlight issues at bay.
- Clean headlight lenses regularly.
- Check for damaged wires frequently.
- Replace bulbs as they dim or fail.
- Ensure proper alignment for best visibility.
Future-proofing Headlight Functionality
To avoid future problems, consider these tips:
- Upgrade to high-quality bulbs for longevity.
- Use protective films to guard against scratches.
- Install relay kits to reduce the load on wiring.
- Inspect regularly for any wiring corrosion.
Frequently Asked Questions On How To Test Headlight Wiring With A Multimeter
Can You Test Headlights With A Multimeter?
Yes, you can test headlights with a multimeter. Set the device to measure voltage, then connect the probes to the headlight’s terminals to check for proper function.
What Voltage Are Car Headlights?
Car headlights typically operate on a 12-volt electrical system. High-intensity discharge (HID) or LED headlights may use different voltages for operation.
How Do You Know If A Headlight Relay Is Bad?
To determine if a headlight relay is bad, check for a dead headlight, a functioning bulb but a non-working headlight, or a clicking noise from the relay. If these symptoms are present, the relay may need replacement.
Why Is My Headlight Wiring Not Working?
Your headlight wiring may not work due to a blown fuse, faulty wires, a bad headlight relay, or a malfunctioning switch. Check these components for any damage or failures.


