
Replacing the headlight bulb in a Nissan Xterra is a straightforward process. It typically involves removing the headlight assembly and replacing the old bulb.
The Nissan Xterra, a robust and hardy SUV, often traverses challenging conditions, making functional headlights critical for visibility. A clear, well-lit path not only ensures your safety but also the safety of others on the road. Frequent travelers and adventurers need to periodically check and replace their headlight bulbs to maintain optimal driving conditions.
Taking care of Xterra headlights keeps roads safe and helps. Follow the manufacturer’s guidelines or consult a professional for a seamless bulb replacement experience.
Introduction To Nissan Xterra Headlight Bulb Replacement
Your Nissan Xterra is not just a vehicle; it’s a dependable adventure companion ready to tackle roads less traveled. A crucial aspect of any journey is visibility, which is why maintaining functional headlights is essential. Regular inspection and timely replacement of your Xterra’s headlight bulbs ensure you always have a clear view ahead. We’ll see why lights are important. Learn about car lights. Change a car light easily.
The Importance Of Functional Headlights
Headlights keep you safe by showing the way and signaling others. Driving with a defective headlight bulb can compromise your safety and is illegal in many regions. Keeping both headlights in proper working order should be a regular part of your vehicle maintenance routine. Bright, well-functioning headlight bulbs help in avoiding potential accidents and Upgrade overall road safety.
Overview Of Nissan Xterra’s Lighting System
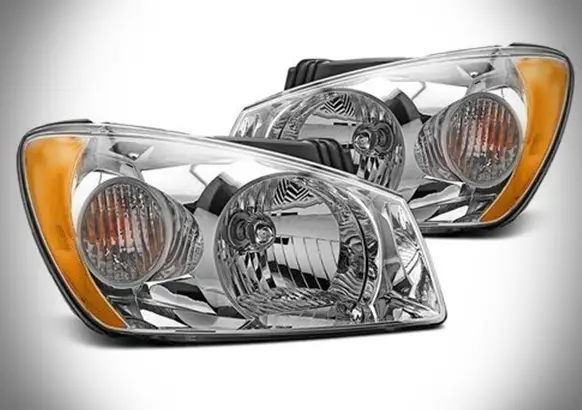
The Nissan Xterra comes equipped with a sophisticated lighting system designed to provide maximum visibility and safety on the road. The model features halogen or xenon bulbs, depending on the year and trim level, each with its replacement procedure. Understanding your Xterra’s specific bulb type is critical before attempting any replacements. Good headlights mean safe trips in dark or bad weather.
Understanding Headlight Bulbs
When thinking about vehicle maintenance, headlight bulbs might not be the first component that comes to mind. But they’re critical for safe driving at night or in poor visibility conditions. Xterra owners need to change bulbs for safe nighttime travel. Choices matter for clear visibility while driving in the dark. Let’s shine a light on the types of bulbs that can be used in the Nissan Xterra, and how you can recognize it’s time for a replacement.

Types Of Headlight Bulbs Used In Nissan Xterra
| Type | Description | Advantages | Disadvantages |
|---|---|---|---|
| Halogens | Traditional bulbs with a filament surrounded by halogen gas. | Cost-effective and easy to replace. | Shorter lifespan and is less efficient than other bulbs. |
| LEDs | Light Emitting Diodes use a semiconductor to emit light. | Energy-efficient with a longer lifespan. | Higher upfront cost and can require modifications to your headlight housing. |
| HIDs | High-Intensity Discharge bulbs use xenon gas and an electric charge. | Brighter light and a longer lifespan than halogens. | More expensive and can cause glare for other drivers if not properly aligned. |
Lifespan And Signs Of Headlight Bulb Failure
Car bulbs wear out, and different types last at different times. Early signs prevent road vision problems. Look for these signs:
- Dimming Lights: If you notice your headlights dimming, they’re likely nearing the end of their life.
- Flickering: A bulb that flickers on and off is a clear sign that replacement is due.
- Uneven Lighting: Should one headlight appear brighter than the other, it’s time to inspect both bulbs.
- Complete Burnout: No light means it’s time to swap out the bulb.
- Warning Dashboard Lights: Some vehicles have systems that will alert you to failing bulbs. Check your Nissan Xterra’s manual for this feature.
Bulb life can vary, influenced by several factors such as usage, bulb type, and driving conditions. Generally, halogen bulbs last around 450 to 1,000 hours, while LEDs can exceed 30,000 hours. HIDs split the difference, usually good for about 2,000 to 3,000 hours of use. Significantly, regular checks and timely replacements not only ensure clarity of vision but also uphold the safety standards of your driving experience.
Preparing For The Replacement Process
A bright path ahead isn’t only a metaphor for clarity in direction but a literal necessity when driving at night. The Nissan Xterra, known for its ruggedness and reliability, is no exception to the need for optimal headlight functionality. Headlight bulb replacement is a straightforward process that can vastly improve your nighttime visibility and safety. Getting ready to replace your Nissan Xterra’s headlight bulb means gathering the right tools, understanding the steps involved, and taking necessary safety measures. This guide will lead you through preparation and execution with ease.
Tools And Materials Needed For Bulb Replacement
Before Starting on the headlight bulb replacement journey, assembling the necessary tools and materials is crucial. This ensures a smooth and efficient process, free from unnecessary interruptions or delays.
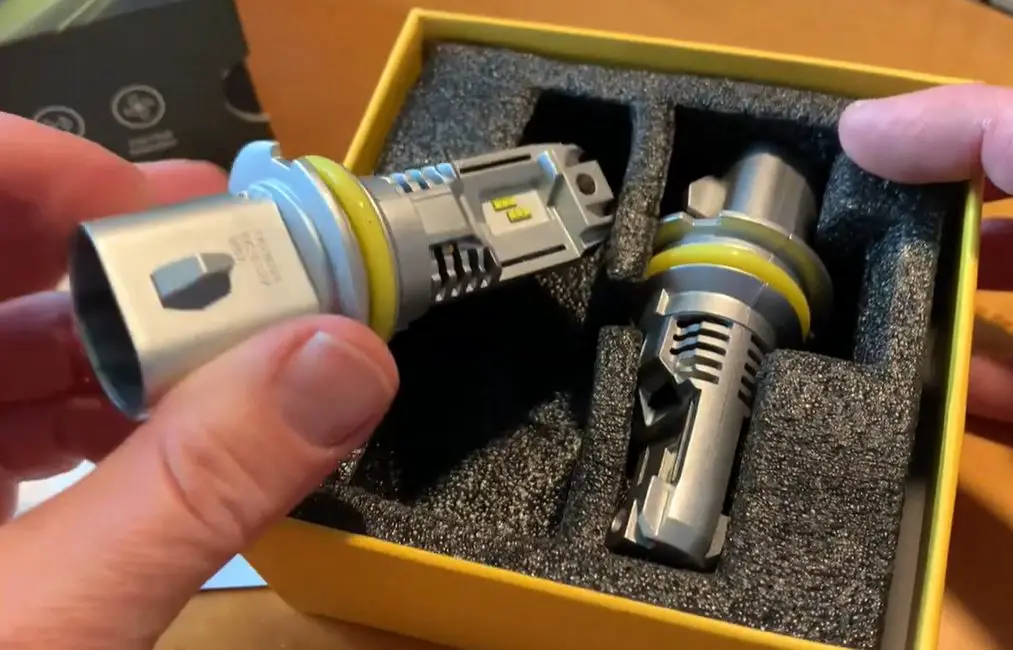
- New headlight bulb(s): Ensure compatibility with your Nissan Xterra model.
- Gloves: To keep oils from your hands off the new bulb, which could shorten its lifespan.
- Screwdrivers: Depending on your Xterra model, you may need both Phillips and flat-head screwdrivers.
Safety Precautions And Preparation Steps
Maintaining safety while replacing your headlight bulb is of utmost importance. Adequate preparation mitigates the risk of injury or damage to your vehicle.
- Turn off the vehicle: Ensure your Nissan Xterra engine is off and keys are removed from the ignition.
- Open the hood: Securely prop the hood to provide easy access to the headlight assembly.
- Clean workspace: Clear the area of any potential hazards and ensure sufficient lighting.
- Disconnect the battery: To avoid the risk of electric shock, it’s wise to disconnect the vehicle’s battery.
- Allow bulbs to cool: If the headlights were used recently, give them time to cool down to prevent burns.
By following these safety precautions and preparing effectively, you set the stage for a successful headlight bulb replacement for your Nissan Xterra.
Step-by-step Guide To Replacing The Headlight Bulb
Starting on a Nissan Xterra headlight bulb replacement doesn’t have to be a daunting task. Even for those with minimal mechanical expertise, this do-it-yourself project is entirely achievable with the right guidance. Prepare to do this job and keep the lights bright! The following step-by-step guide will walk you through the process with precision and care, ensuring you can confidently replace those vital bulbs.
Accessing The Headlight Assembly
The first phase in replacing your Nissan Xterra’s headlight bulb is to access the headlight assembly. This is a straightforward process that involves a few simple steps:
- Open the hood to reveal the engine compartment and the back of the headlight assemblies.
- Locate the headlight assembly connected to the bulb you wish to replace.
- Identify the positioning of any securing clips or fasteners that may be holding the headlight assembly in place.
- Remove these fasteners carefully. Depending on your Xterra model, you might need a screwdriver or socket wrench.
Removing The Old Bulb And Installing The New One
With access to the headlight assembly, the next step is the removal of the aged bulb followed by the installation of a bright new one. Adhere to these instructions:
- Disconnect the power connector from the back of the bulb by squeezing the clip or turning it counterclockwise, depending on the connector type.
- Turn the bulb holder slightly counter-clockwise and pull it out from the headlight assembly.
- Extract the old bulb from the holder. It is crucial to avoid touching the glass of the new bulb with bare hands, as oils from the skin can shorten its lifespan.
- Align the new bulb with the holder and insert it without touching the glass. Bulbs typically only fit one way, so ensure proper alignment.
- Reinsert the bulb holder into the headlight assembly and turn it clockwise to secure it.
- Reconnect the power connector to the back of the bulb holder.
- Test the new bulb by turning on your Xterra’s headlights. Confirm that it illuminates correctly.
- Reattach any fasteners or clips you removed to access the headlight assembly, making sure everything is secure.
Replacing a headlight bulb in your Nissan Xterra is genuinely a procedure that can be completed efficiently with these steps. Not only will you save time and money, but you will also gain a sense of accomplishment knowing you’ve taken an active role in maintaining your vehicle’s safety and functionality. Remember to choose the correct bulb type for your Xterra model to ensure optimum performance and compatibility.
Troubleshooting Common Issues After Replacement
Replacing the headlight bulbs on your Nissan Xterra might seem straightforward, but occasionally you might encounter issues post-installation. Fixing lights helps cars work well and be safe to drive. Let’s tackle some of the common issues you might face after replacing the headlight bulbs and how to resolve them effectively.
Dealing With Improper Fit Or Connectivity
A proper fit is crucial for the new headlight bulb to function correctly. If the bulb does not seem to fit or if it’s loose, first check to make sure you have purchased the correct bulb size for your Nissan Xterra. Bulbs come in many sizes and you must refer to your owner’s manual or a reliable bulb size guide. Should the bulb size be correct, examine both the bulb and the headlight housing for any damage or debris that might prevent a secure fit.
If the issue pertains to electrical connectivity, inspect the bulb connectors for corrosion or bent pins, which could hinder the power supply to the headlight. Bulb connectors should be clean and make a firm connection. In some cases, dielectric grease can be applied to the connectors to improve electrical conductivity and protect against moisture.
Addressing Headlight Aim And Alignment
Correct headlight aim and alignment are fundamental for ensuring you have a clear view of the road ahead, without blinding oncoming traffic. If your headlights seem misaligned after a bulb replacement, you’ll need to adjust them:
- Locate the headlight adjusters on your Xterra; your owner’s manual will indicate where these are situated.
- Park your vehicle on a level surface facing a wall or garage door, ensuring that it’s about 25 feet from the wall.
- Turn the headlights on and mark the center of each headlight beam on the wall with tape.
- Using the adjusters, align each headlight so the brightest part of the beam is slightly below and to the right of the marks you’ve made on the wall. This ensures that the light is directed on the road and not into the eyes of oncoming drivers.
Take the time to test your alignment adjustments in real road conditions to confirm that visibility has improved and that your beams are set correctly. Remember to recheck the alignment periodically, as vibration from driving can sometimes alter the settings.
Handling these common post-replacement issues can save you time and ensure your Nissan Xterra’s headlights function safely and effectively. If these troubleshooting steps don’t resolve your problem. It might be time to consult with a professional mechanic or visit a Nissan dealership for assistance.
Maintenance And Care For Longevity
Ensuring the longevity of your Nissan Xterra’s headlight bulbs is a crucial aspect of vehicle maintenance. Not only do functional headlights provide clear visibility during nighttime drives, but they also play an essential role in road safety. Regular upkeep and timely interventions can prevent unexpected failures. Here’s how you can maintain and extend the life of your vehicle’s headlights.
Regular Maintenance Tips For Headlight Bulbs
- Inspect Bulbs Regularly: Check your headlight bulbs every few months. Look for dimming or color changes; these are signs of aging bulbs.
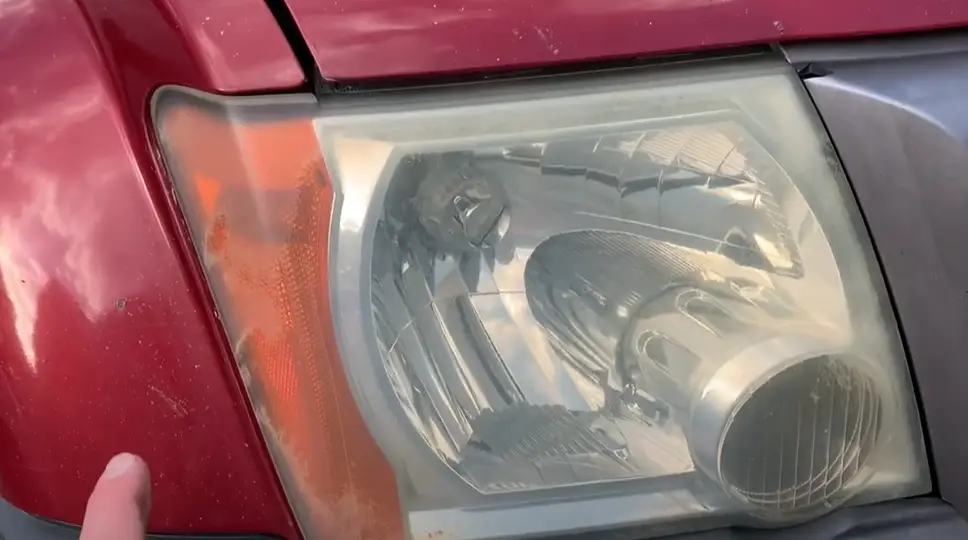
- Clean the Headlights: Dirt and debris can decrease the effectiveness of headlights. Clean the lenses with a quality cleaning solution to ensure optimal light output.
- Avoid Touching the Bulb: When replacing headlight bulbs, handle them by the base and avoid touching the glass. Oils from your skin can create hot spots, leading to premature burnout.
- Invest in Quality Bulbs: Choosing high-quality headlight bulbs can make a significant difference in longevity and performance.
- Check Alignment: Misaligned headlights can lead to reduced visibility. Ensure the beams are accurately aligned for the best on-road lighting.
When To Consult A Professional For Headlight Services
Even with routine maintenance, specific headlight issues require a professional touch. Here is when you should seek expert assistance:
- Electrical Problems: If your headlights flicker or fail to turn on, an underlying electrical issue could be at fault. A certified technician should inspect and rectify these concerns.
- Condensation Inside the Lens: Moisture inside the headlight assembly can lead to bulb failure. Technicians can seal or replace the unit to prevent further issues.
- Severe Damage: After collisions or impacts, seek immediate professional services. This ensures proper repairs and realignment for safe driving.
- Complex Headlight Systems: Modern vehicles may have advanced lighting systems that require calibration or coding. Technicians with specialized equipment will handle these tasks successfully.
Frequently Asked Questions Of Nissan Xterra Headlight Bulb Replacement
What Type Of Bulb Does Nissan Xterra Use?
The Nissan Xterra typically uses halogen headlight bulbs. Specific models may vary, so it’s recommended to consult the vehicle’s manual or a Nissan dealership for the exact bulb type.
How To Change Headlight Bulb In Xterra?
To change the headlight bulb in a Nissan Xterra, first, ensure the vehicle is off and the headlights are cool. Then, access the back of the headlight assembly, remove the old bulb by twisting it counterclockwise, and replace it with a new bulb.
How Much Does Replacing Xterra’s Headlight Cost?
The cost of replacing a Nissan Xterra’s headlight bulb can vary. Generally, bulb prices range from $15 to $100, while labor could cost an additional $50 to $100 at a mechanic or dealership.
Can I Upgrade My Xterra Headlights To Led?
Yes, you can upgrade your Nissan Xterra headlights to LED. Purchase a compatible LED conversion kit and follow the installation instructions carefully for improved brightness and energy efficiency.
Conclusion
Replacing the headlight bulb in your Nissan Xterra is a straightforward task that ensures your safety and compliance with road regulations. With this guide, you’re equipped to handle the replacement efficiently, keeping your Xterra’s visibility at its peak. Remember, regular maintenance illuminates your path and prevents future issues.
Drive confidently, knowing your headlights are in prime condition.


