
To repair projector headlights, you can remove the projector from the headlight without any modifications or purchase a new unit from the dealer. It is a cost-effective solution compared to replacing the entire headlight.
However, if you have a partially burnt LED projector headlight, you may need to install a new light or reinstall your original equipment lights. You can also improve the brightness of your projector headlights by upgrading the bulbs to halogen, HID, or LED options, as these bulbs can provide a brighter light source compared to reflector headlights.
By following these steps, you can effectively repair and enhance the performance of your projector headlights.
Understanding Projector Headlights
When it comes to automotive headlights, projector headlights have become increasingly popular for their superior lighting performance and stylish appearance. If you are considering projector headlight repair or simply want to understand more about these headlights, it’s important to have a good grasp of how they work and the advantages they offer over traditional reflector headlights.
What Are Projector Headlights?
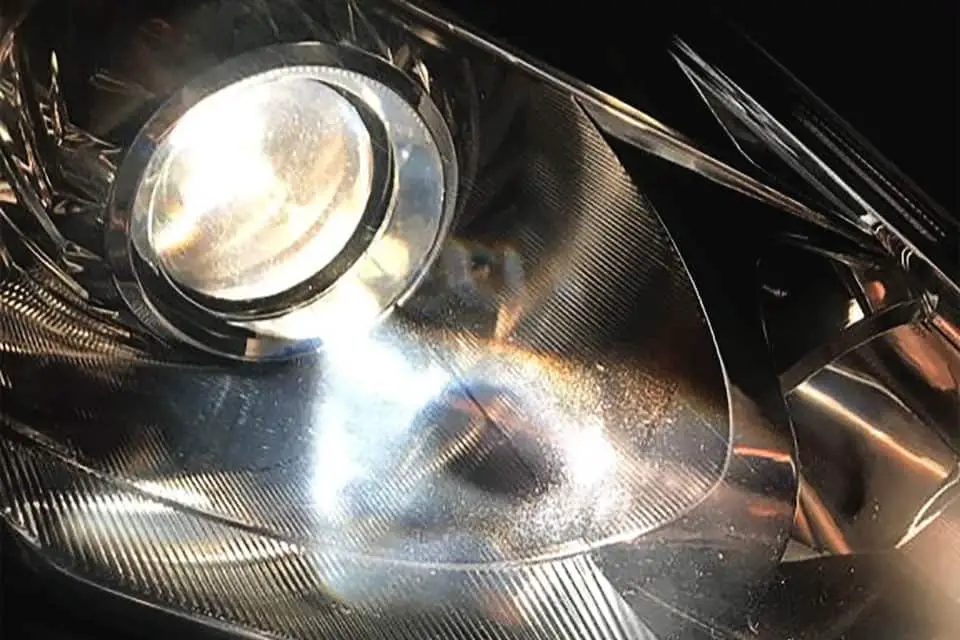
Projector headlights are a type of headlight design that uses a projector lens system to project the light beam onto the road. Unlike reflector headlights that bounce the light from the bulb directly onto the road, projector headlights have a more controlled and focused light pattern. This results in a brighter, more precise and evenly distributed beam of light, enhancing visibility and reducing glare for both the driver and oncoming vehicles.
How Do Projector Headlights Work?
The projector headlight system consists of a bulb, a reflector bowl, and a projector lens. The bulb provides the light source, while the reflector bowl helps to gather and distribute the light. The projector lens then focuses the light into a sharp and well-defined beam before it is projected onto the road. Additionally, some projector headlights may incorporate other features such as LED or HID bulbs for enhanced brightness and energy efficiency.
Advantages Of Projector Headlights Over Reflector Headlights
There are several advantages that projector headlights have over reflector headlights:
- Better light output: Projector headlights produce a brighter and more focused light beam, allowing for improved visibility in low-light conditions and increasing safety on the road.
- Reduced glare: The projector lens helps to control the beam pattern and prevent excessive glare for oncoming drivers, reducing the risk of accidents caused by a blinding light.
- Enhanced styling: Projector headlights offer a sleek and modern design, adding a touch of sophistication to your vehicle’s appearance.
- Compatibility with different bulbs: Projector headlights can accommodate various types of bulbs, including halogen, HID, and LED, providing flexibility for customization and personalization.
- Improved energy efficiency: LED and HID bulbs used in projector headlights are more energy-efficient compared to traditional halogen bulbs, resulting in lower power consumption and a longer lifespan.
Understanding the benefits and functioning of projector headlights can help you make informed choices when it comes to headlight repair or upgrade options for your vehicle. Whether it’s for better lighting performance, safety, or adding a stylish touch to your car, projector headlights are a worthy investment.
Signs Of A Dim Headlight
Dim headlights are a common sign of projector headlight issues. If your low beams are not as bright as they used to be, it may be time for a projector headlight repair. Avoid costly replacements by fixing the issue with a new unit or by replacing worn-out projectors.
Dim headlights can create a hazardous situation on the road, compromising visibility and increasing the risk of accidents. It is important to be aware of the signs of a dim headlight so that you can address the issue promptly and ensure your safety while driving.
Dim Headlight Symptoms
If you suspect that your headlight is dim, there are several symptoms to look out for:
- Reduced brightness: The most obvious sign of a dim headlight is a decrease in brightness. You may notice that the illumination is not as strong as it used to be, making it difficult to see the road ahead clearly.
- Uneven lighting: Another symptom of a dim headlight is uneven lighting distribution. You may observe that certain areas of the road are well-illuminated while others remain dim, creating blind spots.
- Difficulty seeing at night: Dim headlights can significantly impact your ability to see clearly at night. If you find it challenging to spot obstacles or read road signs in the dark, it may be an indication of a dim headlight.
- Increased strain on eyes: When driving with dim headlights, you may experience increased strain on your eyes. This can lead to eye fatigue, making it harder for you to stay focused on the road.
Causes Of Dim Headlights
Dim headlights can be caused by various factors. Some common reasons for dim headlights include:
- Worn-out bulbs: Over time, headlight bulbs can become worn-out, resulting in reduced brightness. Regularly inspect your bulbs for signs of aging and replace them if necessary.
- Incorrect alignment: Improper alignment of the headlights can cause them to shine in the wrong direction, reducing their effectiveness. It is crucial to ensure that your headlights are properly aligned.
- Dirty or foggy lens: A dirty or foggy lens can obstruct the light emitted by your headlights, causing them to appear dim. Regular cleaning and maintenance of your headlight lens are essential to maintain optimal brightness.
- Electrical issues: Faulty wiring or a malfunctioning electrical system can also contribute to dim headlights. It is recommended to have a professional inspect your electrical components to identify and resolve any issues.
Importance Of Addressing Dim Headlights Promptly
Addressing dim headlights promptly is crucial for several reasons:
- Safe driving: Clear visibility is essential for safe driving. Dim headlights can impair your ability to see the road and other vehicles, increasing the risk of accidents.
- Legal requirements: Many jurisdictions have specific regulations regarding headlight brightness. Driving with dim headlights may result in legal consequences, such as fines or penalties.
- Prevent further damage: Ignoring dim headlights can lead to more severe issues. For example, a worn-out bulb may cause electrical problems or damage other headlight components if not replaced promptly.
- Improved visibility: By addressing dim headlights, you can ensure optimal visibility on the road, allowing you to spot potential hazards and react accordingly.
Removing The Dim Headlight
Dim headlights can significantly affect your visibility on the road, making it crucial to address the issue promptly. In this guide, we will explore the steps to remove a dim headlight assembly and highlight common challenges that you might encounter during the process.
Preparing For Headlight Removal
Before you start removing the dim headlight assembly, it is important to gather the necessary tools and ensure a safe working environment. Follow these steps to prepare for headlight removal:
- Gather the required tools, including a screwdriver set, gloves, and a clean cloth.
- Park your vehicle on a flat surface and engage the parking brake for added stability.
- Turn off the vehicle’s engine and locate the hood release lever near the driver’s side.
- Open the hood and secure it with the hood prop rod to provide easy access to the headlight assembly.
Step-by-step Guide To Removing The Headlight Assembly
Follow these step-by-step instructions to remove the dim headlight assembly:
- Locate the retaining clips or screws that hold the headlight assembly in place. These are typically located at the top and bottom of the assembly.
- Using a screwdriver or the appropriate tool, carefully remove the retaining clips or screws.
- Once the retaining clips or screws are removed, gently pull the headlight assembly out of its housing.
- Disconnect the electrical connector from the back of the headlight assembly. Be cautious while doing this to prevent any damage to the wiring.
- With the electrical connector disconnected, you can now completely remove the dim headlight assembly from the vehicle.
Common Challenges And How To Overcome Them During Removal
During the removal of the dim headlight assembly, you may encounter some challenges. Here are a few common ones and how you can overcome them:
| Challenge | Solution |
|---|---|
| The retaining clips or screws are stuck or rusted. | Apply a penetrating oil to help loosen the clips or screws. Use a combination of gentle force and patience while removing them. |
| The electrical connector is difficult to disconnect. | Make sure to press the release tab, located near the connector, while gently pulling the connector away from the assembly. |
| The headlight assembly does not come out easily. | Check for any additional screws or clips that may be holding the assembly in place. Refer to your vehicle’s manual or seek professional assistance if needed. |
By following these steps and being prepared for potential challenges, you can successfully remove the dim headlight assembly and take the necessary steps to resolve the issue.
Replacing The Dim Headlight
If you’ve noticed that your headlight is dim and not providing sufficient illumination on the road, it’s time for a replacement. Replacing the dim headlight is a simple task that can enhance your visibility and ensure a safer driving experience. In this guide, we’ll walk you through the process of selecting the correct replacement parts, providing a step-by-step installation guide, and sharing tips for proper alignment of the new headlight assembly.
Selecting The Correct Replacement Parts
When it comes to selecting the correct replacement parts for your dim headlight, it’s essential to choose components that are compatible with your vehicle’s make and model. Follow these steps:
- Identify the exact specifications of your current headlight assembly, including the bulb type and size.
- Refer to your vehicle’s user manual or consult an online database to find the appropriate replacement parts for your specific make and model.
- Verify the compatibility of the replacement parts with your vehicle by cross-referencing the part numbers and ensuring they match.
By carefully selecting the correct replacement parts, you can ensure a seamless installation process and optimal performance of your new headlight assembly.
Step-by-step Guide To Installing The New Headlight Assembly
Once you have the correct replacement parts, it’s time to install the new headlight assembly. Follow these step-by-step instructions:
- Begin by disconnecting the negative terminal of your vehicle’s battery to prevent any electrical mishaps.
- Remove any screws, clips, or fasteners that secure the existing headlight assembly to the vehicle’s structure.
- Gently detach the wiring harness connected to the back of the current headlight assembly.
- Take out the old headlight assembly and set it aside.
- Align the new headlight assembly with the mounting points on your vehicle.
- Connect the wiring harness of the new headlight assembly to the corresponding vehicle’s wiring.
- Secure the new headlight assembly in place using the screws, clips, or fasteners.
- Reconnect the negative terminal of your vehicle’s battery.
Following these steps will ensure a successful installation of the new headlight assembly, restoring the brightness and functionality of your headlights.
Tips For Proper Alignment Of The New Headlight
Proper alignment of the new headlight assembly is crucial to achieving optimal visibility on the road. Here are some tips to ensure accurate alignment:
- Invest in a headlight alignment tool or consult a professional to ensure precise alignment for maximum effectiveness.
- Ensure that the headlights are properly leveled, both horizontally and vertically, for consistent illumination.
- Check the alignment after installing the new headlight assembly and make any necessary adjustments.
- Regularly inspect and clean the lenses of your headlights to maintain clear visibility.
- Consider upgrading to high-quality bulbs or LED conversions for improved brightness and visibility.
By following these tips, you can enhance the visibility of your headlights and ensure a safer driving experience at night or in low-light conditions.
Testing And Adjusting The New Headlight
Looking to repair your projector headlights? Learn how to test and adjust the new headlights without the need for expensive replacements. Improve visibility and brightness with simple repairs.
Conducting A Functionality Test
To ensure that the new projector headlight is functioning properly, it’s important to conduct a functionality test. Follow these steps to perform a thorough evaluation of the headlight’s performance:- Start by turning on the headlight and checking if both the low and high beams are working as expected.
- Inspect the beam pattern to ensure it is focused and evenly distributed. A well-adjusted beam should have a clear cutoff line, preventing light from glaring into oncoming traffic.
- Test the functionality of any additional features, such as fog lights, turn signals, or halo lights, if applicable. Verify that they are all working correctly.
Fine-tuning The Headlight Aim
Properly aligning the projector headlight is crucial for optimal visibility and ensuring that it does not blind other drivers on the road. Follow these steps to fine-tune the aim of your new headlight:- Park your vehicle on a level surface facing a wall or garage door.
- Measure the height of the headlight from the ground and mark it on the wall at the same height.
- Back up your vehicle approximately 25 feet away from the wall.
- Using the adjustment screws located on the back of the headlight assembly, adjust the vertical and horizontal aim of the beam.
- Make small adjustments and regularly check the beam pattern on the wall to ensure it aligns with your marked height and is properly aimed.
Tips For Maximizing The Brightness And Performance Of The New Headlight
- Choose the right type of bulb for your projector headlight. Halogen, HID, and LED bulbs are all options to consider based on your preferences and budget.
- Regularly clean the lens of your headlight to remove any dirt, debris, or haze that may reduce the brightness and clarity of the beam.
- Ensure that the wiring and connections are secure and free from any damage or corrosion that could affect the performance of the headlight.
- Consider upgrading to a higher-quality bulb or using a headlight restoration kit to improve the brightness and clarity of your headlight.
- Regularly check and adjust the aim of your headlight to ensure it is properly aligned and providing optimal visibility while minimizing glare.

Credit: www.repairsmith.com
Frequently Asked Questions On Projector Headlight Repair
Can Projector Headlight Bulbs Be Replaced?
Yes, projector headlight bulbs can be replaced. You can follow the same steps to replace a broken bulb or upgrade your headlights in the future. Projector headlights can use halogen, HID, and LED bulbs as the light source, and these bulbs can be brighter than those in reflector headlights.
How Can I Improve My Projector Headlights?
To improve your projector headlights, you can try these steps: – Replace worn-out projectors with new ones – Upgrade to brighter halogen, HID, or LED bulbs – Check and adjust the headlight aim – Keep the headlights clean and clear – Consider adding auxiliary lights for better visibility.
Why Are My Projector Headlights So Dim?
Your projector headlights may be dim due to several reasons. It could be because of worn-out projectors, low-quality bulbs, or a faulty electrical connection. To fix this issue, consider replacing the projectors, upgrading the bulbs, and checking the wiring.
Do I Need Special Bulbs For Projector Headlights?
No, special bulbs are not required for projector headlights. They can use halogen, HID, or LED bulbs as the light source, which can be brighter than the ones used in reflector headlights.
Conclusion
Projector headlight repair is a cost-effective alternative to replacing the entire unit. By replacing the worn-out projectors, you can restore the brightness and functionality of your headlights without breaking the bank. Whether you’re dealing with dim low beams or looking to upgrade your headlights, this DIY approach allows you to improve your projector headlights with ease.
Don’t let dim headlights hamper your visibility on the road – opt for projector headlight repair and enjoy a brighter, safer driving experience.


