

The headlight relay is typically located in the vehicle’s fuse box or under the hood. Check your owner’s manual for the exact location.
Understanding where to find the headlight relay in your vehicle is critical for both maintenance and troubleshooting. The relay, a key component of your car’s electrical system, controls the power to the headlights, ensuring they operate effectively.
Where Do I Find the Headlight Relay? It’s a common question for car owners who want to fix their cars on their own. The user’s manual often provides a detailed diagram, guiding you to either the main fuse box, usually found under the dashboard or a secondary box under the hood.
Manufacturers sometimes place relays in less conspicuous spots, so consulting the manual or a vehicle-specific guide is always advisable. Proper knowledge of your vehicle’s layout not only aids in quick fixes but also avoids any unnecessary tampering that could lead to further issues.
Always ensure the car is turned off and the keys are removed before accessing the relay to maintain safety.
The Essential Guide to Headlight Relays
Headlight relays are a pivotal part of your vehicle’s lighting system. These small electrical components act as a bridge between the headlight switch and the headlights themselves.
They ensure the proper power reaches your lights, maintaining optimum performance. Understanding the location and function of your headlight relays is essential for effective troubleshooting and maintenance.
Purpose Of The Headlight Relay
The main job of a headlight relay is to manage the power sent to the headlights. It effectively handles the high current load required to illuminate your vehicle’s headlights.
This prevents the headlight switch from dealing with excessive current, which could lead to overheating and potential damage.
- Controls and stabilizes electrical current
- Enhances headlight longevity
- Protects headlight switch from overload
- Enables consistent headlight functionality
Symptoms Of A Faulty Headlight Relay
Recognizing a failing headlight relay can save you from potential visibility issues while driving at night. There are several signs that you might need a new relay:
| Symptom | Description |
|---|---|
| Dimming Lights | Inconsistent light output from your headlights. |
| Flickering Headlights | Headlights switch on and off intermittently. |
| Non-Functioning Lights | Headlights fail to turn on at all. |
| Clicking Sounds | Unusual noises from the relay indicate a struggle to maintain a connection. |
Spotting these symptoms early can prevent further complications. Regular checks ensure your headlights remain reliable for every journey.
Get to Know Your Car’s Vital Electrical System
Your vehicle’s electrical system is a complex network that powers everything from the headlights to the radio. A key component is the headlight relay, a crucial part of ensuring your lights function properly.
To locate and understand how the relay fits into the larger electrical system, let’s start by breaking down the basic components.
Basic Components Of The Electrical System
The electrical system of a vehicle includes various parts:
| Component | Function |
|---|---|
| Battery | Stores the electrical power needed to start the engine. |
| Alternator | Charges the battery while your vehicle is running. |
| Fuses | Protect the electrical circuits by breaking the connection if the current is too high. |
| Wires and connectors | Create a network for electrical flow. |
| Relays | Control the electrical current to components like the headlights. |
How Relays Work In The Electrical System
Relays serve as bridges in the electrical system. They allow a small current to control a larger one, which is essential for components that need more power, such as headlights. A headlight relay will switch on the headlights when you turn the ignition or the headlight switch.
Understanding the relay’s role helps when troubleshooting electrical issues or performing maintenance. Typically, you can find the headlight relay in the fuse box. This is often located under the hood or within the dashboard, depending on the vehicle’s make and model.
- Locate the fuse box by consulting your vehicle’s owner’s manual.
- Look for a diagram on the fuse box cover that indicates the relay’s position.
- Find the headlight relay; it’s usually a small plastic box that plugs into the fuse box.
By knowing the essentials of your vehicle’s electrical system and the role of relays, you can confidently approach electrical problems.
A Comprehensive Exploration of the Common Locations of Headlight Relays
Headlight relays are vital for your car’s lighting system. A faulty relay can cause your headlights to fail. Finding the relay is the first step to resolution. The relays are often tucked away in various car areas. Knowing the common spots to look at will save you time and effort.
Engine Compartment
The engine compartment is the most frequent home for the headlight relay. Here’s what to look for:
- Near the battery
- Close to the fender walls
- Attached to the firewall
- Inside a protective housing or relay box
Under The Dash
Another common spot is under the dash. You may need to:
- Open your car’s door
- Look beneath the dashboard
- Be prepared to crouch down for a better view
Integrated Into The Fuse Box
Some cars have headlight relays integrated into the fuse box. To locate them:
| Step | Action |
|---|---|
| 1. | Find the fuse box, often under the dash or in the engine compartment. |
| 2. | Look for a diagram on the box cover or owner’s manual for relay positions. |
Relays are usually cube-shaped and plug into sockets. They may be colored or labeled for easy identification. Always verify by consulting your car’s manual or a mechanic if unsure.
The Ultimate Handbook to Understanding and Utilizing Vehicle-specific Relay Locations
Discovering the headlight relay in your vehicle is key for maintenance and repairs. Each car has its unique position for this little but vital component.
Whether you’re facing dim lights or preparing for future issues, knowing exactly where to look can save time and stress.
Consulting The Owner’s Manual
Begin by grabbing your owner’s manual. This book holds a treasure trove of information specific to your car. Detailed diagrams show exact relay positions. Look for the ‘Electrical Components’ section. The index can guide you if you’re lost.
No manual? Go online! Many automakers provide them digitally on their websites.
Differences In Relay Location By Make And Model
Relays aren’t always in the same spot. Domestic brands might favor under-hood placement while European models could hide them under the dash. We’ve compiled a simplified guide to relay locations based on car types:
- Compact Cars: often behind fuse box panels inside the cabin.
- Trucks and SUVs: look in engine compartments or near the battery.
- Sedans: typically beneath the steering column or side panels.
- Sports Cars: may require removal of additional panels for access.
Understanding your vehicle’s make and model will simplify the search. Remember, placement can vary within a brand. Check out our tables for a quick reference guide to common makes:
| Make | Common Relay Location |
|---|---|
| Ford | Under the hood, near the front. |
| Toyota | Inside the cabin, fuse box. |
| Honda | Under the dash, driver’s side. |
| Chevrolet | Engine bay, near the battery. |
Finally, observe components with caution. The wrong move can spell extra repair costs. If unsure, professional help is always a wise choice.
Your Guide to Effortless Relay Identification with Essential Tools and Preparation
Delving into the heart of your vehicle’s electrical system to find the headlight relay requires prep work. Before you embark on this task, gather the proper tools. Ensure you establish a safe environment. This guide will explain the tools needed and the safety measures to follow.
Necessary Tools For Locating Relays
To locate the headlight relay, a set of specific tools will aid in a smooth search. List these tools:
- Vehicle’s Owner’s Manual: Your first tool for accurate information.
- Fuse Box Diagram: Helps identify relay positions within the fuse box.
- Flashlight: Illuminates dark corners, making it easier to find the relay.
- Relay Puller or Pliers: Assists in safely removing the relay without damage.
- Multimeter: Essential for testing relay functionality.
Safety Precautions Before Searching
Take these safety steps before beginning:
- Turn off your car and remove the key from the ignition.
- Ensure the vehicle is on level ground and secured.
- Wear protective gloves to prevent electric shocks or burns.
- Avoid contact with wet surfaces to reduce the risk of electric shock.
Preparedness and safety are key. Now, you are ready to identify the headlight relay in your vehicle.
Follow This Simple Step-by-step Guide to Headlight Relay Discovery
When night falls or fog sets in, your car’s headlights are your best pals on the road. They hinge on a tiny but crucial part: the headlight relay. This guide simplifies locating it, ensuring you’re never left in the dark.
Identifying The Fuse Box
Start at the heart of all electrical systems: the fuse box. This is where the headlight relay lives.
- Look for the fuse box in the cabin or under the hood. Your owner’s manual shows the exact spot.
- Open the box to reveal fuses and relays snugly arranged inside.
- Fuse boxes often have diagrams on the cover. If not, check the manual.
Locating Relays Within The Engine Compartment
Moving under the hood, let’s pinpoint the relay.
- Relays are little boxes. The headlight relay might be marked with an icon or initials like “H/L RLY”.
- Use a flashlight to spot it if it’s dark.
- If the relay is unmarked, compare it to your manual’s diagram.
- Relays might look alike. Make sure you have the right one!
Remember: Safety first. Do this when your car is off. If you need more help, mechanics are always there for you. Now, you’re ready to find that headlight relay with ease!
Diagnosing A Bad Headlight Relay with Insider Tips for a Stress-Free Solution
The headlights are crucial for safe driving. A faulty relay often causes headlight failure. Before you buy a new relay, make sure it’s the culprit. Follow these steps to diagnose a bad headlight relay in your vehicle.
Visual Inspection Of The Relay
First, locate the headlight relay in your car’s fuse box. A vehicle manual helps. Find any signs of damage or corrosion.
- Look for burn marks on the relay.
- Check for broken casing.
- Examine if metal components are intact.
Clean connections might solve the issue. Yet, appearance isn’t everything. Tests confirm relay health.
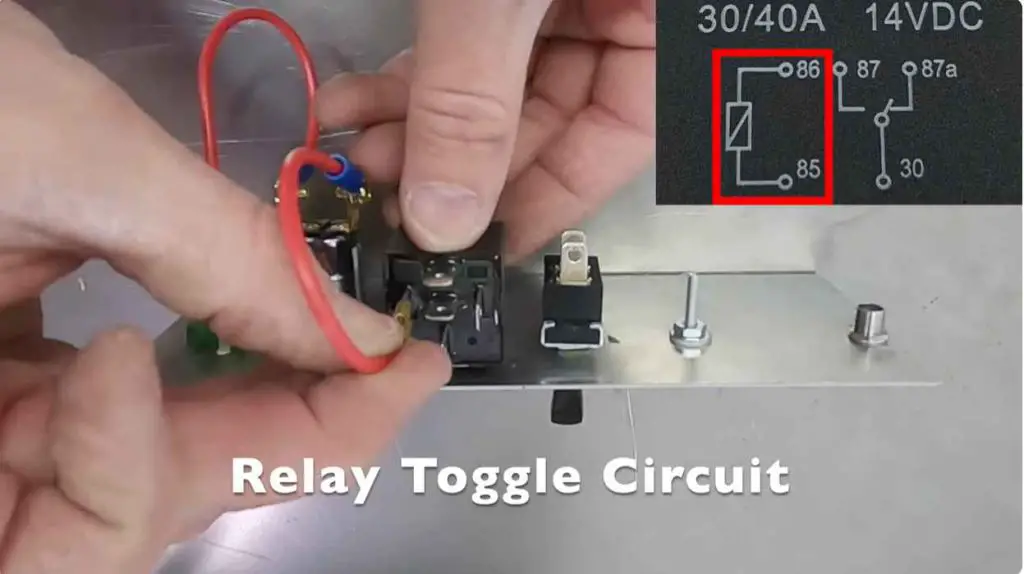
Testing Relay Functionality With A Multimeter
Use a multimeter to test the relay. It measures resistance and verifies current flow. Follow these steps:
- Set the multimeter to the ohmmeter setting.
- Connect the multimeter probes to the relay terminals.
- A reading of zero or infinity indicates a bad relay.
A healthy relay shows some resistance. No reading suggests a replacement is needed.
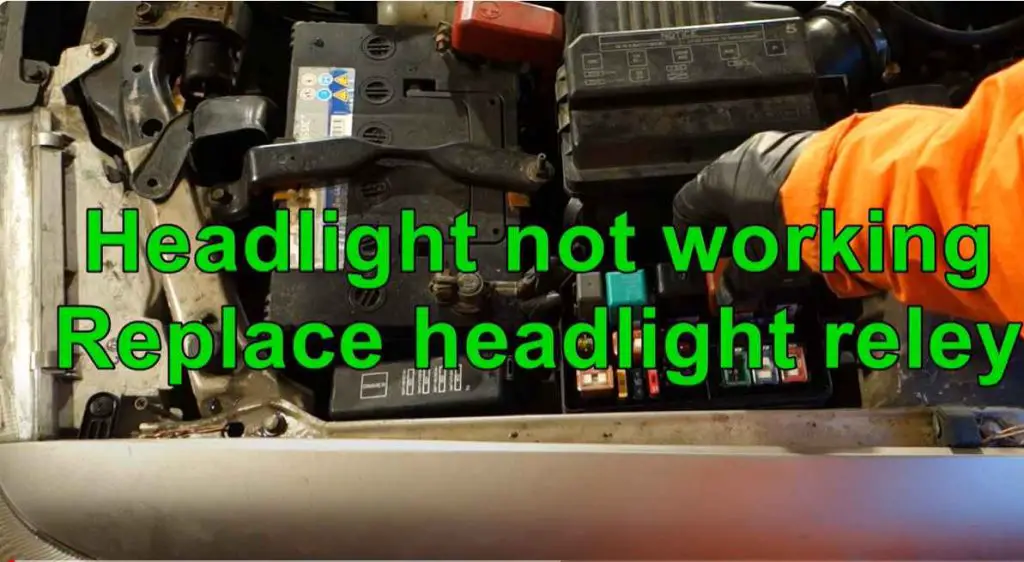
The Easy Way to Headlight Relay Replacement
Driving with faulty headlights isn’t just unsafe; it’s against the law. When lights dim or flicker, the headlight relay might be to blame. This relay acts like a switch, controlling the power needed for the headlights.
Changing it ensures bright and reliable lights. Let’s walk through the steps to replace a headlight relay correctly.
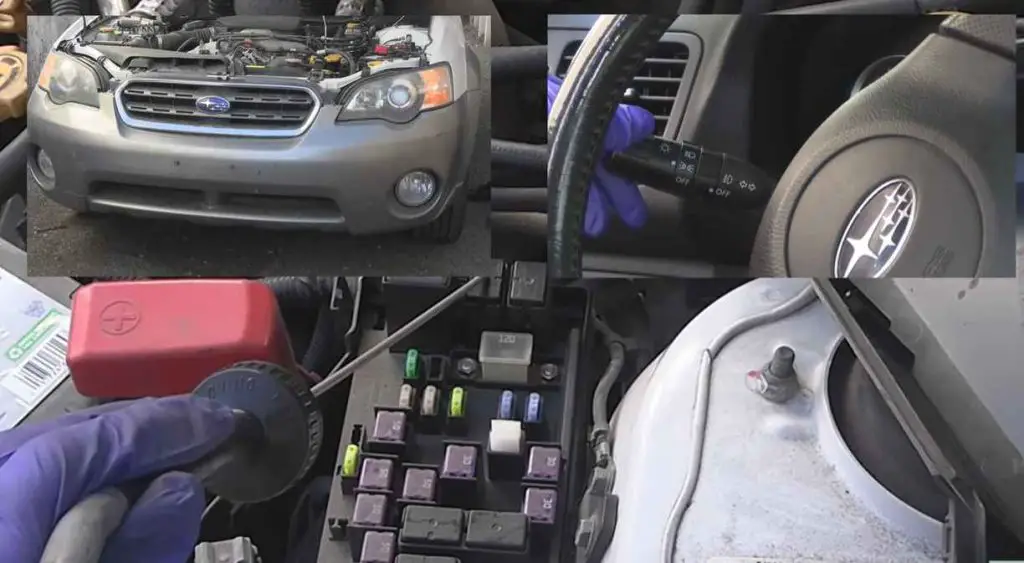
Step-by-step Replacement Process
- Locate Your Vehicle’s Relay Panel: Often found in the engine compartment, in a black box labeled ‘Relay’.
- Identify the Relay: Refer to the manual to find the headlight relay. It’s labeled on the box cover.
- Remove the Old Relay: Gently pull the suspect relay straight out. Pliers might help with a firmer grip.
- Check Relay Prongs: Look for signs of burn or corrosion. These issues mean replacement is needed.
- Test with a Multimeter: Test for continuity with a multimeter if the prongs look okay. No continuity means it’s faulty.
- Insert the New Relay: Align the prongs and press into the correct slot.
- Test Your Lights: Turn on your vehicle and check the headlights to make sure they work.
Ensuring Correct Relay Positioning
Proper relay placement is crucial for functionality. Here’s how to ensure the relay sits right:
- Align the Prongs: Match the new relay’s prongs with the slot pattern.
- Press Firmly: Secure the relay without forcing it. It should snap into place.
- Avoid Bending: If prongs bend, straighten them before retrying.
- Double-Check Tightness: The relay should fit snugly without wobbling.
Relay replacement brings peace of mind during night drives. It ensures headlights work well and keeps you safe.
Tips And Tricks For Easy Relay Access
Finding the headlight relay in your vehicle can be a simple task with the right approach. Knowing where to look and how to clear the path for easy access is essential. Follow these tips to locate and reach the relay without hassle.
Removing Components For Better Access
Gaining access to the headlight relay may require removing certain parts. A clutter-free workspace is crucial. Here’s how to do it:
- Identify your vehicle’s fuse box.
- Consult the manual for component locations.
- Detach any covers or panels obstructing the fuse box.
- Use caution to avoid damaging other parts.
Tools That Facilitate The Process
Equipping yourself with the right tools can make finding the headlight relay a breeze. Here’s a list of must-haves:
| Tool | Function |
|---|---|
| Screwdriver | For unscrewing panels |
| Flashlight | To illuminate dark areas |
| Needle-nose Pliers | For pulling relays |
| Fuse Puller | To extract fuses safely |
Always remember safety first: Disconnect the battery to prevent electric shocks. Once you have the right tools and the area is clear, finding and accessing the headlight relay is straightforward. Keep your workspace organized and take your time.
A Quick Guide to Troubleshooting Headlights
Headlight problems can leave you in the dark about what to do next. Identifying the root cause is key to a quick fix. Often, it is the headlight relay causing the issue.
Let’s dive into the troubleshooting process and shine some light on common issues with headlight relays.
Evaluating Other Components
Before blaming the relay, check other parts. Is it the bulb, fuse, or wiring? Follow these steps:
- Inspect the headlight bulbs. Look for signs of damage or burnout.
- Test the fuses. A blown fuse needs replacement.
- Examine the wiring. Frayed or damaged wires require attention.
Completing these checks helps narrow down the problem.
Common Mistakes In Relay Diagnosis
Wrongly pinpointing the relay as the culprit is common. Remember:
- Intermittent problems aren’t always relay-related.
- Corrosion or loose connections can mimic relay failure.
Double-check all connections and terminals before proceeding.
| Component | Check for | Next Steps |
|---|---|---|
| Bulbs | Dark filaments | Replace if necessary |
| Fuses | Breakage | Replace with the correct amp rating |
| Wires | Wear and tear | Repair or replace |
Unlock Success with Professional Assistance And Services
Navigating the intricate world of auto repairs can be daunting. The headlight relay, a critical component of your vehicle’s lighting system, may sometimes complicate troubleshooting efforts.
Seeking professional assistance and services is often the most effective route to ensure your headlights function flawlessly.
When To Seek Professional Help
It’s time to seek professional help when you notice persistent headlight issues. Be on the lookout for symptoms like dimming lights, flickering, or complete failure to turn on.
If inspecting the fuse box and relays intimidates you, don’t hesitate. Professional auto technicians provide accurate diagnostics and solutions.
Finding Reliable Automotive Services
Choosing a reliable service center for your vehicle can be challenging. Here is a step-by-step guide to ensure you find top-notch assistance:
- Read Reviews: Start with online feedback from previous customers.
- Check Certifications: A certified mechanic with relevant expertise offers peace of mind.
- Ask for Recommendations: Friends and family can provide great insights into dependable shops.
Additionally, transparent costing and warranty on repairs are signs of reputable services. Trustworthy mechanics will explain the issue and offer a clear roadmap for repairs.
| Checklist for Picking a Service Center | Details |
|---|---|
| Credentials | ASE certification, specific brand training |
| Reviews | Positive feedback, high ratings |
| Price Transparency | No hidden fees, clear communication |
| Warranty Assurance | Guarantee on parts and labor |
| Personal Recommendations | Trusted suggestions from your network |
Your Roadmap to Longevity Success
Ensuring your vehicle’s headlights function perfectly involves regular maintenance. Like any other car component, headlight relays require attention to prevent failure. Keeping them in check extends their lifespan. Let’s delve into maintaining your car’s electrical lifeline for headlight reliability.
Regular Electrical System Check-ups
Scheduled examinations of the electrical system keep cars running smoothly. Regular check-ups can uncover potential issues. These straightforward steps safeguard your headlight relay:
- Visual Inspection: Look for signs of damage or corrosion.
- Circuit Testing: Use a multimeter to ensure proper functionality.
- Battery Health Check: A dying battery can affect the relay’s operation.
Best Practices For Relay Maintenance
Adopt these best practices for optimal relay health. Prevent unexpected headlight glitches with these measures:
| Practice | Benefit |
|---|---|
| Clean Connectors | Reduces the risk of poor connections due to dirt. |
| Check for Moisture | A dry environment prevents relay damage. |
| Tighten Loose Wires | Secures connections for uninterrupted operation. |
Replacements of worn-out parts should occur without delay. Keep spare relays handy for quick swaps. Use relays that match your vehicle’s requirements, as using the wrong type can cause malfunctions.
Recap Of Finding And Fixing Relay Issues
In our journey to diagnose and fix headlight problems, we’ve covered various steps. These included:
- Locating the headlight relay in your car’s fuse box.
- Testing the relay with a multimeter to check for faults.
- Replacing the relay if it fails the test.
Always refer to the vehicle’s manual for exact location and specifications. Simple tools like a multimeter can confirm a bad relay. Reliable auto shops have these parts in stock.
Importance Of Safe Nighttime Driving
Safe nighttime driving hinges on well-functioning headlights. Dark roads demand strong, clear headlights for the following reasons:
- Visibility: Headlights illuminate the road ahead, vital for seeing obstacles.
- Safety: They help other drivers see your car, preventing accidents.
- Communication: Headlights signal your presence and intent on the road.
Regular maintenance and prompt repairs of headlight systems are non-negotiable for a safe driving experience after sundown.
Conclusion: Ensuring Proper Headlight Function
Ensuring that your car’s headlights function properly is critical for driving safety. This blog section wraps up our guide on locating and resolving headlight relay issues. Remember, a functioning headlight relay is key for clear vision on the road during nighttime.
Safe driving starts with functioning headlights, so take the time to familiarize yourself with your headlight relay’s location.
Frequently Asked Questions On Where Do I Find The Headlight Relay
Does Each Headlight Have Its Relay?
Typically, each headlight does not have its separate relay; one relay often controls both headlights. However, high-performance or larger vehicles might use individual relays for each headlight for better circuit management.
Always consult your vehicle’s wiring diagram for specific configurations.
How Do I Know If My Headlight Control Module Is Bad?
To determine if your headlight control module is failing, look for symptoms like flickering headlights, non-functioning lights despite good bulbs, or erratic light behavior. Precision diagnostics can confirm module issues.
Can A Bad Relay Cause One Headlight Not To Work?
Yes, a faulty relay can cause one headlight to stop working due to interrupted electrical flow to the headlight bulb.
Can You Replace A Headlight Relay?
Yes, you can replace a headlight relay. Typically, it involves locating the relay, removing the old one, and inserting the new relay into the correct position. Refer to your vehicle’s manual for specific instructions.


