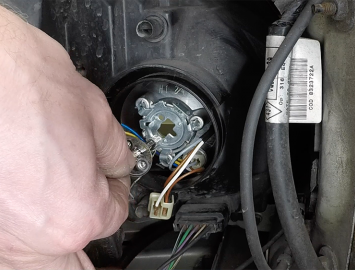
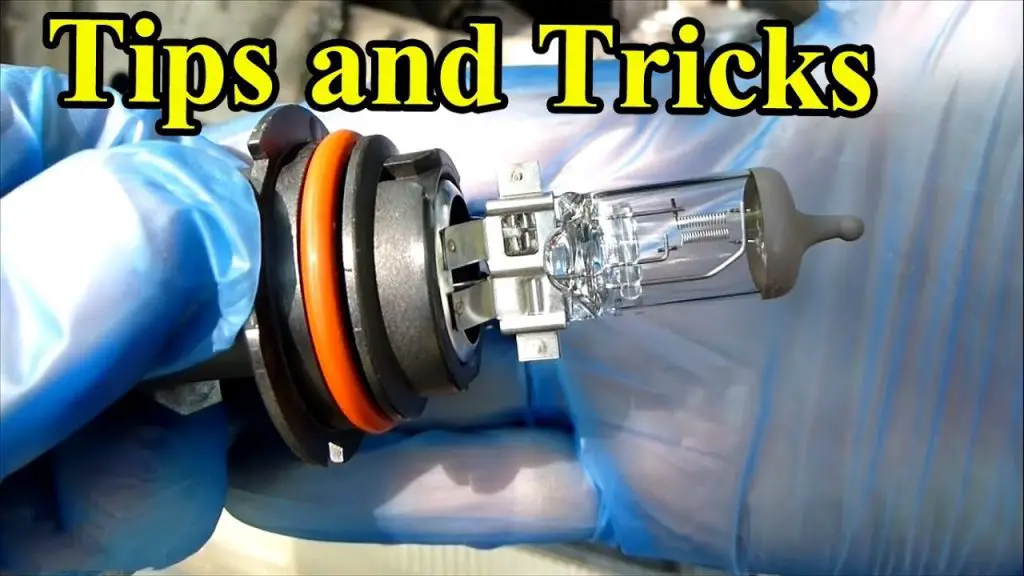
To replace a headlight bulb, first locate the back of the headlight assembly. Remove the old bulb and insert the new one.
Headlights are crucial for safe driving, especially at night or in poor visibility conditions. A burned-out headlight bulb can compromise your safety and lead to traffic violations. Replacing a headlight bulb is a straightforward task that most car owners can do themselves.
It involves accessing the headlight assembly, removing the faulty bulb, and installing a new one. This process can save you time and money compared to visiting a mechanic. Understanding how to replace a headlight bulb ensures you can quickly address the issue, maintaining optimal visibility and safety on the road.
Gather Necessary Tools
Replacing a headlight bulb can seem daunting. It becomes easier with the right tools. First, gather the necessary tools. This ensures a smooth replacement process.
Required Tools List
- New headlight bulb: Ensure it matches your car’s make and model.
- Screwdriver: A flathead or Phillips, depending on your car.
- Gloves: Protects your hands and the bulb.
- Owner’s manual: Provides specific instructions for your car.
Optional Tools
- Flashlight: Helps you see better in low light.
- Socket wrench: Useful for removing bolts securely.
- Dielectric grease: Prevents corrosion on electrical connections.
Having these tools ready will save time and effort. You’ll be prepared for any challenges. Happy repairing!

Credit: www.youtube.com
Choose The Right Bulb
Choosing the right headlight bulb is crucial for your vehicle’s safety. The correct bulb ensures you have proper visibility on the road. This section will guide you on selecting the right bulb.
Check Vehicle Manual
Your vehicle’s manual is the best place to start. It specifies the exact type of headlight bulb needed. Find the section that discusses headlight maintenance.
Here is what you might find:
| Vehicle Model | Headlight Bulb Type |
|---|---|
| Sedan | H11 |
| SUV | 9005 |
| Truck | H13 |
Types Of Headlight Bulbs
There are different types of headlight bulbs available. Knowing them helps you make the best choice.
- Halogen Bulbs: These are the most common. They are affordable and easy to replace.
- Xenon (HID) Bulbs: These bulbs are brighter and more energy-efficient. They are a bit expensive.
- LED Bulbs: LED bulbs last longer and are very bright. They can be costly but save energy.
Access The Headlight Assembly
Replacing a headlight bulb might seem challenging. But it starts with accessing the headlight assembly. Follow these simple steps to ensure a smooth process.
Open The Hood
The first step is to open the hood. Locate the hood release lever inside your car. It is usually near the driver’s side footwell. Pull the lever to release the hood latch.
Next, go to the front of the car. Find the secondary hood release under the hood. Lift the hood and secure it with the prop rod.
Locate The Headlight Assembly
Find the headlight assembly inside the engine bay. It is usually near the front corners of your car. Look for a bulb socket or a wiring harness connected to the assembly.
Consult your car’s manual if you have trouble finding it. The manual provides detailed diagrams and instructions. This ensures you locate the correct assembly.
Accessing The Bulb
To access the bulb, you may need to remove other components. This could include the battery or air filter housing. Carefully remove any obstructing parts to reach the bulb.
Once you have clear access, locate the bulb holder. The holder is secured with a clip or screw. Gently release the clip or unscrew the holder to remove it.
Disconnect The Wiring Harness
The next step is to disconnect the wiring harness. This provides power to the headlight bulb. Carefully pull the connector off the bulb.
Some connectors may have a locking tab. Press or lift the tab to release the connector. Ensure you do not damage the wiring during this process.
After disconnecting the wiring, remove the old bulb. Gently twist or pull the bulb to release it from the holder. Take note of the bulb’s orientation for easy replacement.
Dispose of the old bulb properly. Avoid touching the new bulb’s glass surface to prevent damage.
Insert the new bulb into the holder. Ensure it fits securely and matches the old bulb’s orientation. Reconnect the wiring harness to the new bulb.
Replace any components you removed earlier. Lower the hood and ensure it is securely closed.
With these steps, you have successfully replaced your headlight bulb.

Credit: payneautogroup.com
Remove The Old Bulb
Replacing a headlight bulb can seem daunting, but it’s straightforward. Follow these steps to remove the old bulb safely and efficiently.
Disconnect Power Connector
First, locate the back of the headlight assembly. You will find the power connector attached to the bulb. This connector supplies electricity to the bulb. To disconnect it:
- Press the tab on the power connector.
- Pull the connector away from the bulb gently.
Ensure you do not pull too hard to avoid damaging the connector. Disconnecting the power ensures safety while removing the bulb.
Remove The Bulb
Next, locate the bulb holder. This might involve removing a dust cover or a clip. Follow these steps to remove the bulb:
- Turn the bulb counterclockwise to unlock it.
- Pull the bulb out of the holder carefully.
Be sure not to touch the glass of the bulb with bare hands. Oils from your skin can shorten the lifespan of the new bulb. Use gloves or a clean cloth if necessary.
| Step | Action |
|---|---|
| 1 | Press the tab on the power connector. |
| 2 | Pull the connector away from the bulb. |
| 3 | Turn the bulb counterclockwise. |
| 4 | Pull the bulb out of the holder. |
Removing the old bulb is a critical step. Ensure all connections are handled with care. This ensures the new bulb fits and functions correctly.
Install The New Bulb
Replacing a headlight bulb might seem challenging. Follow these steps to install the new bulb correctly. Handle the new bulb carefully and secure it properly for safety.
Handle With Care
Always handle the new bulb with care. Use gloves or a clean cloth to avoid touching the glass. Oils from your skin can damage the bulb and reduce its lifespan.
- Wear gloves or use a cloth.
- Avoid touching the glass part.
- Keep the bulb in its packaging until ready.
Secure The New Bulb
Insert the new bulb into the socket. Make sure it is aligned properly. Twist or lock it into place according to your car’s specifications.
- Align the new bulb correctly.
- Twist or lock it securely.
- Reconnect any clips or wires.
After securing the bulb, test it to ensure it works. Turn on your headlights and check both brightness and alignment. This ensures your safety on the road.
| Step | Action |
|---|---|
| 1 | Wear gloves or use a cloth |
| 2 | Avoid touching the glass |
| 3 | Align the new bulb |
| 4 | Twist or lock the bulb |
| 5 | Reconnect clips or wires |
| 6 | Test the new bulb |
Reassemble And Test
Once you have replaced your headlight bulb, it’s time to reassemble the parts and test the new bulb. This step is crucial to ensure everything is working correctly. Follow the steps below to complete the process smoothly.
Reconnect Power Connector
First, locate the power connector that you removed earlier. Align it with the headlight bulb. Push the connector until you hear a click sound. This ensures a secure connection.
Be careful with the wires. Ensure they are not tangled or stretched. This can damage the connector or the bulb.
Test The New Headlight
Before you reassemble everything, it’s important to test the new headlight. Turn on your car’s ignition. Switch on the headlights.
Check if the new bulb lights up properly. Ensure it is as bright as the other headlight. If it doesn’t light up, you may need to check the connection.
Here are some quick checks:
- Ensure the bulb is seated correctly.
- Check the power connector for a secure fit.
- Inspect for any loose or broken wires.
If everything looks fine, go ahead and reassemble any parts you removed. Put back the headlight cover, if any, and secure it. Finally, close the car hood.
Your new headlight bulb is now ready to light the way!
Troubleshooting Tips
Replacing a headlight bulb can seem simple. Sometimes, things don’t go as planned. Here, we’ll cover some troubleshooting tips.
Common Issues
Even with the best intentions, you can face issues. Here are some common problems:
- Bulb not lighting up: This can happen if the bulb is not seated properly. Check the connection and ensure it’s secure.
- Flickering light: A flickering light can indicate a loose connection. Tighten all connections and inspect for corrosion.
- Incorrect bulb type: Using the wrong bulb can cause issues. Always refer to your car’s manual for the correct bulb type.
When To Seek Professional Help
Sometimes, problems require expert help. Here’s when you should consult a professional:
- Persistent flickering: If the light continues to flicker, it may be an electrical issue.
- Multiple bulbs failing: This could signal a deeper electrical problem.
- Socket damage: If the socket looks burnt or damaged, seek help.
Consulting a professional can save time and ensure safety.

Credit: haynes.com
Frequently Asked Questions
Can I Replace A Headlight Bulb Myself?
Yes, you can replace a headlight bulb yourself. Follow your car’s manual for guidance. Ensure you have the correct bulb type.
Will Autozone Change A Headlight Bulb?
Yes, AutoZone offers headlight bulb replacement services. They can help you install a new headlight bulb.
How To Replace A Headlight Bulb?
To replace a headlight bulb, first, turn off your vehicle. Open the hood and locate the headlight assembly. Remove the old bulb by twisting it counterclockwise. Insert the new bulb, ensuring it’s secure. Close the hood and test the new headlight.
Which Way To Twist A Headlight Bulb?
Twist the headlight bulb counterclockwise to remove it. Insert the new bulb and twist it clockwise to secure it.
Conclusion
Replacing a headlight bulb is a simple task with the right guide. Follow the steps carefully to ensure success. Regularly check your headlights for optimal performance. With a little effort, you can save time and money. Drive safely with well-maintained headlights.

