
A LED rocker switch is a user-friendly on-off control featuring a built-in light. It is commonly used in automotive and marine applications for its clear visual feedback.
LED rocker switches provide a simple way to toggle electrical circuits with the added benefit of a light indicator, often illuminating when the switch is active. Their ease of use and straightforward installation make them a popular choice among hobbyists and professionals alike.
Ideal for controlling various accessories such as lights, these switches are designed to fit into standard cutouts, making them versatile for numerous applications. The LED feature not only serves as a status indicator but also enhances the aesthetic appeal of control panels. Robust and durable, these switches can handle a range of voltages, and their illuminated nature assists with functionality in low-light conditions.
Understanding Led Rocker Switches
Understanding LED rocker switches is critical for anyone looking to use reliable and efficient electrical components in their projects. Whether it’s for automotive panels, industrial equipment, or home appliances, these switches offer an aesthetically pleasing design with the added functionality of built-in light indication. By delving deep into the mechanics, features, and advantages of LED rocker switches, users can make the most of these switches’ capabilities and integrate them into various applications.
Differences Between Traditional Switches And Led Rocker Switches
At the heart of the distinction between LED rocker switches and traditional switches lies not only in their design but also in their usability and functionality:
- Visualization: An LED rocker switch comes equipped with an illumination feature that tells the user whether the switch is in an ‘on’ or ‘off’ position, enhancing user experience, especially in low-light conditions.
- Design Versatility: With various color options available for the embedded LED, rocker switches provide better compatibility with different control panel designs.
- Energy Efficiency: LED rockers are more energy-efficient than traditional indicator lights, consuming less power for the same level of brightness.
- Durability: The solid-state construction of LEDs in rocker switches ensures a longer lifespan compared to traditional incandescent bulbs.
Core Components Of Led Rocker Switches
To understand the efficiency behind LED rocker switches, one must recognize its core components:
| Component | Function |
|---|---|
| Actuator | The surface part you press to toggle the switch. |
| Housing | Encases the switch, protecting internal components. |
| Terminals | Conduct electricity, connecting to the circuit. |
| LED Indicator | Provides visual feedback regarding the switch state. |
How Led Rocker Switches Function
When it comes to operation, LED rocker switches offer a user-friendly interface:
- Upon pressing the actuator, the internal circuit closes, allowing current to flow through the terminals.
- The LED receives power, emitting light that passes through the translucent actuator, signaling the ‘on’ state.
- The stable construction enables the switch to maintain its state until pressure is applied again, toggling the switch and altering the circuit state.
This clever design not only provides tactile feedback but also visual confirmation, enhancing overall user interaction with the device.
Choosing The Right Led Rocker Switch
When it comes to finalizing the details of your control panel, one of the key components you’ll encounter is the LED rocker switch. It’s more than just a simple on-off mechanism; it’s the gateway to operational efficiency and design elegance. Selecting the right LED rocker switch ensures not only the functionality you require but also the seamless integration with your panel’s aesthetic. Within this guide, we’ll delve into critical factors you must consider, including switch ratings, environmental conditions, and design considerations.
Assessing Switch Ratings For Your Control Panel
Selecting a LED rocker switch with the correct ratings is pivotal for system integrity and safety. Here’s what to keep in mind:
- Current and Voltage Ratings: Check the maximum current and voltage that the switch can handle. This should match or exceed your system’s requirements.
- Electrical Life: Consider how many cycles the switch can perform without failure. Frequent use demands a switch with a high electrical life.
- Temperature Ratings: Ensure the switch can operate effectively within the range of temperatures it will be subjected to.
Durability is also an essential component of switch ratings. A switch that handles extensive use over time is crucial for control panels in industrial environments.
Impact Of Environmental Factors On Switch Selection
Your control panel’s environment can greatly influence the type of LED rocker switch you need. Here’s a breakdown:
| Environmental Factor | Switch Feature |
|---|---|
| Dust and Debris | Sealed or protected switches to prevent ingress |
| Moisture or Water Exposure | Waterproof or water-resistant ratings, like IP67/IP68 |
| Extreme Temperatures | Switches designed for high or low temperature tolerance |
By assessing the potential impact of these factors, you can ensure the longevity and reliability of your switches in any conditions.
Aesthetic Considerations — Coordinating With Your Panel Design
A switch should not only be functional but also complement your control panel’s design. Here are some points to consider:
- Color Scheme: Match the LED color to your panel’s design theme or use it as an indicator of function.
- Panel Material: Choose a switch finish that corresponds with your control panel material, be it plastic, metal, etc.
- Panel Backlighting: Ensure the LED brightness and color temperature suit your control panel’s backlighting.
Proper synchronization of functional design elements and aesthetics can enhance the user experience and bring a polished look to your control panel.
Preparing For Led Rocker Switch Installation
Welcome to the pivotal stage of enhancing your vehicle’s functionality: preparing for an LED Rocker Switch installation. A task that may seem daunting is made simple with the right preparation. Below, you’ll uncover every step needed to ensure a seamless and safe installation. Let’s gear up with the proper tools and safety measures, ensuring your new switch operates perfectly from the get-go.
Necessary Tools And Materials
Gathering the correct tools and materials is crucial for a smooth installation process. Ensure all items are at hand before starting to avoid any interruption. Here’s what you’ll need:
- LED Rocker Switch: Choose one compatible with your system’s voltage and current requirements.
- Wire Stripper: For stripping and preparing wires for connection.
- Phillips & Flat-Head Screwdrivers: For opening panels and securing connections.
- Electrical Tape: To insulate and protect wire connections.
- Connection Terminals: Depending on your switch type, you might need spade or ring terminals.
- Voltmeter: To ensure no live wires during installation and to check connections afterward.
- Drill & Bits: If a new hole is needed for mounting the switch.
Safety Precautions Before Installation
Prioritizing safety cannot be overstated. Follow these precautions to protect yourself and your equipment:
- Power Down: Begin by disconnecting the power source to prevent electrical shock.
- Use Protective Gear: Wear insulated gloves and safety glasses at all times.
- Check with a Voltmeter: Confirm that all wires are free from voltage before touching.
- Understand your Wiring: Study the wiring diagram for your LED Rocker Switch to avoid misconnections.
- Be in a Safe Environment: Ensure your work area is dry and free from flammable materials.
Adhering to these guidelines not only ensures a successful installation but also maintains the integrity of your electrical system.
Installing Your Led Rocker Switch
Upgrading your electrical setup with an LED rocker switch can offer convenience and a modern touch to any project. Whether you’re enhancing a vehicle, marine craft, or customizing your home circuitry, here’s everything you need to know to get that switch wired and ready to go!
Step-by-step Installation Process
Follow this detailed guide to install your LED rocker switch with ease:
- Gather your tools – You’ll need a wire stripper, screwdriver, and electrical tape.
- Disconnect power – Always start by disconnecting the power source to prevent electric shock.
- Prepare the switch – If necessary, insert the LED rocker switch into the panel cutout.
- Strip the wires – Remove a small section of the insulation from each wire you’ll be connecting.
- Identify wiring locations – Ensure you have the grounding, power, and load wires identified correctly.
- Connect the wires – Attach the ground wire to the switch’s ground terminal, the power wire to the power terminal, and the load wire to the load terminal.
- Secure connections – Fasten each wire firmly to its terminal with a screwdriver, and ensure no loose strands are present.
- Test the switch – Reconnect the power source, and test the LED rocker switch before finalizing the installation.
Tips For Ensuring Proper Illumination And Operation
For the perfect finishing touch, use these tips:
- Choose the correct switch – Make sure the LED rocker switch is compatible with the voltage of your system.
- Check polarity – The LED in the switch requires correct polarity. Connect the positive lead to the switch’s positive terminal, usually indicated by + or ‘ACC’.
- Weatherproofing – If the switch is for outdoor use, apply weatherproof sealant to prevent moisture intrusion.
- Use a terminal block – For a more professional and cleaner installation, consider using a terminal block to manage wire connections.
- Test before sealing – Before you close up the panel, check the switch operation to ensure all connections work appropriately.
Personalizing Your Control Panel
Personalizing Your Control Panel with LED rocker switches isn’t just about functionality; it’s about bringing a touch of your unique style to your dashboard. Whether it’s for a vehicle, boat or gaming setup, customizing these switches can result in a control panel that stands out while offering clear signals about the status of each function. Let’s dive into selecting vibrant LED colors and intuitive labels for specific functions and wiring them up for a harmoniously lit console that screams sophistication and personal flair.
Selecting Led Colors And Labels For Specific Functions
Visual cues are paramount when it comes to operating any control panel. Customizing your LED rocker switches involves choosing colors that not only appeal to your aesthetic sense but also serve to differentiate each function clearly. Here’s how:
- Identify Functions: Start by listing out all the functions you want the switches to control.
- Pick Colors: Match each function with a suitable LED color. Standard color coding often follows conventions such as red for power or danger-related functions, green for lights, and blue for additional gadgets.
- Create Labels: Adding labels to your rocker switches not only enhances the ease of use but also personalizes your space. Consider custom engraving or printing labels for clarity and durability.
Ensuring that color coding and labeling are consistent and intuitive can significantly reduce the margin of error while operating your control panel.
Wiring Multiple Led Rocker Switches For Panel Uniformity
To achieve a seamlessly unified aesthetic across your control panel, attention to detail is vital in wiring your LED rocker switches. The key points to consider include:
- Electrical Diagram: Before starting, create an electrical diagram. This will help you plan the layout and understand where each wire should go.
- Uniformity in Wiring: Keeping the wiring uniform not only looks better but also simplifies troubleshooting in the future. Ensure all the switches are wired similarly.
- Testing: After wiring, test each switch to confirm the LED illuminates correctly and that the functions operate as intended.
Remember that a well-organized and correctly installed set of LED rocker switches improves both the appearance and functionality of your control panel, making it a joy to use every time.

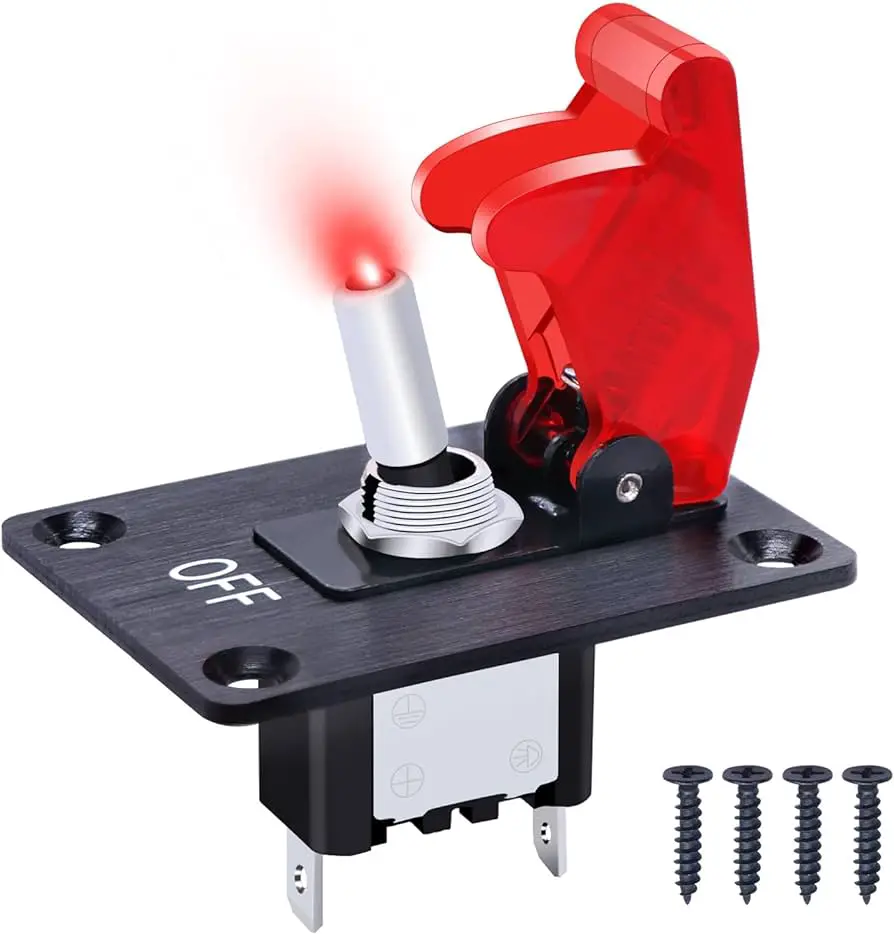
Credit: www.amazon.com
Extending The Life Of Your Led Rocker Switch
LED rocker switches are a durable and user-friendly solution for controlling various electrical devices. Despite their sturdiness, these switches can benefit from meticulous care to extend their lifespan. Performing routine maintenance and timely troubleshooting can save you time and money, keeping your switches operational for longer periods. Let us delve into how best to preserve your LED rocker switch’s integrity and functionality.
Routine Maintenance Tasks
Ensuring that LED rocker switches continue to function optimally requires consistent maintenance. Below are key tasks to keep them running smoothly:
- Regular Cleaning: Gently wipe the switch surface with a damp cloth to remove dirt and grime.
- Check Connections: Periodically inspect wiring connectors for loose contacts and securely fasten any that have come loose.
- Testing Operation: Regularly test the switch to ensure the LED indicator lights up and that the switch activates the connected device appropriately.
Common Issues And How To Troubleshoot Them
Addressing issues early can prevent LED rocker switches from failing prematurely. Familiar concerns and their solutions include:
- LED Fails to Illuminate: Confirm the wiring connections are secure and look for any sign of wear. Replace the switch if the LED component is non-functional.
- Intermittent Functionality: This can be due to loose terminals. Tighten connections and ensure the switch is correctly seated.
- Failure to Control a Device: Test the switch with a multimeter to check for electrical continuity. If defective, it may need replacing.
| Issue | Cause | Solution |
|---|---|---|
| Dim LED Light | Inadequate voltage or worn-out LED | Test voltage and replace switch if needed |
| Unresponsive Switch | Broken internal mechanism | Inspect for physical damage, replace if necessary |
| Noisy Operation | Dirt or debris inside | Clean the switch thoroughly |
Frequently Asked Questions Of Led Rocker Switch
Will A Light In A Rocker Switch Drain Battery?
Yes, a light in a rocker switch can drain a battery if the switch remains connected without the main device being turned on.
Are Rocker Switches Better Than Toggle Switches?
Rocker switches aren’t necessarily better than toggle switches; each has applications they suit best. Rockers are user-friendly for large-button applications, while toggles offer precise control and can handle more robust functions. Your choice depends on specific needs and personal preference.
What Is An Illuminated Rocker Switch?
An illuminated rocker switch is a type of on-off switch that lights up to indicate when it’s active, enhancing visibility and ease of use.
Can You Replace A Light Switch With A Rocker Switch?
Yes, you can replace a traditional light switch with a rocker switch. Ensure compatibility with your electrical system, and always follow safety guidelines during installation.
Conclusion
As we wrap up, it’s clear that LED rocker switches offer versatility and durability for various applications. Perfect for those seeking reliable, user-friendly switch options, they enhance any control panel with a modern touch. Remember to consider your specific needs to choose the ideal LED rocker switch for your project.


