
To install a Nilight LED Light Bar, securely mount the bar and connect the wiring harness to your vehicle’s power supply. Ensure the light bar is properly aligned for optimal lighting.
Installing a Nilight LED Light Bar enhances your vehicle’s visibility and aesthetic appeal. Ideal for off-road enthusiasts and those requiring additional lighting, the installation process is straightforward, involving mounting the bar and wiring it to your vehicle’s electrical system. The light bar’s durable design ensures it withstands tough conditions, while its bright illumination improves safety.
By following the manufacturer’s instructions and adhering to road safety regulations, you can upgrade your vehicle’s lighting effectively. It’s essential to position the light bar correctly to ensure maximum effectiveness and avoid dazzling oncoming traffic. A successful installation not only offers a rugged look but also extends your driving hours safely into the night.
Nilight Led Light Bar Install: Brighten Your Drive!
Illuminate the night and enhance your vehicle’s visibility with an exciting upgrade: the Nilight LED Light Bar installation. Ideal for off-road adventurers, professional drivers, and safety enthusiasts alike, this robust lighting addition delivers superior brightness and unparalleled durability. Whether you’re navigating treacherous terrain or simply seeking a clearer view on dark roads, installing a Nilight LED Light Bar is a brilliant way to brighten your driving experience. Let’s delve into the essentials for a seamless installation.
Essential Tools And Materials
Before embarking on your light bar installation journey, gathering the necessary tools and materials is crucial. Here’s a list to get you started:
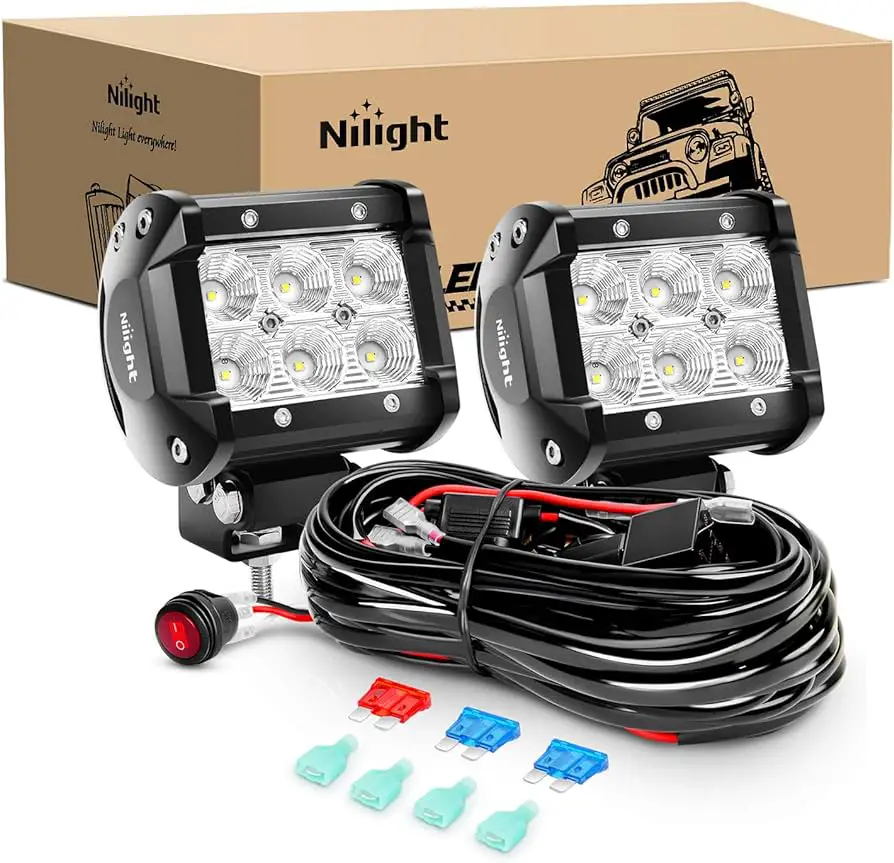
- Nilight LED Light Bar Kit: Includes the light bar and mounting brackets.
- Wiring Harness: For connecting the light bar to your vehicle’s power supply.
- Mounting Hardware: Screws, bolts, and washers for securing the light bar in place.
- Drill & Drill Bits: For creating pilot holes for the mounting hardware.
- Screwdrivers: Both Philips and flat-head varieties.
- Wrench Set: To tighten the bolts and nuts.
- Wire Strippers/Crimpers: For handling the wiring connections.
- Electrical Tape & Zip Ties: For managing cables and ensuring a tidy setup.
Preliminary Vehicle Preparation Steps
Proper preparation sets the foundation for a successful installation. Follow these steps to prepare your vehicle:
- Vehicle Cleaning: Start with a clean surface by washing the area where you’ll be mounting the light bar.
- Positioning: Determine the optimal spot for installation to ensure maximum illumination and aesthetic appeal.
- Measuring: Measure twice to avoid errors when drilling or cutting.
- Marking: Make clearly visible marks for drill points to guide your installation.
- Assembly: Partially assemble your Nilight LED Light Bar to ensure all parts fit correctly before final installation.
Safety Precautions
Safety is paramount during any installation process. Heed the following precautions:
- Disconnect the Battery: Always disconnect the vehicle’s battery before starting the installation to prevent electric shock and protect the vehicle’s electrical system.
- Wear Protective Gear: Gloves and safety goggles are essential to protect against metal shavings and debris while drilling.
- Check for Obstructions: Ensure there are no hidden wires, fuel lines, or other critical components behind the drilling area.
- Follow Instructions: Thoroughly read the Nilight LED Light Bar manual for specific product guidelines and recommendations.
- Secure Wiring: Firmly secure all wiring away from moving parts and heat sources to prevent damage.
- Test Functionality: Before finalizing the installation, connect the light bar to test for proper functioning.
With these tips and a bit of patience, upgrading your ride with a Nilight LED Light Bar can transform your nightly journeys, turning dark roads into well-lit paths. Time to take on the night with confidence!
Choosing The Right Nilight Led Bar
Illumination upgrades for your vehicle should meet not only your aesthetic desires but also enhance its functionality and safety. Nilight LED light bars provide a blend of stellar performance and durability, making them a popular choice for off-road enthusiasts and those seeking improved visibility for nightly drives. Opting for the right LED bar is paramount, and by evaluating your vehicle specs, comparing models, and understanding your lighting needs, you can make a well-informed choice.
Evaluating Vehicle Specifications
Getting the perfect fit begins with addressing your vehicle’s specifications. This includes factors such as the available mounting space, power compatibility, and the structural design of your vehicle.
- Mounting Space: Measure the area where you intend to install the LED bar to determine the maximum size you can accommodate.
- Power Supply: Check your vehicle’s power output to ensure it can properly support the LED light bar without draining the battery or requiring an upgrade to your alternator.
- Suitable Design: Select a model that complements the lines and contours of your vehicle for a seamless integration.
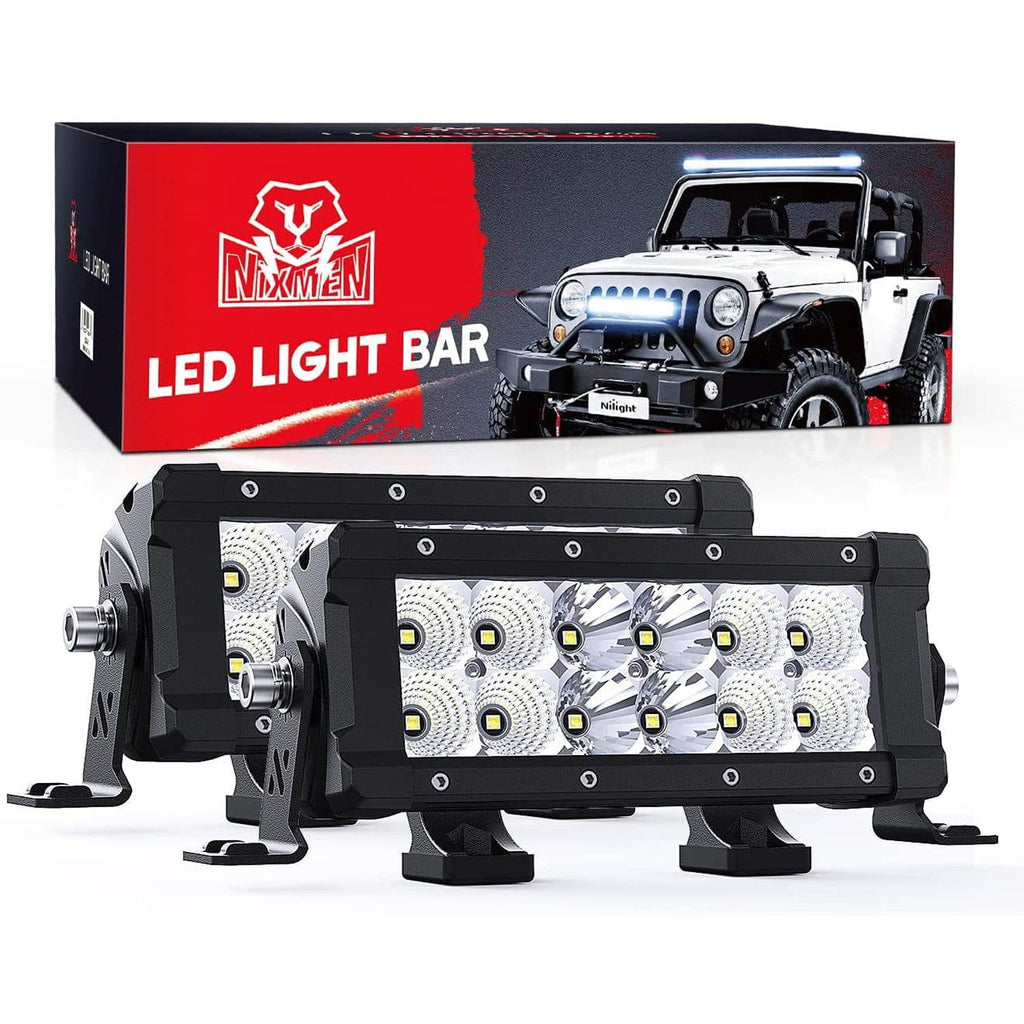
Comparing Nilight Led Light Bar Models
Nilight offers a diverse range of LED light bars, each designed for specific applications and preferences. Factors to consider when comparing models include:
| Model | Size | Waterproof Rating | Warranty |
|---|---|---|---|
| Nilight Spot Flood Combo Light | 20 inches | IP67 | 2 years |
| Nilight Triple Row Light | 16 inches | IP67 | 2 years |
| Nilight Super Slim Light Bar | 36 inches | IP68 | 2 years |
Review the features of each model, paying close attention to their Waterproof rating which indicates resilience to elements, and warranty period which provides peace of mind.
Understanding Lumens And Beam Patterns
Lumens measure the total amount of visible light emitted by a source, and beam patterns affect how this light is distributed. These are critical aspects when choosing an LED light bar, as they significantly impact overall visibility.
- Spot Beam:
- – Intense, focused light suitable for long-range visibility.
- Flood Beam:
- – Wider light pattern designed for general area illumination.
- Combo Beam:
- – A mix of spot and flood beams providing both distance and area lighting.
Identify the primary use of your LED light bar to determine the right lumen output and beam pattern. High lumen numbers are preferable for dark environments or off-road conditions, while specific beam patterns suit different terrain types.
Pre-installation Planning
Welcome to the crucial first step in enhancing your vehicle’s lighting capabilities: Pre-installation Planning for your Nilight LED Light Bar. By carefully considering the following aspects, you can ensure that your light bar provides the best possible performance and reliability. Tackling this stage with attention to detail will save you time and headaches later on.
Positioning For Optimal Illumination
Choosing the right location for your Nilight LED Light Bar is crucial for achieving maximum visibility and light distribution. Consider these points:
- Vehicle type: The make and model of your vehicle will influence the mounting options available.
- Driving conditions: Think about the environments you’ll be driving in—off-road requires different positioning than highway driving.
- Light angle: Aim for a position that allows the light to be angled for the broadest, most effective coverage without blinding other drivers.
Electrical Considerations And Wiring
Getting the wiring right is essential for a seamless install and operation:
- Compatibility: Verify that your vehicle’s electrical system can handle the new LED Light Bar without overloading it.
- Wiring harness: Use a high-quality harness with a fuse and relay to protect your electrical system and ensure easy connectivity.
- Switch placement: Install a switch in a convenient location for easy control of your light bar.
Mounting Options And Bracket Placement
Determining the best way to secure your light bar will affect its durability and stability. Here’s what to consider:
| Mount Type | Advantages | Considerations |
|---|---|---|
| Bumper Mount | Offers a low, stable mounting point | May require cutting or drilling |
| Roof Mount | Provides elevated lighting | Can create wind noise and resistance |
| Grille Mount | Integrates light bar into the front grille | May restrict airflow to the radiator |
After determining the type of mount, ensure that the bracket placement is secure and allows proper heat dissipation for prolonged LED life. Use brackets that are robust and suited for your vehicle’s specific contours and mounting points.
Step-by-step Installation Guide
Revamping your vehicle’s lighting never seemed easier. A Nilight LED Light Bar is not only a game-changer in aesthetic appeal but an essential boost for night-time visibility and safety. This installation guide is tailored to guide you through the process, ensuring a seamless and highly functional upgrade for your vehicle. By following our comprehensive step-by-step installation guide, you’ll be illuminating the road ahead with your new Nilight LED Light Bar in no time. Let’s get started!
Mounting the Nilight LED Light BarMounting The Nilight Led Light Bar
The first step to installing your new Nilight LED Light Bar is securing it to your vehicle. Choose a suitable location, ensuring it aligns with your driving needs and adheres to local regulations. Here’s how to get it mounted:
- Determine the mounting location: Decide whether you prefer the roof, bumper, or grille of your vehicle for placement.
- Gather the tools: You’ll need a drill, screws, nuts, and bolts that come with your Nilight mounting kit.
- Align the light bar: Hold the light bar up against the chosen spot to make sure it fits properly.
- Mark the holes: Once the position is set, use a marker to designate where you’ll drill.
- Drill and secure: Carefully drill the holes, then fasten the light bar using the provided mounting hardware.
Wiring And Electrical Connections
With the Nilight LED Light Bar in place, it’s now time to connect the dots, electrically speaking. Pay close attention to this critical part:
- Check the wiring kit: Your Nilight should come with a complete wiring harness. Ensure all parts are accounted for before starting.
- Lay out the wiring: Run the wiring from the light bar to the battery, avoiding areas that get hot or have moving parts.
- Connect to the battery: Attach the red wire to the positive terminal and the black wire to the negative terminal.
- Install the switch: Find a convenient spot for the switch within the driver’s reach and secure it in place.
- Test for connectivity: Before finalizing everything, check all connections are secure and there are no exposed wires.
Securing Components And Testing
Time to wrap up the installation and light up your adventure! Here’s the final stretch:
- Secure the wiring: Use zip ties or electrical tape to keep the wiring neat, away from heat sources, and secured against vibration.
- Double-check connections: Revisit each connection point to confirm that everything is tight and correctly installed.
- Test the lights: Turn on your vehicle’s battery and flip the switch to test the Nilight LED Light Bar. Look for even lighting and proper function.
- Adjust the beam: Depending on your preference or needs, adjust the angle of the light bar for optimal lighting coverage.
Congratulations! Your Nilight LED Light Bar is now installed and ready to shine. Hit the road confidently, knowing you have powerful lighting by your side.
Troubleshooting Common Issues
Installing a Nilight LED Light Bar on your vehicle is an excellent way to enhance visibility for off-road adventures or work after dark. Despite the straightforward installation process, you might occasionally encounter issues that require troubleshooting. Identifying and solving these problems ensures that your LED light bar operates efficiently and safely. In this section, we address common issues and provide practical solutions.
Dealing With Flickering Lights
Flickering in LED light bars usually points to power inconsistencies. Troubleshooting this issue involves:
- Checking the Voltage: Confirm that your vehicle’s voltage output matches the light bar’s requirements. Use a multimeter to check for stable readings.
- Inspection of Wiring: Inspect all connections for loose or corroded wires that could interrupt power flow. Tighten any loose connections and replace corroded wires.
- Examining the Relay: A faulty relay can cause flickering. Test the relay and replace it if necessary to maintain a consistent current to the light bar.
Ensuring Waterproof Connectivity
LED light bars are exposed to the elements, making waterproof connections critical. Protect your installation using the following methods:
- Sealant Use: Apply a silicone-based sealant at connection points to block moisture penetration.
- Check for Proper Fit: Make sure all rubber gaskets and seals are intact and properly seated to prevent water ingress.
- Proper Housing: Ensure that the light bar housing is securely fastened and free of cracks or gaps where water could enter.
Managing Electrical Feedback And Noise
Electrical feedback can interfere with your vehicle’s electronics. To minimize feedback and noise:
- Install a Noise Suppressor: A noise suppressor can reduce interference from the LED light bar on your radio and other electronics.
- Check Grounding Points: Poor grounding can result in feedback. Ensure that all grounding points are clean, secure, and have direct contact with the chassis.
- Rewire if Necessary: In some cases, running the light bar’s power cables away from other electrical wires can alleviate interference issues.
Credit: www.nilight.com
Frequently Asked Questions For Nilight Led Light Bar Install
Does A Nilight Light Bar Need A Relay?
Yes, a Nilight light bar typically requires a relay to ensure proper power distribution and to protect the vehicle’s electrical system.
Can You Wire Led Light Bar Directly To Battery?
Yes, you can wire an LED light bar directly to a battery. Ensure you include a fuse and a switch for safety and control.
How Many Amps Does A Nilight Light Bar Use?
The amp draw for a Nilight light bar varies by model, typically ranging from 1 to 15 amps depending on wattage and size. Always check the product specifications for exact figures.
Why Is My Nilight Light Bar Not Working?
Your Nilight light bar might not be working due to a blown fuse, loose wiring, or defective switch. Check these components and replace if necessary. Ensure all connections are secure and the light bar is properly grounded. If issues persist, contact Nilight customer support for assistance.
Conclusion
Wrapping up our guide on the Nilight Led Light Bar installation, it’s clear that adding this robust lighting solution to your vehicle doesn’t have to be daunting. Whether you’re a seasoned DIY enthusiast or new to custom mods, follow these steps for a seamless upgrade.
Ready to illuminate the path ahead, your next off-road adventure awaits with unparalleled visibility. Let’s brighten your journey, starting now.


